Hello! Ever since discovering the joys of Pinterest super late in the game, I have spent many an enjoyable evening cooking up new recipes for myself and Johnny. It has been great fun because I love to cook and I was so bored with all of the dinners that I have been making time and time again. This past Friday, I cooked a feast for dinner and while it was a lot of food, it also meant leftovers for days and that’s always good! Check it out:


The Menu:
- Mac n’ cheese: You can see the recipe on this previous post of mine!
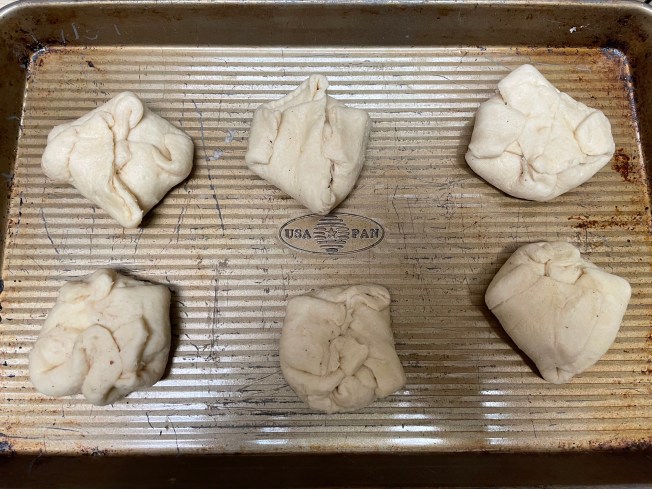
- Jalapeño popper rolls: Berly’s Kitchen on Pinterest
- Perogies with sauteed onions and garlic and honey mustard
- Rosemary and butter carrots
My sweet Johnny spent most of the week being bummed out that he had to go to work on Saturday. I planned on cooking a big dinner on Friday anyways but when I got a surprise day off, I decided to go even bigger to help cheer him up. Johnny’s love language is definitely sharing his favorite music for me and since I have not one ounce of musical talent, cooking our favorite meals is my love language for him.
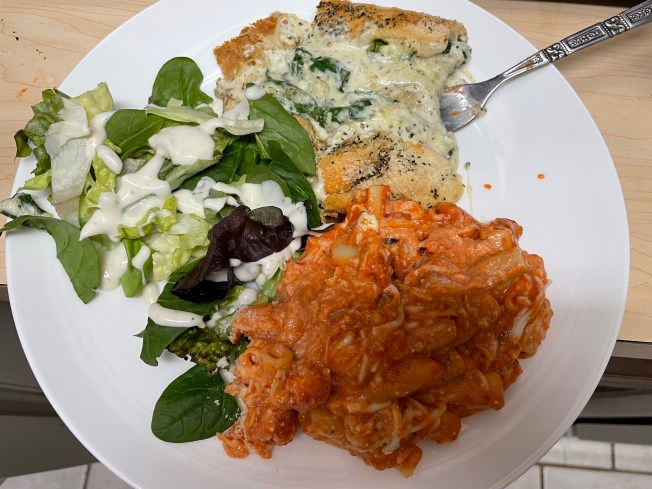
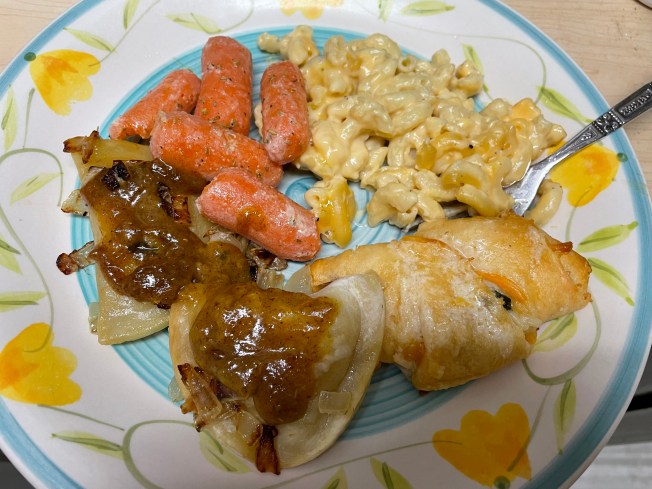
I started with homemade mac n’ cheese with the tried and true recipe that my mom has been making since I was little. It was and is still one of my favorite dishes and my niece is especially partial to it too. However, I still think it turns out better when my mom makes it! Although it’s not quite up to JANE level standards when I make it, it is still really yummy and I like to make mac n’ cheese grilled cheeses with the leftovers.
Then, it was on to the jalapeño popper rolls, which were delicious! This recipe was another one that required pizza dough to make but I figured Pillsbury croissants would work too. At least, I hoped so because the last time I substituted croissants for pizza dough for a recipe, it didn’t turn out the best. This time around, Pillsbury did me right and the rolls were a highlight of the meal and something I would happily make again.
I didn’t have pickled jalapenos as the recipe called for so I cut mine up and broiled them in the oven for about five minutes. The end result tasted exactly like the jalapeño popper quesadillas that are mine and Johnny’s favorite. In fact, it was almost an identical recipe minus the crushed up tortilla chips to give the quesadillas some extra crunch.
Originally, I just planned on cooking the mac n’ cheese and the rolls but I figured I might as well try and clear some food from my pantry, fridge, and freezer since I had extra time on my hands. For example, I love the idea of baby carrots. However, whenever I buy a bag, they always just end up sitting in my crisper drawer.
I figured it was now or never to use the carrots so I just threw them in a pot of water and cooked them up. It took about thirty minutes for the baby carrots to be completely tender. Then, I drained the water and put them back in the pot with butter, rosemary, salt, and pepper and let that simmer for five minutes. This is something that I made when I first moved into my apartment and it was just as tasty as I remembered it being. They are also still really good leftover!
Similarly to baby carrots, I always find myself buying onions and garlic during grocery shopping even though I rarely use them! I guess it’s just a habit because those were ingredients that were never not available at my parent’s home. I had a box of perogies that have been sitting in my freezer for a while so I knew just what to do: Saute the veggies and the perogies along with honey mustard. 😀
This was not a complex meal to make at all and, even though I might have went a bit overboard, we ate like royalty on Friday night… and also every night that we had the leftovers lol! I enjoyed my cooking session so much and it was the best to see how surprised Johnny was when he got home from work. ❤
What is your favorite meal to cook? What is your love language? I want to hear from all of you, so leave me a comment and let’s chat! Much love. -Sarah