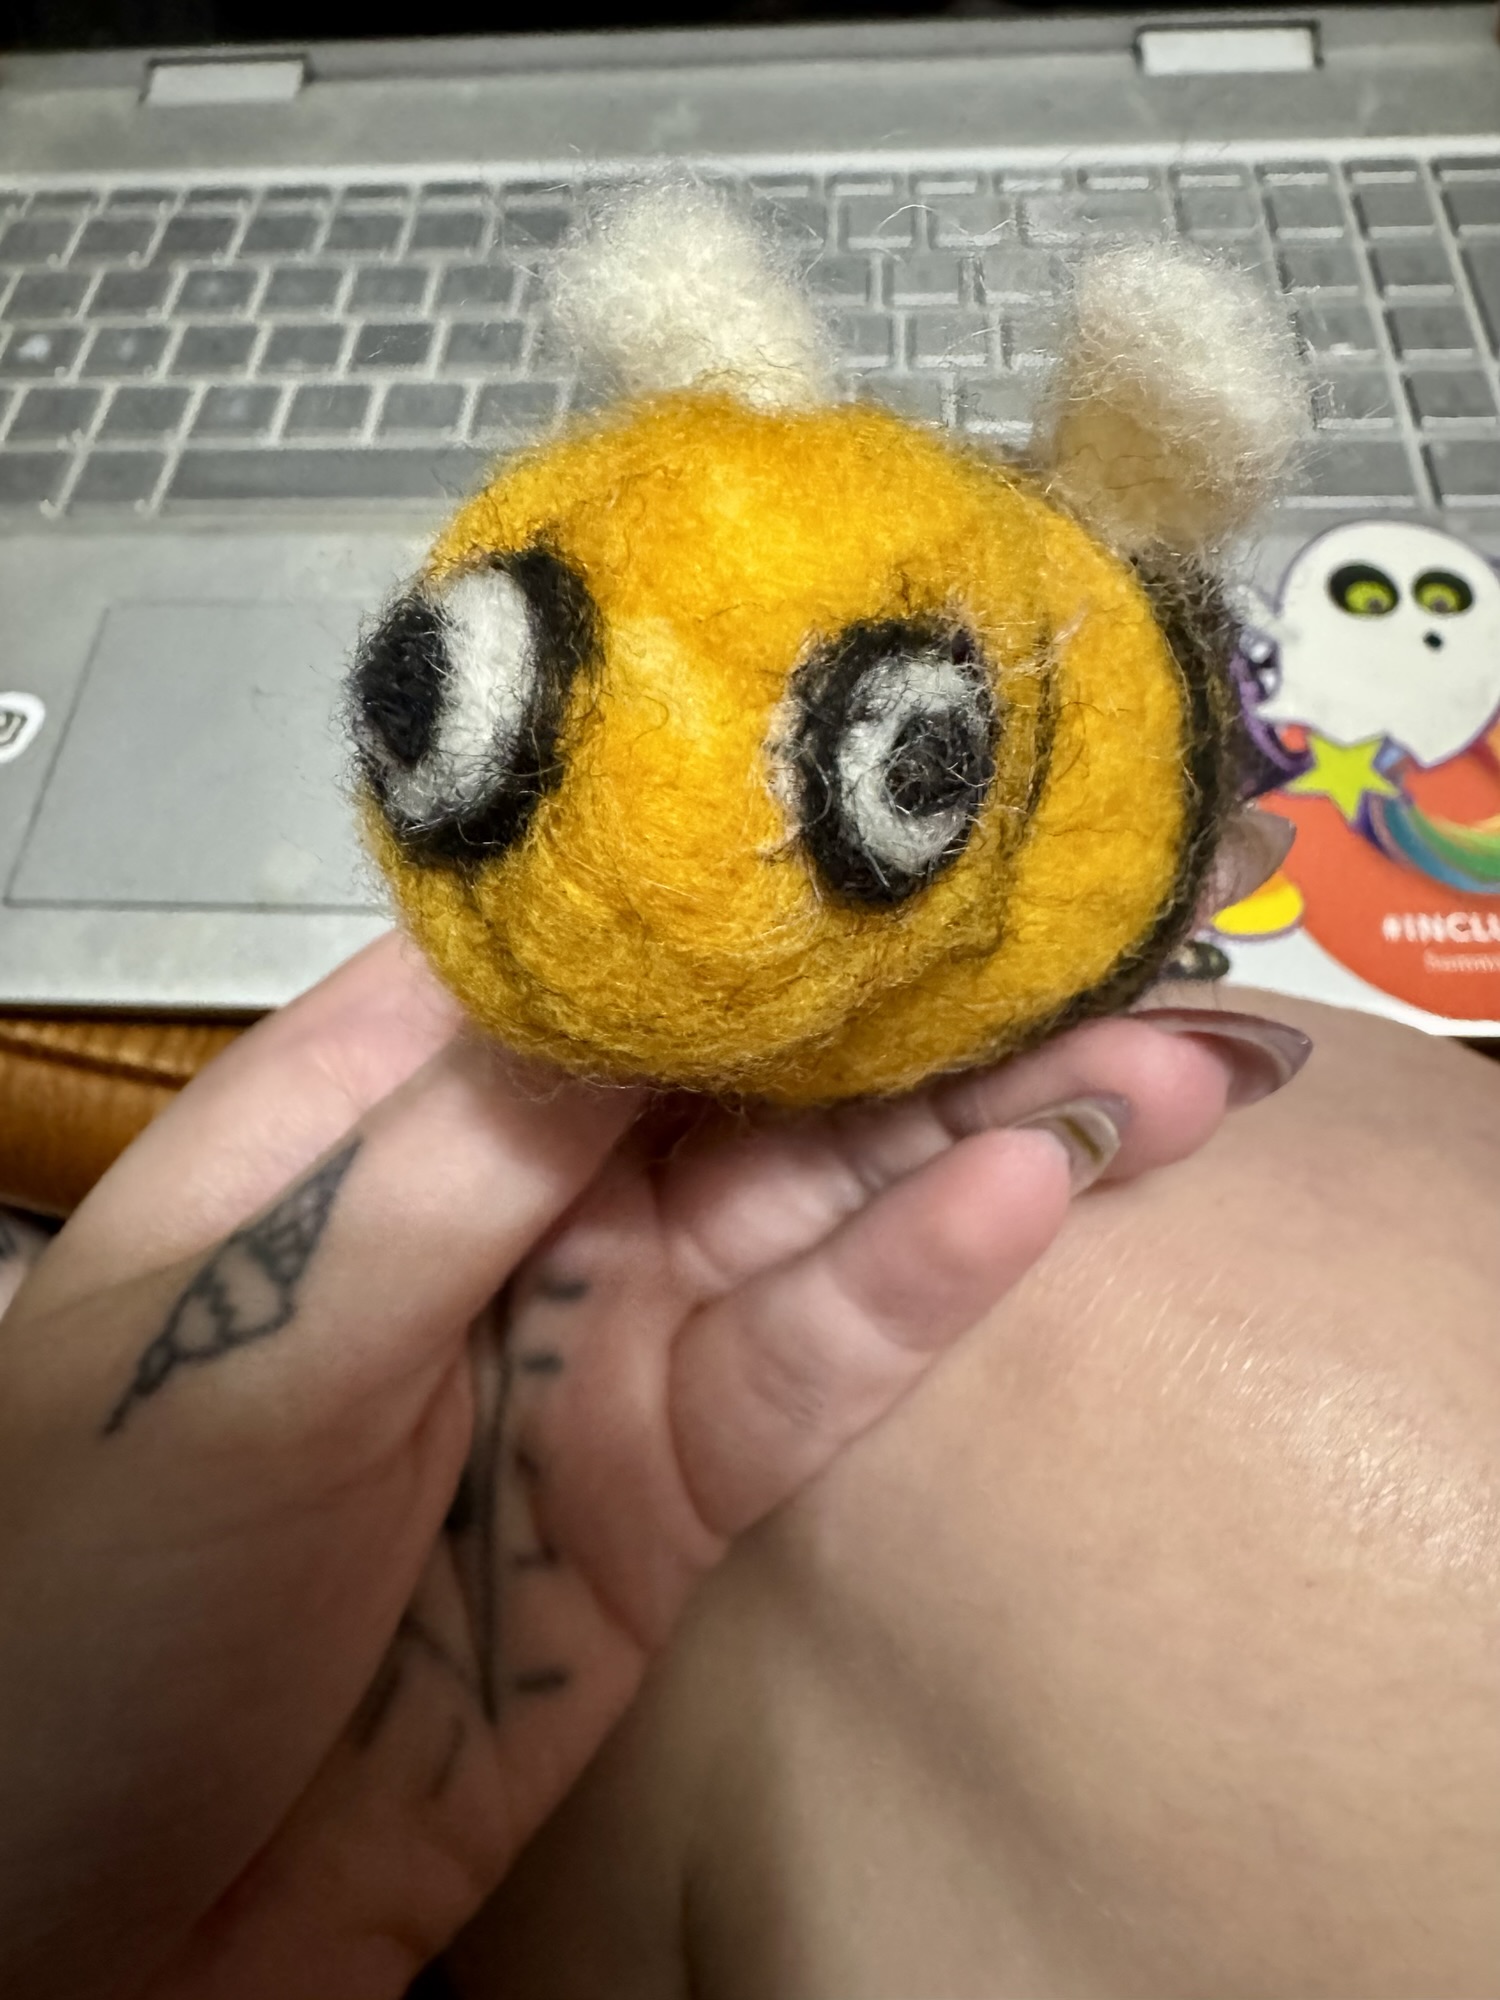
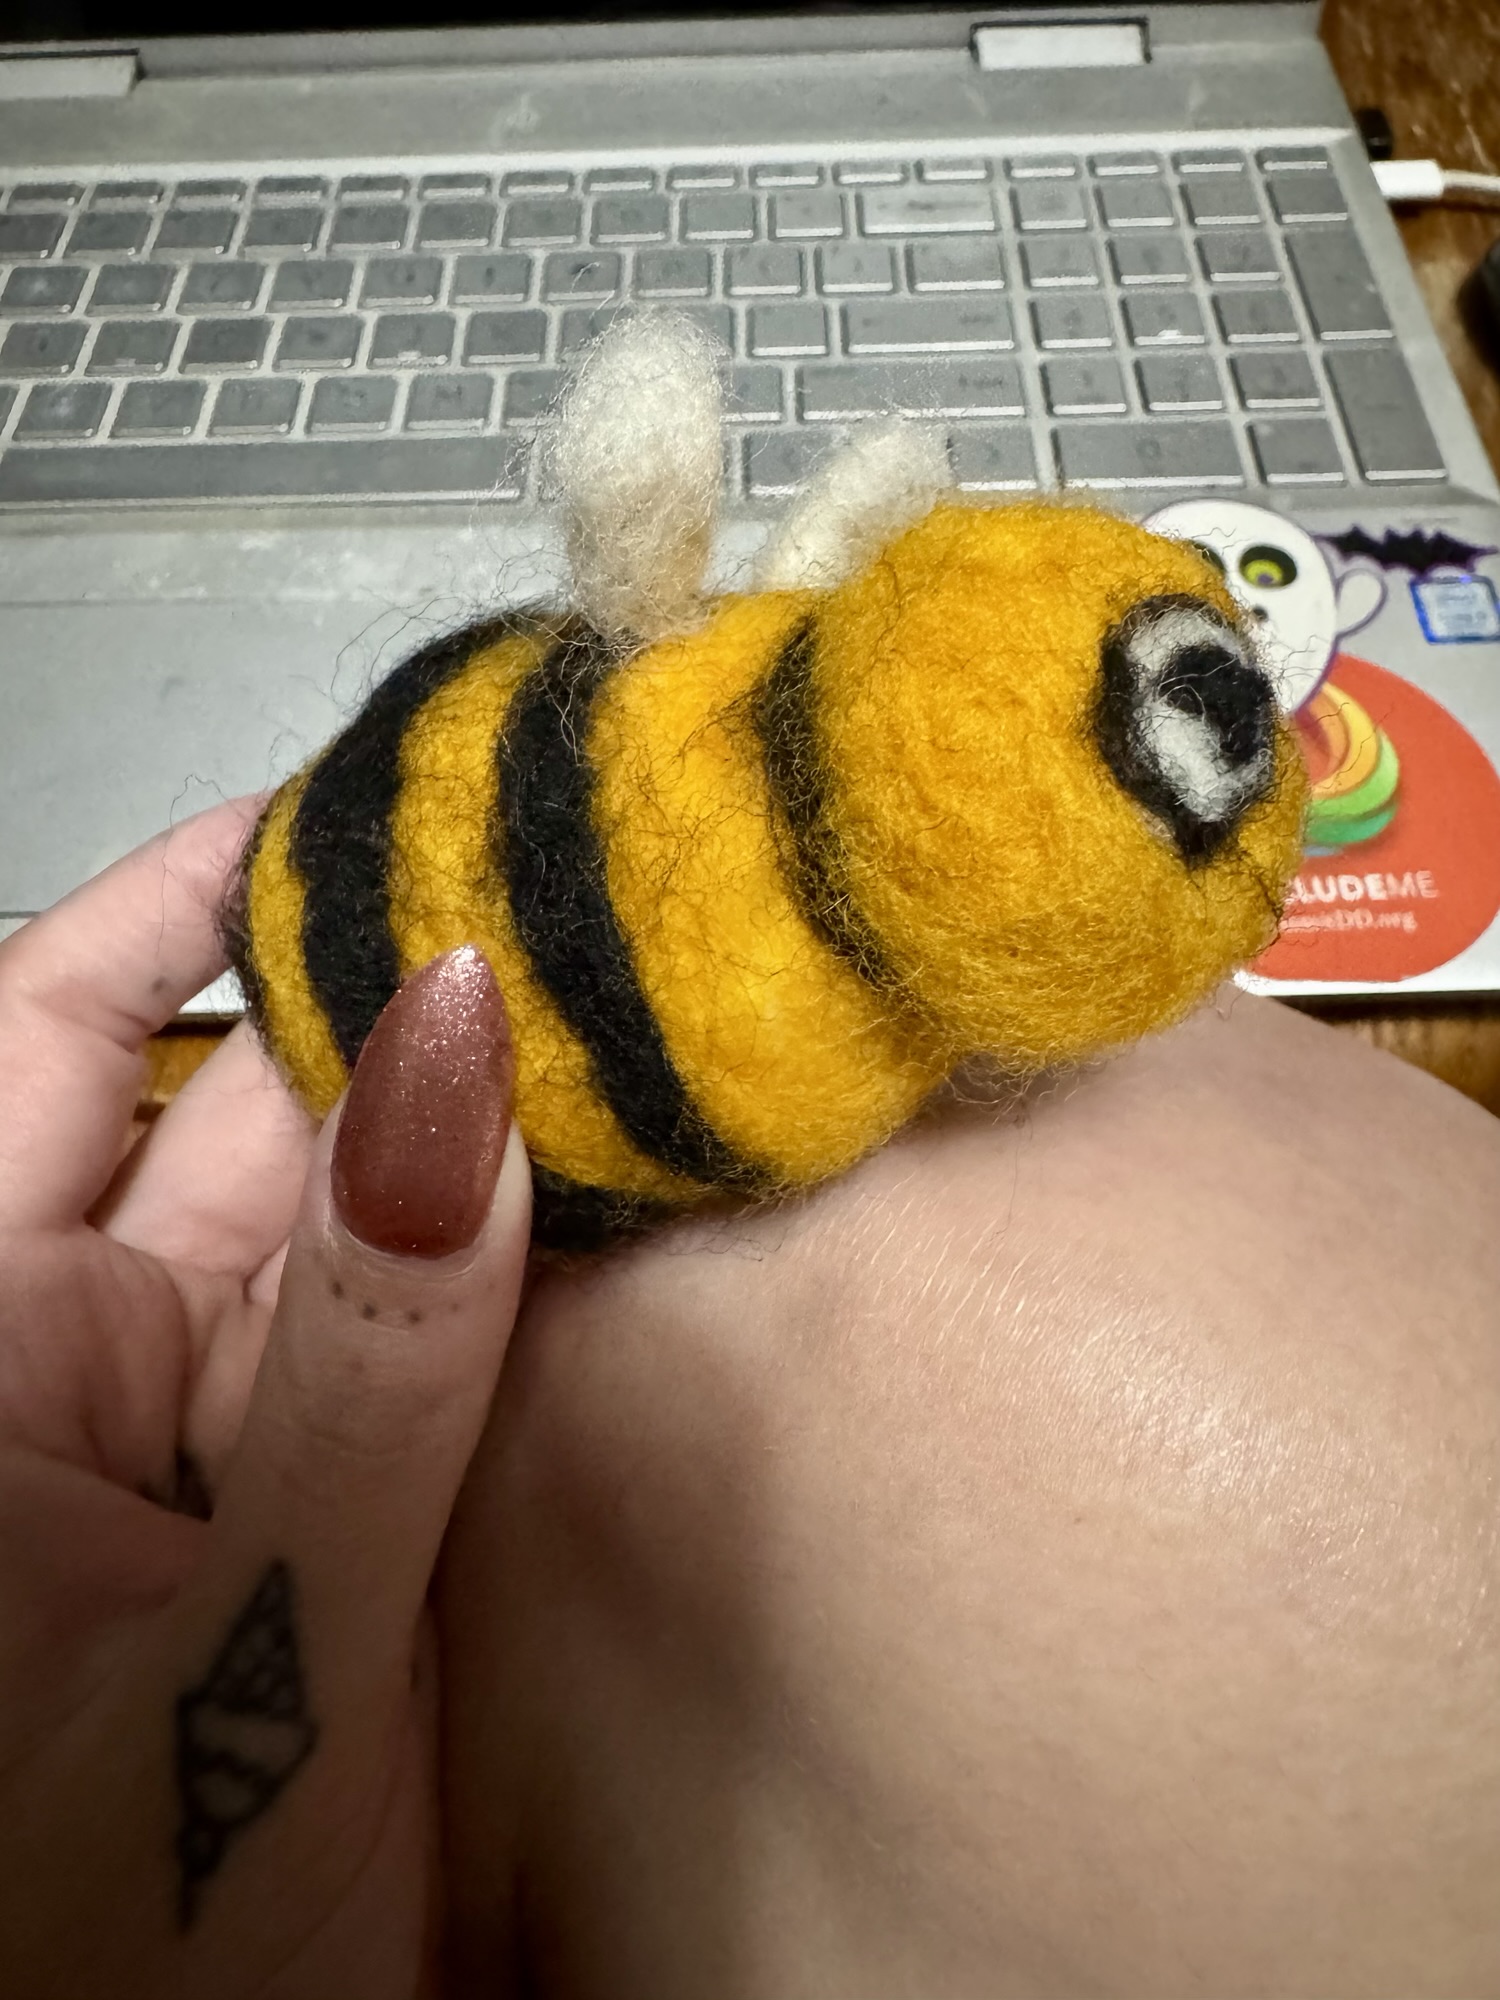
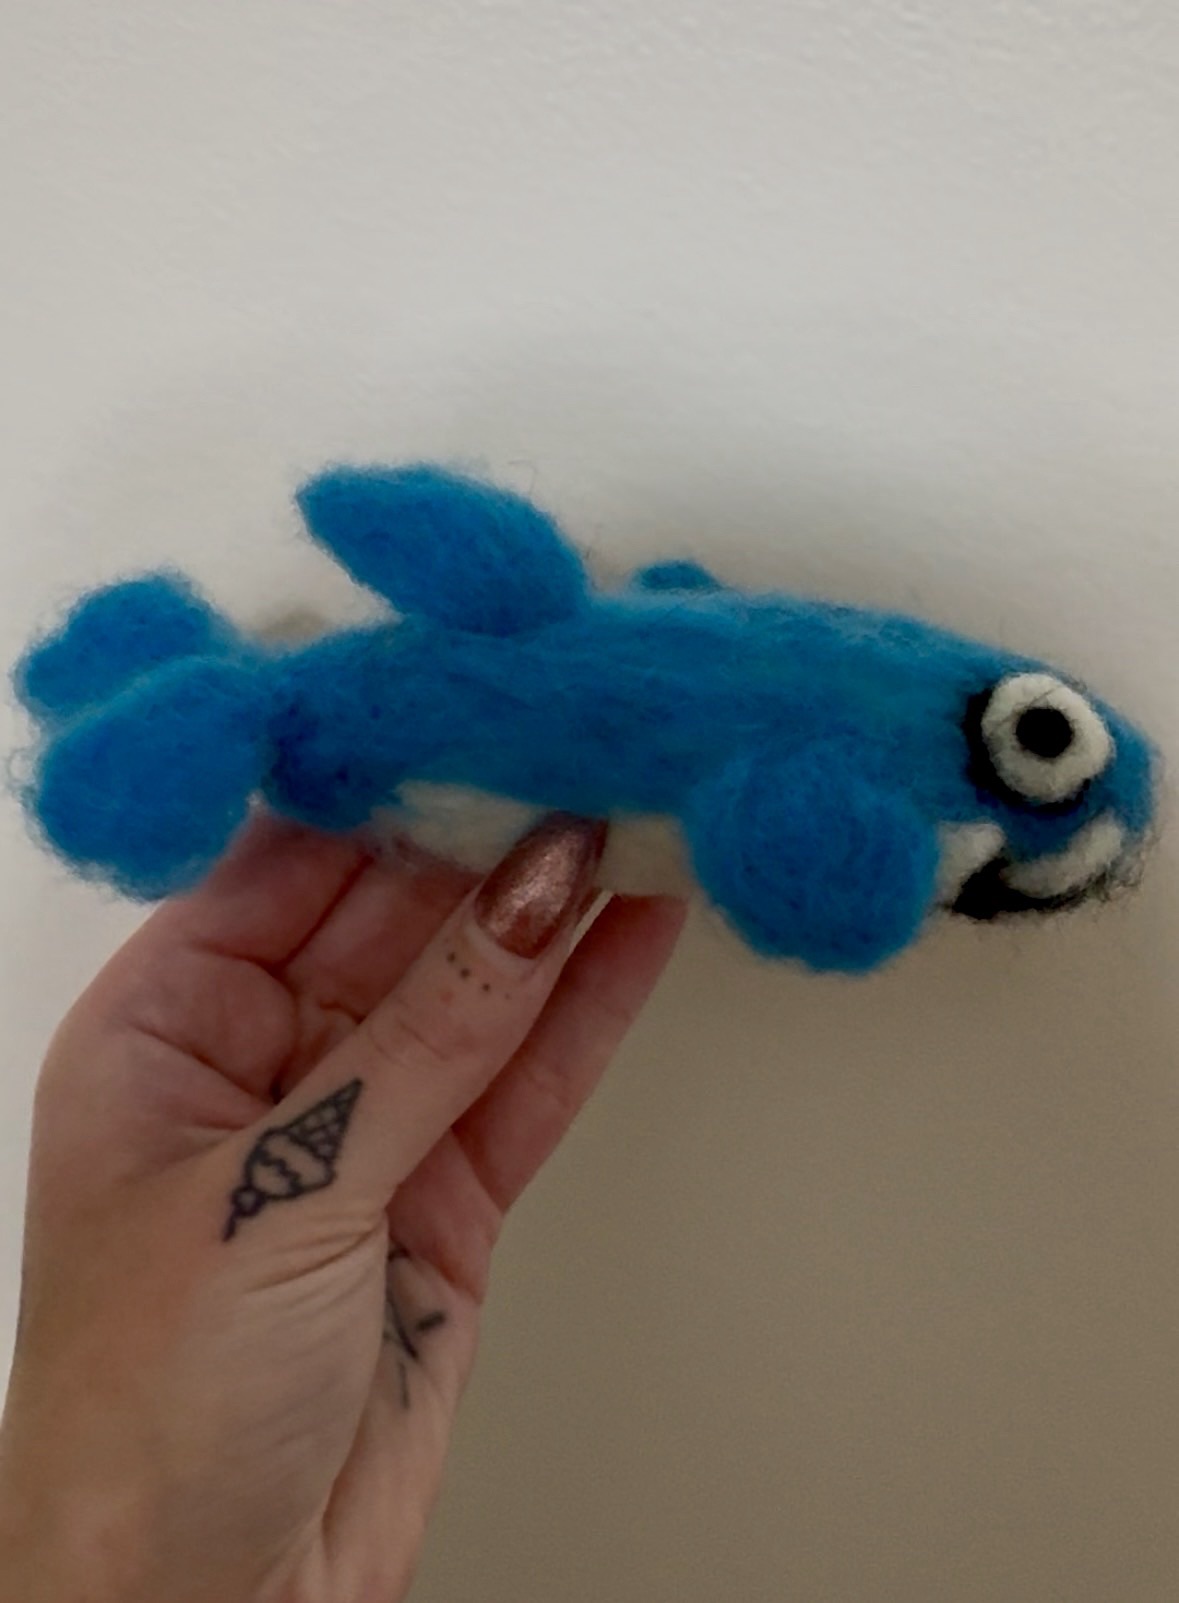
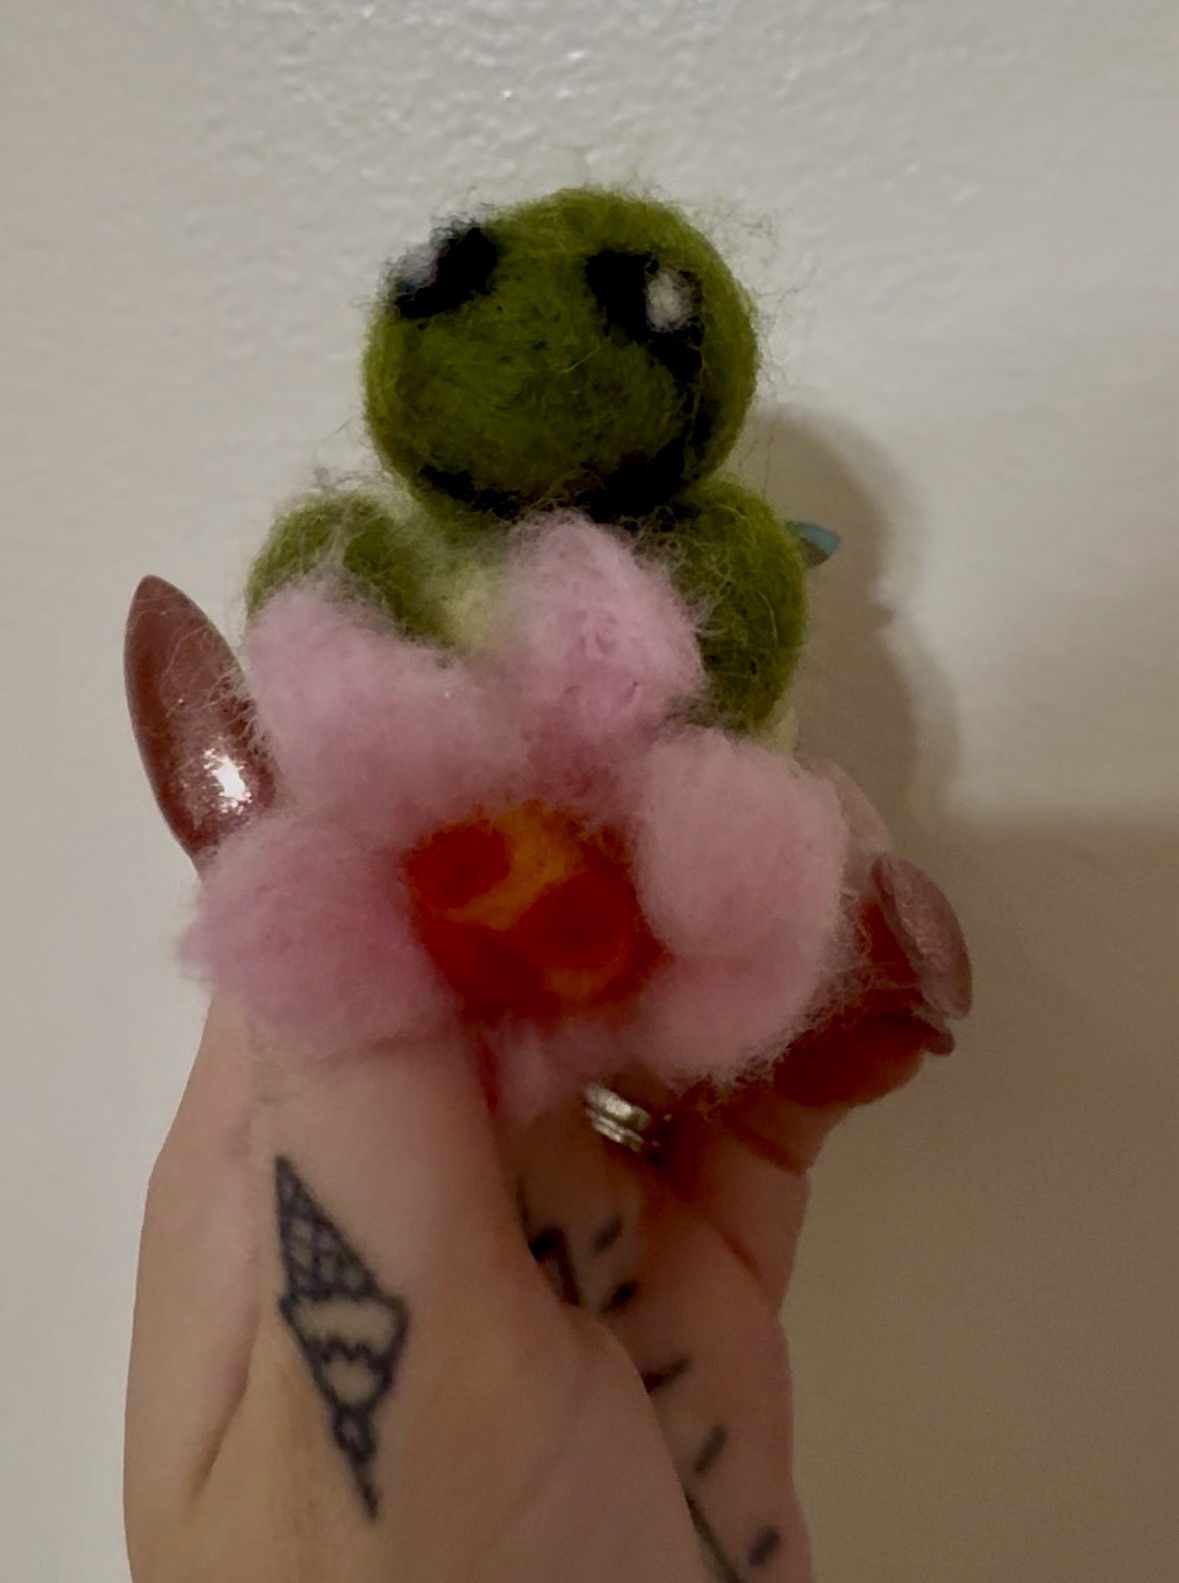
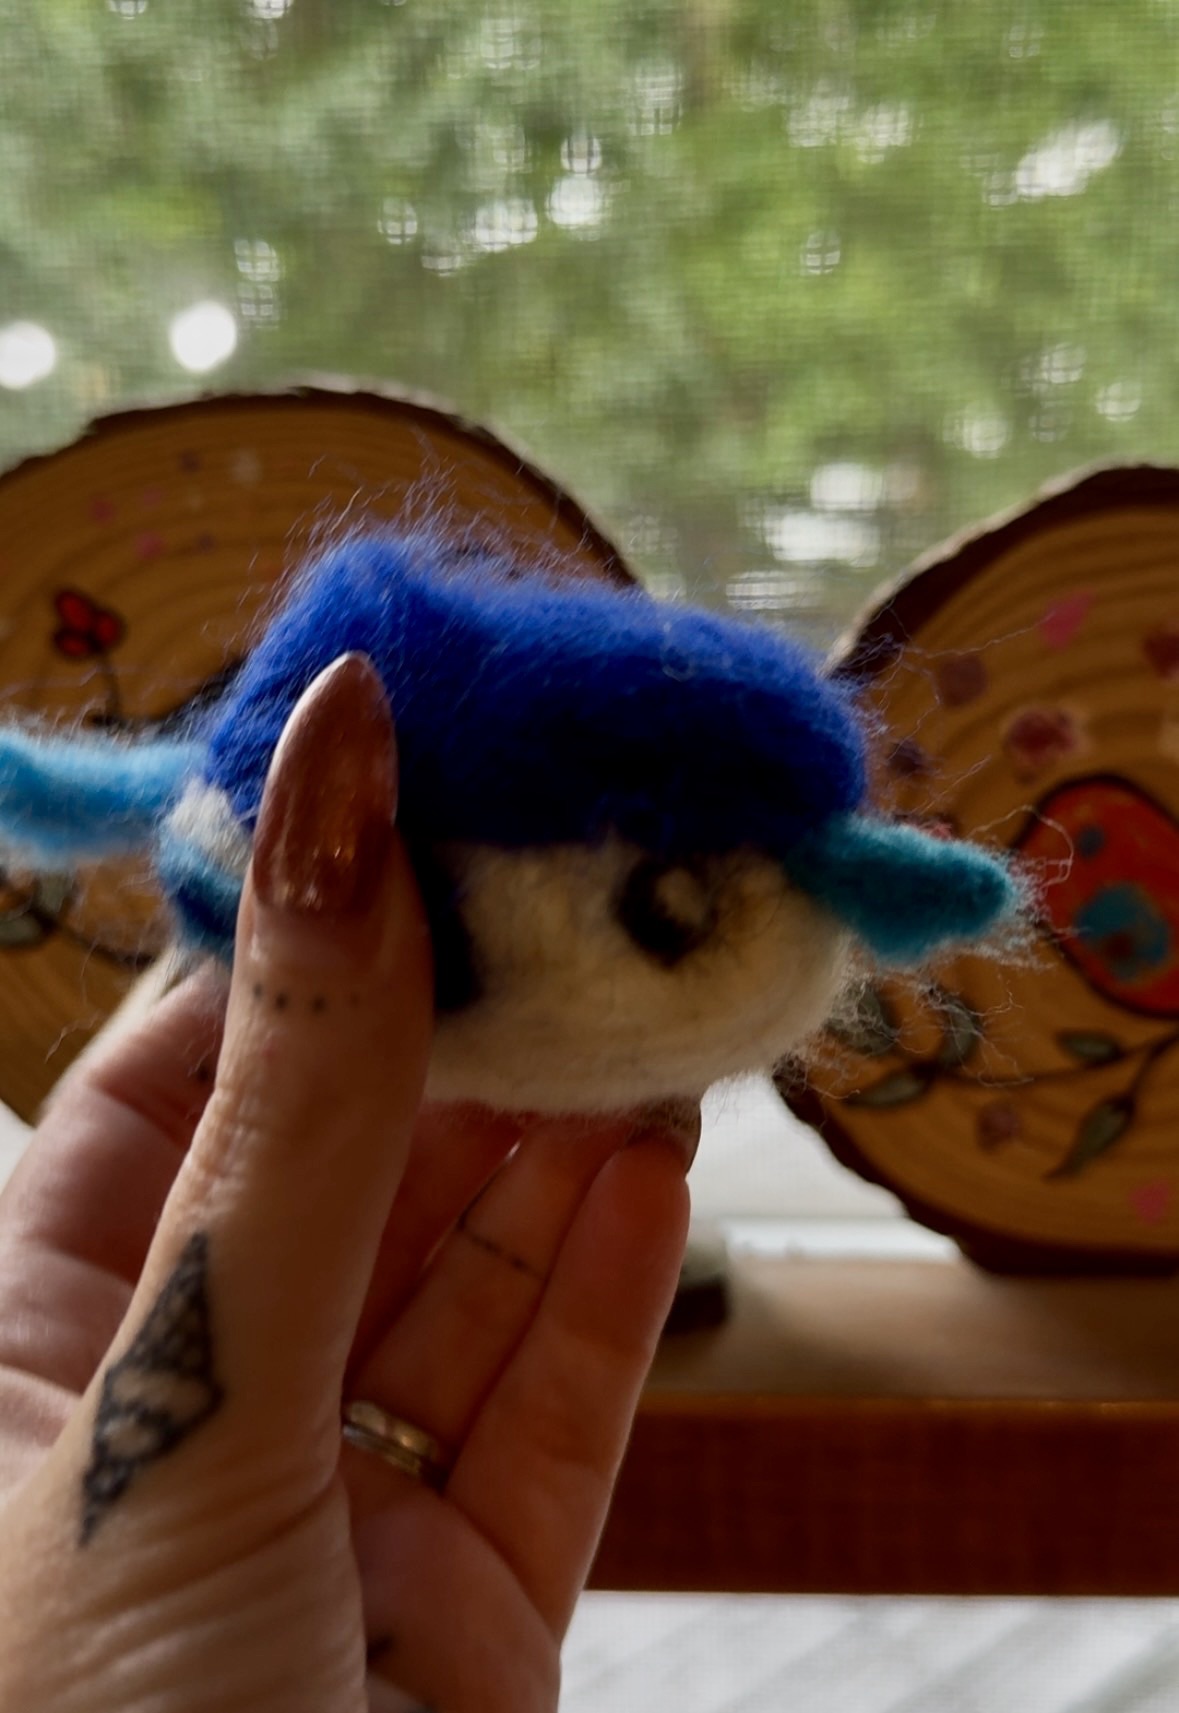
Category Archives: Arts & Crafts

Paint Night

Standard
Paint Night

Hello!!! I don’t know about all of you, but I had a great weekend!! After spending an entire week being sick AF, I rallied hard and it couldn’t have came a moment too soon because I had big plans. On Friday, I attended a paint night with my brother and on Saturday, Johnny and I took our birthday girl niece out for a treat day. It felt so good to have some fun after feeling like death warmed over and I enjoyed every minute of it. Check out what I created at paint night:

image_50398721(11)image_50751233(1)

On Friday evening, my brother Andrew and I went to the Solon Rec Center for a paint class hosted by the wonderful Melinda of So So Artsy. This is the second time Andrew and I have been to one of her events and she is just the best. Melinda owns a paint and sip studio, but she also teaches classes at community centers. Of course, this was a no sip class but that doesn’t mean that Melinda didn’t bring the party anyways. She has the brightest personality, is hilarious, and made our experience a million times better.

For our canvas art, we were painting cardinals and began with the background. For the top half, we mixed blue with the smallest touch of white and did the reverse for the bottom. To keep things moving full steam ahead, we blow dried the wet paint and began the next part. Step two was making the branch and the bird and we started that by making our outlines with chalk. I was surprised by how easy Melinda made the process for the bird’s outline. All we did was make a big set of parenthesis for the body, a small set for the head, and drew the tail by making a number eleven branching out at the bottom.

Once the outlines were complete, it was time to paint again. For our branches, we used brown with a hint of red and black and for the birds we used red and black. Before I knew it, all of the canvases were filled with sweet red birds perched on their branches. The last thing to do was add some more to the background. Melinda’s example used snow, but I was feeling inspired by cherry blossoms and used red and white instead. Once again, Melinda showed us a quick fix for painting the snow or, in my case, flower petals: Load up your brush with paint, place it flat on the canvas, and twist the brush to make a circle. Afterwards, we blow dried the canvases again and were on our way home with two freshly painted masterpieces!

Andrew and I had an absolute blast at Paint Night and I am looking forward to going to another class with him soon. I wonder what we’ll create next! ❤

Have you been to a paint night before? What did you paint? I want to hear from all of you, so leave me a comment and let’s chat! Much love. -Sarah

Sweet Surprises: Knitted With Love Edition

Standard
Sweet Surprises: Knitted With Love Edition

Hello!! My mom is my number one girl. She is my absolute best friend and I just love being around her. Everyone who crosses her path will tell you the same thing too – she is simply amazing! One thing that my mom and I like to do together is watercolor painting. However, there is one hobby that my mom has that I can’t wrap my head around and that is knitting! My mom has knit the most precious sweaters and baby blankets for my sweet nieces and nephews. She makes a mean scarf and has recently added a new item to her repertoire – headbands! This past week, my mom gifted me with one that she whipped up in no time at all. Check it out:

image_50402305(8)

I knew that my mom was making a headband for me, but it was still a huge surprise when she presented me with the finished product. She literally just started it and I blinked and it was done! I was beyond thrilled with my prezzie and it’s far better than anything that I could buy at the store because my mom made it. I love the soft grey color she picked out for me and it is the perfect neutral to keep from clashing with whatever my hair color is at the time. My new headband also fit like a glove and was just right – not too tight or too loose. She did an excellent job!

Anything that my mom gifts me is instantly very special to me and my handmade headband took the cake. It made me feel so good to know that she made it just for me. In fact, it actually has me hoping for a few more cold days so I can wear it! Knitting is a craft that makes zero sense to me and I think it’s so impressive that my mom can make something beautiful out of a skein of yarn. She is making a headband for my niece next and I know that she’s going to love hers just as much as I do mine. ❤

Huge thank you to my mom for this most wonderful Sweet Surprise. I know that every single stitch was Knitted With Love and I’ll cherish it for always! I love you!!!!

What is your favorite craft? Do you have any knitted with love clothing or accessories? I want to hear from all of you, so leave me a comment and let’s chat! Much love. -Sarah

Sweet Surprises: Painted Parrot Edition

Standard
Sweet Surprises: Painted Parrot Edition

Howdy!! This past Wednesday, my darling niece, Val Gal, came over for a slumber party. It is something we both always look forward to because it is such fun!! I make us dinner, we have ice cream sundaes for dessert, enjoy a movie, and play, play, play. For our entertainment while we noshed on Mint Chocolate Chip sundaes, Val chose Mulan and I was stoked. That was one of my favorite Disney movies as a kid and we were also eating my favorite ice cream. And I was with my favorite person! As always, our partay was a raging success and a full on rager. I was also presented with quite possibly the sweetest gift ever. Check it out:

image_50437377(4)image_50443265(10)image_50455297(3)

Val is a huge fan of crafting. She loves to paint, color, and make masterpieces with Play Doh. For Christmas, I got her a set of animal figurines that she could paint because that is one of her favorite activities. I had honestly forgotten about it when Val told me she brought me something. She handed me a parrot from the set that she painted and said “This is for you, TT. You got it for me for Christmas, but I wanted you to have one too.” Believe me when I say, I completely melted. Out of the mouths of babes!!

My sweet niece is just the coolest kid and Johnny and I cherish the time we spend with her. Val is the best big sister to Raya and is so kind, talented, and absolutely freaking hilarious. That girl keeps me in stitches and I am constantly quoting the ridiculousness she says on the daily. The parrot that she made with love is a testament to what an amazing little girl she is. It was yet another reminder of her thoughtfulness and it really moved me. We are each other’s best friends and she makes my life infinitely better. ❤

My parrot has a prized spot on our knick knack shelf and I smile every time I look at it/think about it. Here’s to many more slumber parties and fabulous memories with my lil BFF!

What is a gift that you cherish? What is your favorite thing that someone made for you? I want to hear from all of you, so leave me a comment and let’s chat! Much love. -Sarah

A Very Madea Craft

Standard
A Very Madea Craft

Hello!!! This past Halloween, Johnny and I watched “Boo! A Madea Halloween” for shits and gigs. Little did we know, we would end up LIVING for the Madea franchise and have worked our way through almost the entire collection over our holiday break. What can we say, we love Tyler Perry in a mumu! During one of our viewings, we noticed a welcome sign outside of Madea’s home that says “Hellur” and I decided I wanted to make one for our apartment. So, we went to Walmart, purchased supplies, and went home to watch more Madea movies as I painted away. I’m not the most crafty gal in the world, but I think I nailed it! Check it out:

hellurimage_50425089(6)image_50734337(2)

It has been a long while since I have crafted anything and it felt really good to make this sign and bask in its awesomeness. I am SO proud of how it turned out and it made me happy to hear Johnny’s raving compliments as I completed my project. I created my own little painting station on the floor with a trash bag as a tarp, prepared my paints and water, and paper towel then painted the base of my sign yellow. My goal was to make this sign as close to the one in the movie as possible. We also plan on making a goth version of it in black, red, and white. Johnny already spray painted the base of his, but I have a feeling I will have to do the painting portion lol.

Once the yellow paint had dried, it was time to get started on the pattern. I started with the leaves going around the sides of the sign, which was most helpful. This allowed me to set up the space for the flowers on the top and bottom and the “Hellur” smack dab in the middle. The leaves were easy peasy, but I definitely ran into some difficulty with the flowers. Despite how simple they look, mine just wasn’t going accordingly to plan. The extra colors in the petals gave me the most trouble and my first attempt ended up looking so muddled that I had to cover it up with yellow paint.

As I waited for my “whoops” coat to dry, I had to figure out what to do next because I knew I wouldn’t be satisfied with my second go at the flowers if I tried again. Rather than another attempt to replicate them, I switched gears and went for roses instead. As the paint dried, I practiced the technique to make watercolor roses. Of course, this is much different with acrylic paint but it was basically the same idea. This was much more like it and I love how it turned out! The roses were a time consuming process and it was well worth it. I loved how it added my own personal touch to the sign!

After the flowers were done, all that was left to do was paint a big, friendly “Hellur” and let the sign dry. This painting costed me less than fifteen dollars in supplies and it is one of my favorite things that I have ever made. I can’t wait to hang it up in the apartment!

What is your favorite Madea movie? Have you made any crafts recently? I want to hear from all of you, so leave me a comment and let’s chat! Much love. -Sarah

Easy Halloween Wreath

Standard
Easy Halloween Wreath

Hello! I love hosting guest bloggers on lifewithlilred, especially during the change of the seasons. It is so much fun to see how my friends and readers from all over the world welcome and celebrate different seasons and the holidays that come with it. I was SO excited to see this past week that one of my darling friends, Rachael, the mastermind behind the fabulous blog, And Fierce, responded to my guest bloggers call to action. She is so fantastic so do give her page some love! Today, we are going to check out an Easy Halloween Wreath that she created and check back in tomorrow for her recipe for pumpkin milkshakes. Yum! Let’s get to it:

Easy Halloween Wreath

Compliments of Rachael from And Fierce

As a Halloween lover, it is extremely hard not to buy everything in the store right when I see it. I think I speak for everyone when I say, it is easier to throw something in your cart and buy it than it is to curate something yourself. I made Winter’s first two Halloween costumes and this year I bought hers. I could’ve made it but I didn’t really have the patience for it this year.

So somehow I’ve had the time to make two Halloween wreaths??

Okay, so, what happened was, I had been slowly putting together sticks from our yard to make this wreath that I kind of came up with in my head. I was feeling myself because of how it turned out. I put in all the time to do it all and plan it out. But I guess it wasn’t as sturdy as I thought. It didn’t take long until it fell off the door. At that point, it was an easy fix. I laid it on the floor in the kitchen to fix later. But I waited too long, because Winter decided that she needed to walk through that area that no one ever walks through. So needless to say, the whole thing was trash at that point. I did take a few things from it to use again.

Here is what the first one looked like…

Screenshot 2023-10-02 at 06-23-22 picsart_10-21-01.02.26.jpg (JPEG Image 1982 × 1982 pixels) — Scaled (36%)

I do like the new one better though. It just feels a bit more lively for the season. I just love orange and black for Halloween too!

You could totally make this in a couple hours, if you are uninterrupted… *ahem* kids.

Supplies

12 inch Wreath Wire

2 spools of 6 inch Tulle, 25 yards (1 black, 1 orange)*

Felt Bat

Fake Black Peonies

Hot Glue Gun & Glue Sticks

Fishing Wire

Ribbon

Instructions:

First thing you want to do is get your tulle ready and cut. I just used the wire wreath as a guide and cut about 12 inch pieces. I cut the whole roll of each and used almost the whole spool.

Next, start adding the tulle to the wreath wire. I took a section of tulle and folded it the long way and then folded it again to loop it on the wire.

Screenshot 2023-10-02 at 06-23-39 picsart_10-21-01.04.57.jpg (JPEG Image 1080 × 1080 pixels) — Scaled (67%)

Notice the direction I did the tulle. I added it from the inside out, if that makes sense. This way it stayed better and it made it lay nice and flat.

I kept it simple by adding evenly to each section just so I didn’t get ahead of myself and have to go back and fix sections.

I then started to get into a groove and this is how I patterned the pieces to try and keep it all even.

Screenshot 2023-10-02 at 06-23-57 picsart_10-21-01.06.09.jpg (JPEG Image 1982 × 2643 pixels) — Scaled (27%)

After I continued and made each section the same, I went back and added tulle pieces where I felt it needed it. Or if you feel like you want yours to be fuller, go ahead and add more. *Also depending on how full you want it to look, you may need more tulle.

Once I got it looking how I wanted, I hot glued the leaves of the peonies. Then I added on the peonies. Next, I looped the fishing wire to add the bat to hang in the middle of the wreath. I also eyeballed the length and used hot glue and cut any excess.

Screenshot 2023-10-02 at 06-24-08 picsart_10-21-01.10.14.jpg (JPEG Image 1080 × 1080 pixels) — Scaled (67%)

I then took my ribbon and looped it through the top of the wreath, on the first wire. I just tied a tight knot and cut any excess.

Screenshot 2023-10-02 at 06-24-20 picsart_10-21-01.11.30.jpg (JPEG Image 1982 × 2643 pixels) — Scaled (27%)

I am obsessed! As you can see, I did copy my original wreath with the same feel, but this one is the mic drop. It’s so pretty and I’m so happy I have it hanging on my door!!

Screenshot 2023-10-02 at 06-24-35 picsart_10-21-01.00.06.jpg (JPEG Image 1982 × 2643 pixels) — Scaled (27%)

How amazing is that wreath?! Rachael absolutely rocked it! For more from this lovely guest blogger, give Rachael a follow on Instagram: @kavebabe, check out her blog, and visit lifewithlilred tomorrow for her pumpkin milkshake recipe. Thanks again, boo! ❤

Do you like to make your own seasonal decorations? What is your favorite holiday to decorate for? I want to hear from all of you, so leave me a comment and let’s chat! Much love. -Sarah

Watercolor Weeping Willow Pt. 2

Standard
Watercolor Weeping Willow Pt. 2

Hello! This past Tuesday, I spent a lovely afternoon painting with my mom. I wanted to revisit doing a watercolor weeping willow to see if I could improve upon my last one. Like my last effort, I am not especially pleased with what I came up with. However, I do think there were a lot of things on an individual basis that were good. The big picture was just meh, though. Take a look at my latest watercolor creation and I’ll tell you what I did like about it:

image_50366209(1)

What bothers me the most about this picture is that I didn’t get full weeping willow vibes from it. I think it’s actually a pretty decent tree, but it wasn’t the tree I wanted lol! I do like the trunk that I made quite a bit and I thought that the color I mixed up for it was great. I also am a fan of the overall color palette that I established. To achieve it, I did a lot of mixing of greens, yellows, blues, and browns. It’s a lot of fun to create your own colors and see what you come up with!

The thing that I am happiest with about this weeping willow is that I think I am getting a more firm grasp on creating the signature “tendrils”. For my other attempt, I did a lot of brush strokes that weren’t blended the best. This time around, I did a really light base coat over the tree and patted it dry. Then, I painted waterlines and applied some paint to the very top of the line. After I had my trail of water, I held the paper up and let the paint run down. This was the closest I got to a tendril and I think that I’ll be onto something if I do smaller waterlines the next time. 😀

As with all of my watercolor paintings, this “weeping willow” is not the best. It doesn’t have to be, though! It’s always nice to spend time painting with my mom and after every sesh, I have new ideas to try. The outcome wasn’t successful, but the fact I tried and am more than willing to try again is a GREAT SUCCESS!!

What is your favorite kind of tree? What should I try painting next? I want to hear from all of you, so leave me a comment and let’s chat! Much love. -Sarah

Watercolor Weeping Willow

Standard
Watercolor Weeping Willow

Hello!! Watercolor painting is something my mom and I really enjoy and it has been a minute since our last painting sesh. Flowers are, admittedly, the only thing we have been painting and I decided to try something different when we painted this Tuesday. I wanted to try my hand at a weeping willow! As always when I have just painted something, I am never particularly thrilled with it. However, this was my first go at anything but a flower and I feel pretty good about attempt number one:

image_50433537(7)

To begin, I assembled my palette with different green, brown, and yellow watercolor paint. Then, I sketched a super rough outline with some assistance from Google Images. I started with the grass and I actually love how that turned out, then moved onto the branches. To do this, I painted the branches with water alone and then added color to the wet paper. I do like the trunk and the placement of the branches, but the upper ones got muddled when I painted the leaves. As always, it was because I was impatient!

When I painted the leaves, I started from the top down and painted the top with water then color and brought it down in thinner strokes. I think that the idea was right, but the execution was wrong. Like the branches, the colors got murky at the top. And, yes, it was because I was impatient! I should have allowed for drying time and I didn’t – especially when I was introducing new colors.

I definitely want to give the weeping willow another shot and next time, I will give myself enough time to give the painting drying time. I like the colors I used so I am not going to change that. I also like that there were areas of white within the painting too, which was a recommendation from a watercolor teacher. I’m excited to see my next painting in comparison to this one because I know there will be at least some improvement. I’m proud of myself for trying something new!

Watercolor painting is a nice reminder of try and try again and I can’t wait to paint again with my mom. I branched out with my weeping willow (See what I did there?) and it’s not the best. But, it’s the best one I have painted yet! 🙂

What is your favorite medium of art? What is your favorite plant? I want to hear from all of you, so leave me a comment and let’s chat! Much love. -Sarah

Watercolor Pansies

Standard
Watercolor Pansies

Hello!! My mom and I really enjoy watercolor painting and it is such a fun and different medium of art to work with. With all of the craziness going on in both of our lives, we haven’t been able to paint as often as we would like. In fact, the last time we painted together was back in March! During that painting session, I tried my hand at pansies and was pretty pleased with the outcome as I had never tried it before.

This past week, we finally got to paint together and I decided to pick up where I left off with pansies. I wasn’t as happy as I was with the ones you’re about to see as the previous effort. However, I hadn’t painted in months and we all have to start (again) somewhere! Check out the image I was trying to pull from and my attempts:

image_6483441(12)image_50369025

After sketching out a basic outline for each flower, I began painting the top right pansy. Obviously, it was a bit of a bust and my mistake was being impatient AF. I gave no time for literally anything to sit and the blob flower became a muddled mess. I was feeling frustrated because my previous pansies were not the best but certainly not the worst and this one just sucked lol. So, I had to regroup, take a breath, and remember that patience is a virtue in life and especially with watercolor!

For the following flowers, I tried really hard to take my time and use the paints and water to my advantage. I also channeled the advice from a previous watercolor teacher to use areas of no paint within what you are working on too. The next flower I attempted was the one in the bottom left and I still wasn’t feeling it, but it was getting closer. Then, I had a brain blast and remembered how I did my original pansies!

The first time I painted pansies, I did a rough outline and then started in the middle. I began with the yellow center and line detailing and waited for it to dry. Then, I applied a light wash of paint, blotted it, and moved onto the next color. I used my original method for the middle right pansy and was much happier with how it turned out. There was even some areas of white to accent the red and orange too. That was much more like it and I ended my painting session feeling satisfied with the top left, two middle, and bottom right pansies.

I’d be a liar if I said I wasn’t slightly disappointed with how my pansies turned out. But, I reminded myself that it was a great first go after an over three month long hiatus. After I shook away the blahs, I felt motivated to paint more so I never have to restart my progress again. I can’t wait for my next painting session with my mom!

What helps motivate you after a disappointment? Have you tried any new artistic ventures recently? I want to hear from all of you, so leave me a comment and let’s chat! Much love. -Sarah

Homemade Rose Oil

Standard
Homemade Rose Oil

Hello!!!! Way back in the day, I used to really enjoy making homemade bath and body care like scrubs, shower gels, and lip balms. It has been SO long since I have done that but it was always a blast! This past week, I decided to revisit one of my old hobbies by making some rose oil with petals from a gorgeous bouquet at my mom and dad’s house. It was insanely easy and, even though I wasn’t too fond of the smell, it was an amazing addition to my bubble bath. No thanks to the bath fizzy from Bath & Body Works that you all read about yesterday! Let’s get to it:

image_50441985(6)

Step By Step:

I made my rose oil by following directions from a surprising source – an article posted by HGTV! Directions for making rose water were also included and I might try that next with the remaining flowers from the bouquet I used. A rose oil concoction went a little something like this:

Step One: Tear or shred your petals. For mine, I took several at a time and tore them in half.

image_50443009(5)

Step Two: Pour a cup of oil into a jar with the petals. Jojoba and grapeseed oil were recommended, but I didn’t have any. However, they mentioned that olive oil would work well too so that is what I used.

image_50739201(3)

Step Three: Bring a few inches of water to a raging boil and remove from heat. Place your jar of oil and petals in afterwards until the water cools.

image_50440705(3)image_50373121(1)

Step Four: Place your jar in front of a sunny window and let it sit for 24 hours.

Step Five: The next day, remove your petals from the jar and squeeze out all of the oil you can from them. To do this, I started pouring the oil with the lid slightly on into another jar. Once a majority of the oil was removed, I used a spoon to press the petals and store the excess.

image_50412033(2)

Easy peasy, right?! Making homemade rose oil was a quick and fun project and I was really pleased with the results. I poured some of my rose oil in the bath tub and it was so lux and lovely. Yes, it was a freaking pain to clean up the oil slick tub after my soak. BUT my skin felt fantastic and it still does several days later. I have noticed a huge difference in the softness of my skin and it feels nourished and healthy. I can’t wait to use it again during my next bath time self care sesh!

Concocting your own rose oil is a wonderful way to bring a second life to roses from your garden or a bouquet. Once again, you can view the directions that I followed here. Tune in tomorrow on lifewithlilred for more flowery vibes as we take a look at my first watercolor painting I have done in a minute!

What is your favorite flower? Do you like to make any crafts or bath and body care with flowers? I want to hear from all of you, so leave me a comment and let’s chat! Much love. -Sarah

Watercolor Flowers

Standard
Watercolor Flowers

Hello! My mom, sister, and I learned the joys of watercolor painting after taking a class together last July. It was so much fun and it inspired my mom and I to take it up as a hobby. I even treated all of us to an at home class last month as an early birthday gift for my mom! During our at home class, our wonderful teacher conducted a painting session on roses and I am so proud of my mom for her dedication to practicing watercolor in her downtime. This past week, I was finally able to paint with her during a visit and decided to see what I could remember of painting roses. I also tried my hand at pansies! Check it out:

image_50384129(3)image_50372609(2)

I like to fancy myself as a creative person in terms of writing, fashion, and figure skating. However, I have never considered myself an artistic person until trying watercolor painting; I can barely draw a stick figure! Quitting my day job for a career in painting is not in my future, but I feel proud of myself whenever I paint anything and it doesn’t turn out awful. At the end of the day, I am trying something new and enjoying myself and that’s the most important thing.

A month had gone by since learning how to paint roses and while I definitely need a refresher, I felt pretty good about the two I made on the first page. The red one is my favorite! In fact, I was having so much fun painting with my mom that I wanted to try something completely new: Pansies. Pansies are one of my favorite flowers and they always remind me of my grandma, who would tend to beautiful window boxes filled with them. The variety of colors and delicate petals speak to me and I know that spring has officially sprung when I start to see them at stores!

To start, I tried to paint a pansy from memory and that didn’t go too hot. A reference picture was a must and I found some great drawings of pansies that were most helpful for my next attempts. Although none of the paintings I tried on the second page look perfectly pansy, I could kind of see it. I also felt like I got a decent grasp on what must be done to improve for next time and that’s good enough for me! I am especially pleased with the one in the top right as well as the flower directly below it. While I love taking watercolor classes, it was an extra feather in my cap to try something brand new all by myself!

I can’t wait to paint again with my mom and am looking forward to giving pansies another go. Practice makes perfect, amiright?!

What is your favorite medium of art to work with? In what ways are you creative or artistic? I want to hear from all of you, so leave me a comment and let’s chat! Much love. -Sarah