Yoohoo! My dad did not plant his usual vegetable garden this summer and opted for beautiful flowers instead. However, he did end up with a cherry tomato plant from seed and it went crazy during the last warm days in the past few weeks. I absolutely love me a cherry tomato and happily took some so I could create one of my favorite meals: Angel hair pasta with pesto, pine nuts, fresh mozzarella, and cherry tomatoes on top. It is heavenly! There is nothing better than huge pieces of fresh mozzarell *chef’s kiss* and I dreamed up a little dish to use the rest of it: Pizza Grilled Cheese. It has become one of mine and Johnny’s favorites and I actually made it a few days ago. 😀
If you are in the mood to just carb out – you are going to freaking love this cooky concoction:
Ingredients:
- Bread of your choice – I use sourdough
- Parsley, garlic powder, and salt and pepper to taste
- Butter
- Shredded Mexican cheese
- Fresh mozzarella
- Pasta sauce
- Pepperoni if you would like
How To:
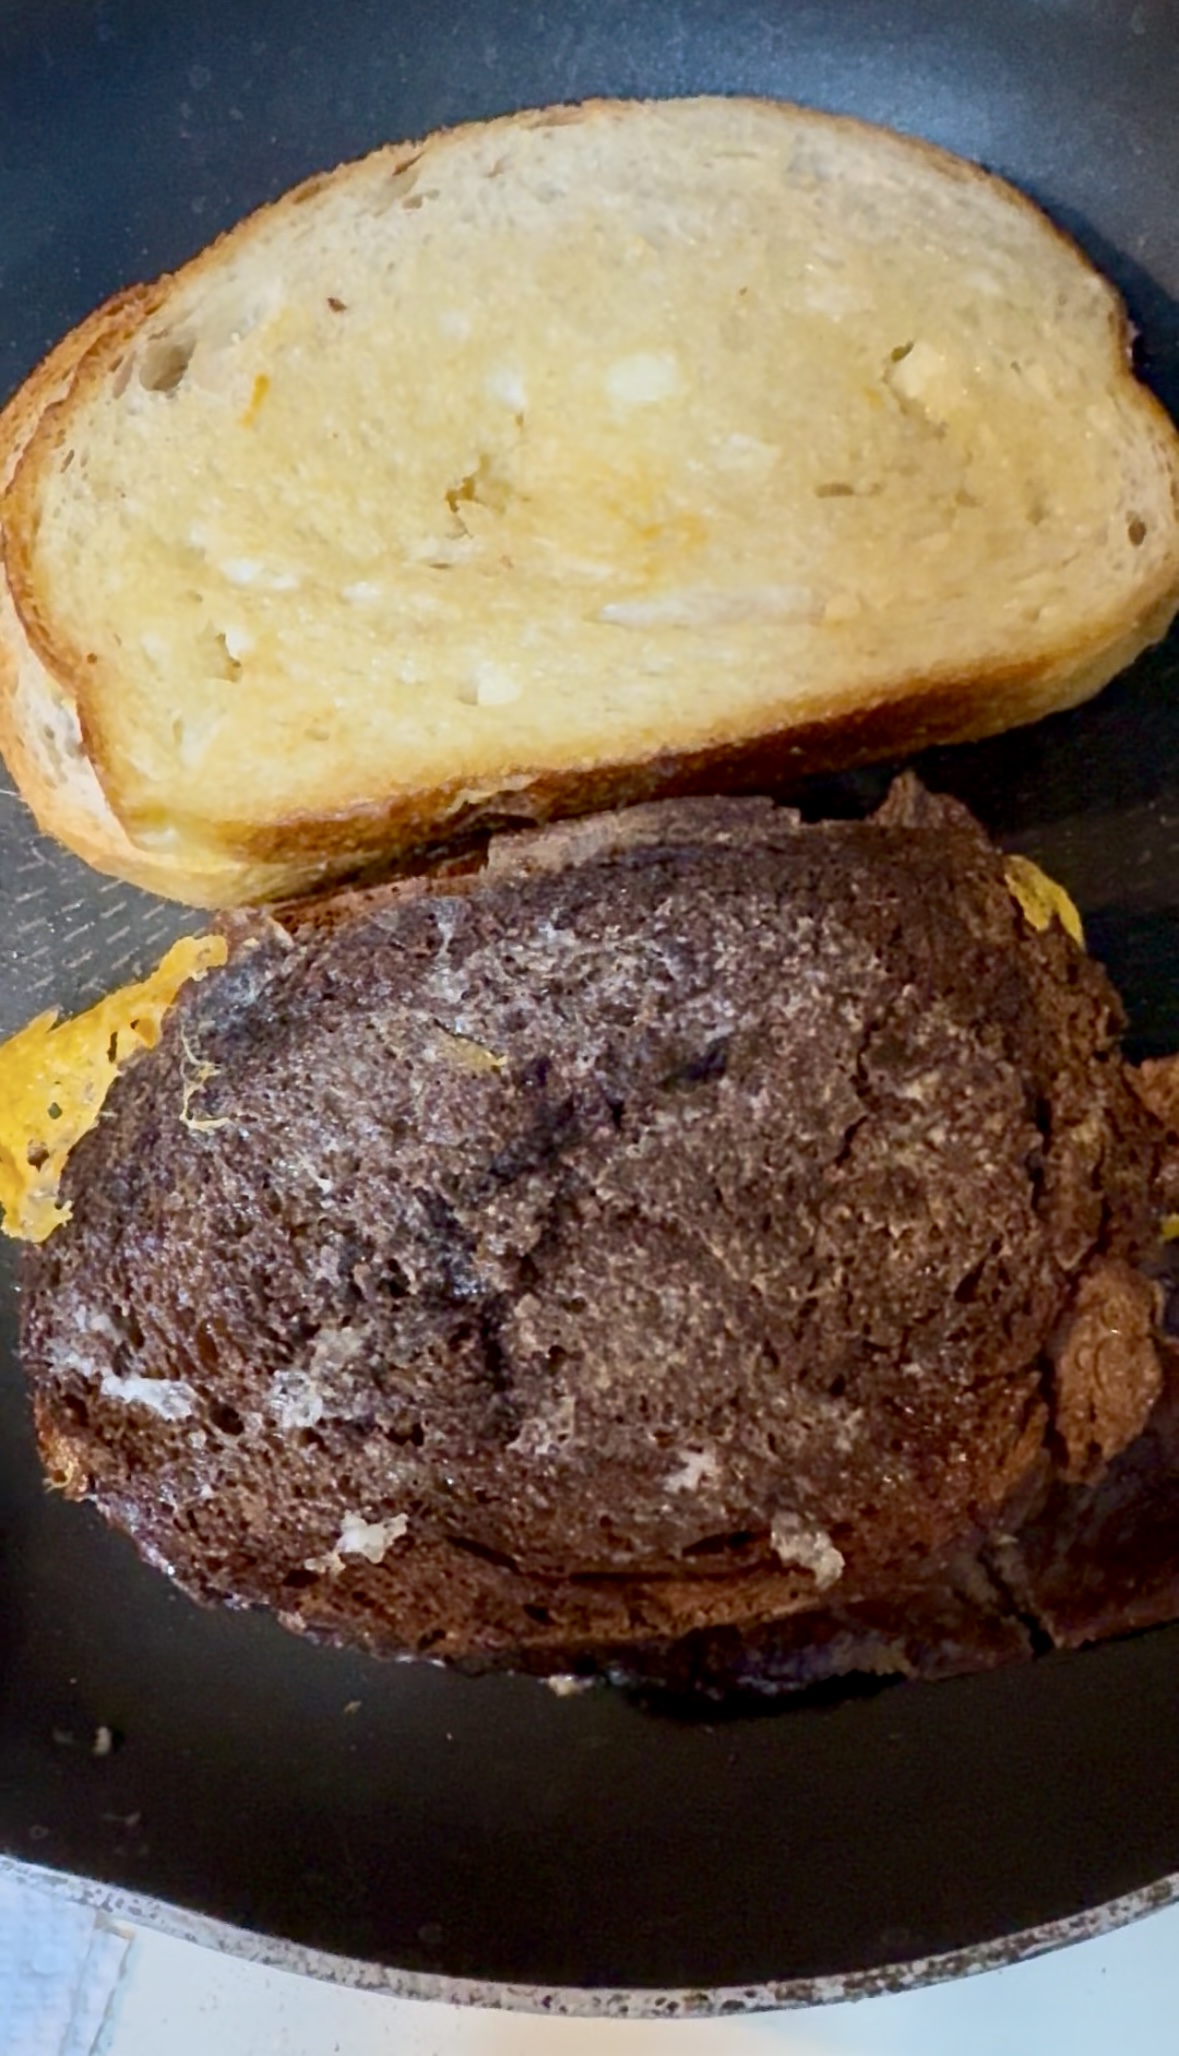
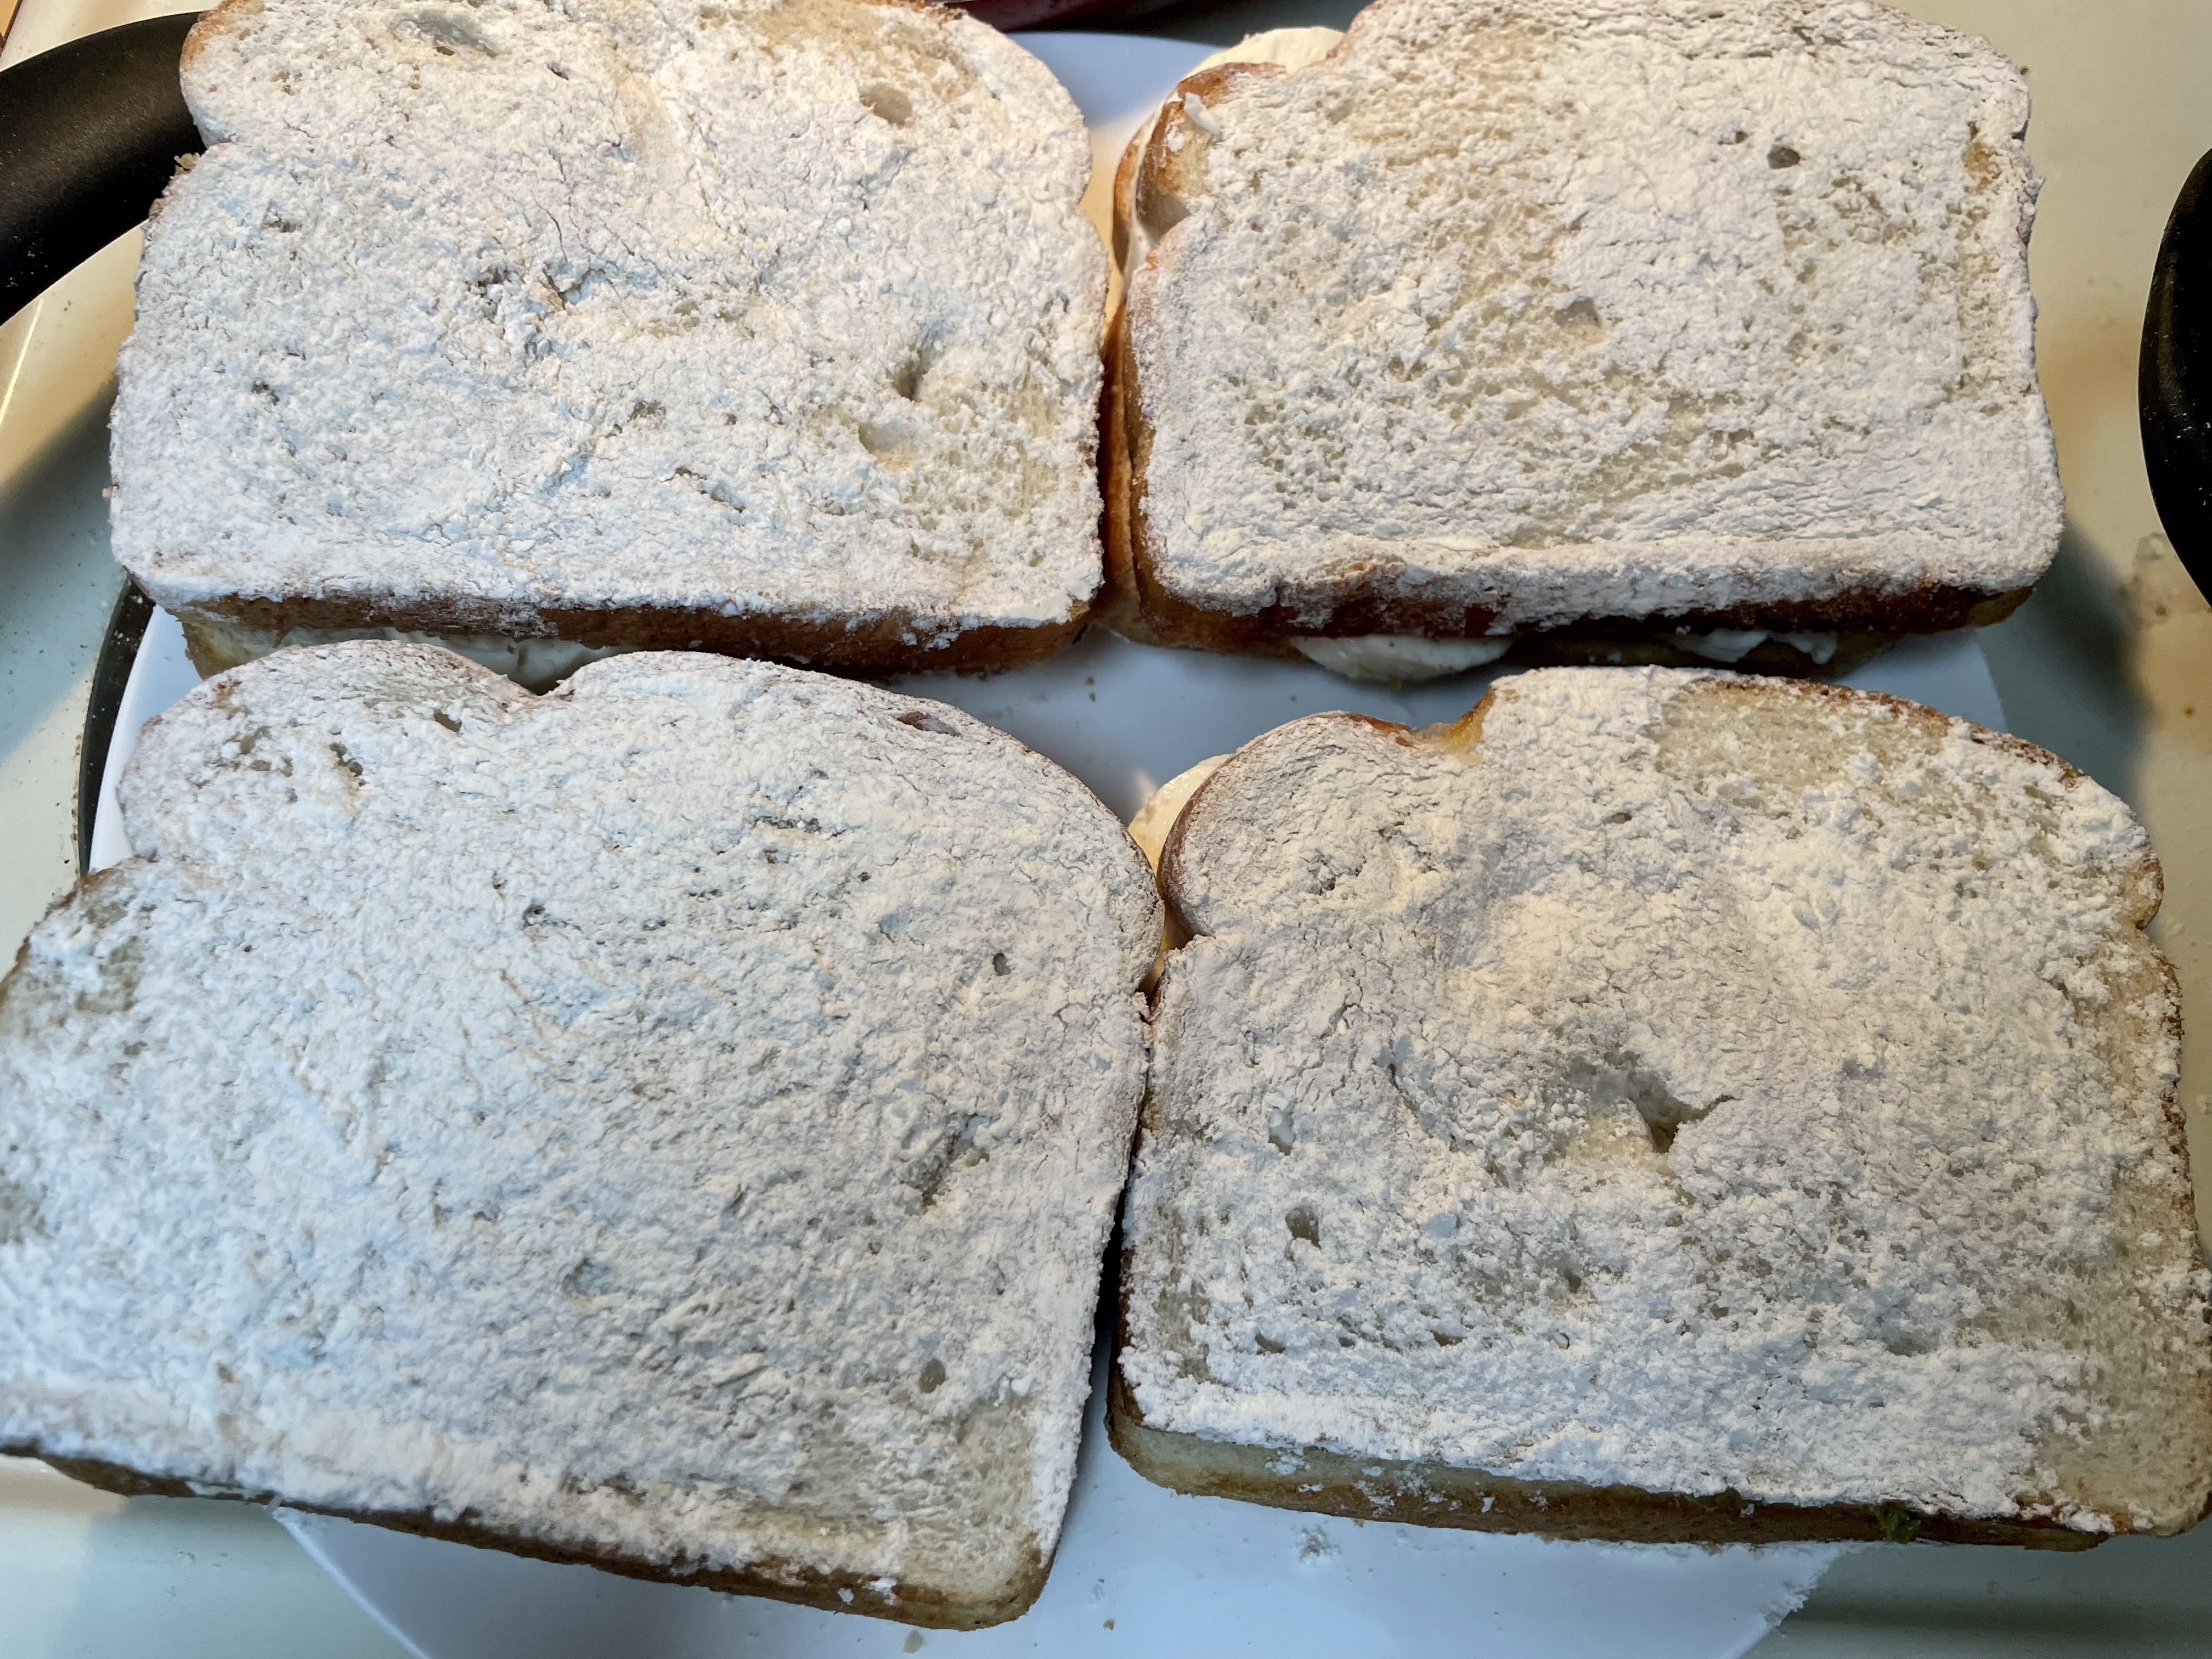
1) The first step is to prep the slices of the bread to turn it into a pseudo garlic bread. Spread the butter and then add parsley flakes and garlic powder. I also use a fair bit of pepper and a pinch of salt. Then sprinkle some shredded Mexican cheese on top.
2) After your bread is ready, transfer one piece of it to a pan but do not turn the heat on yet. This is when you will add the filling. I use four pieces of fresh mozzarella for mine and top Johnny’s with the same as well as four pieces of pepperoni. Then you will add a few spoonfuls of pasta sauce on top and spread evenly. I use three to four spoonfuls.
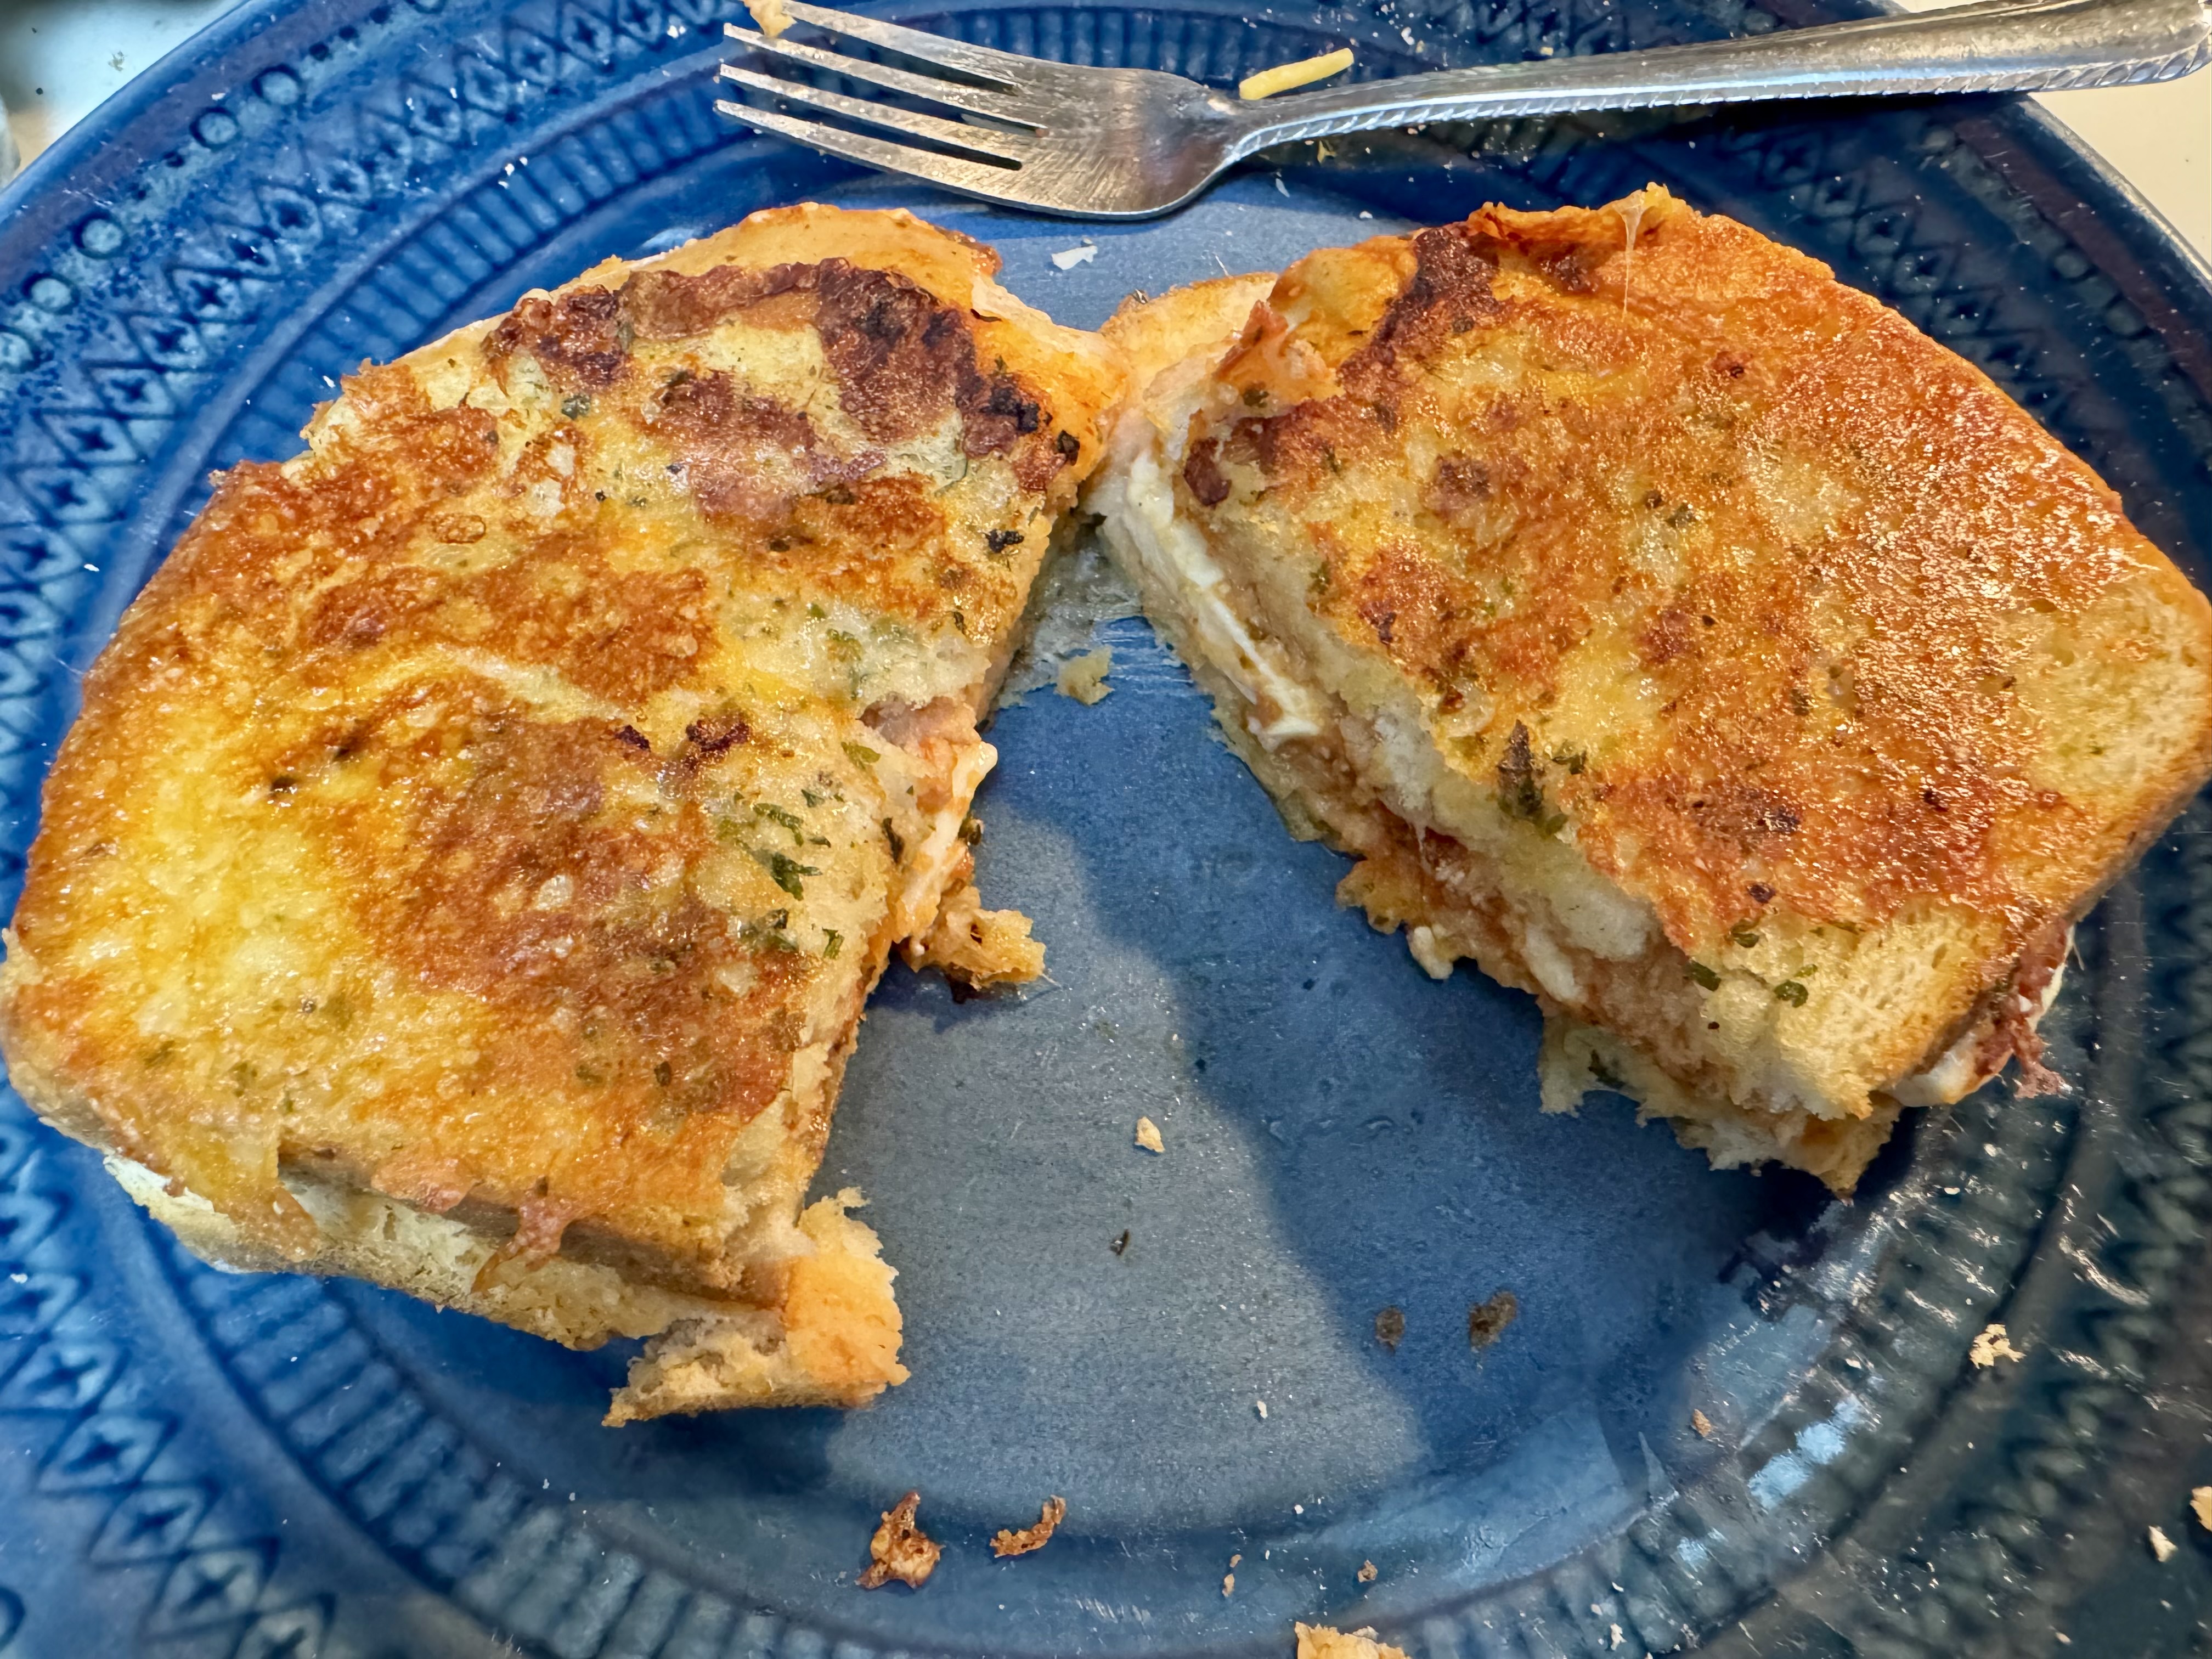
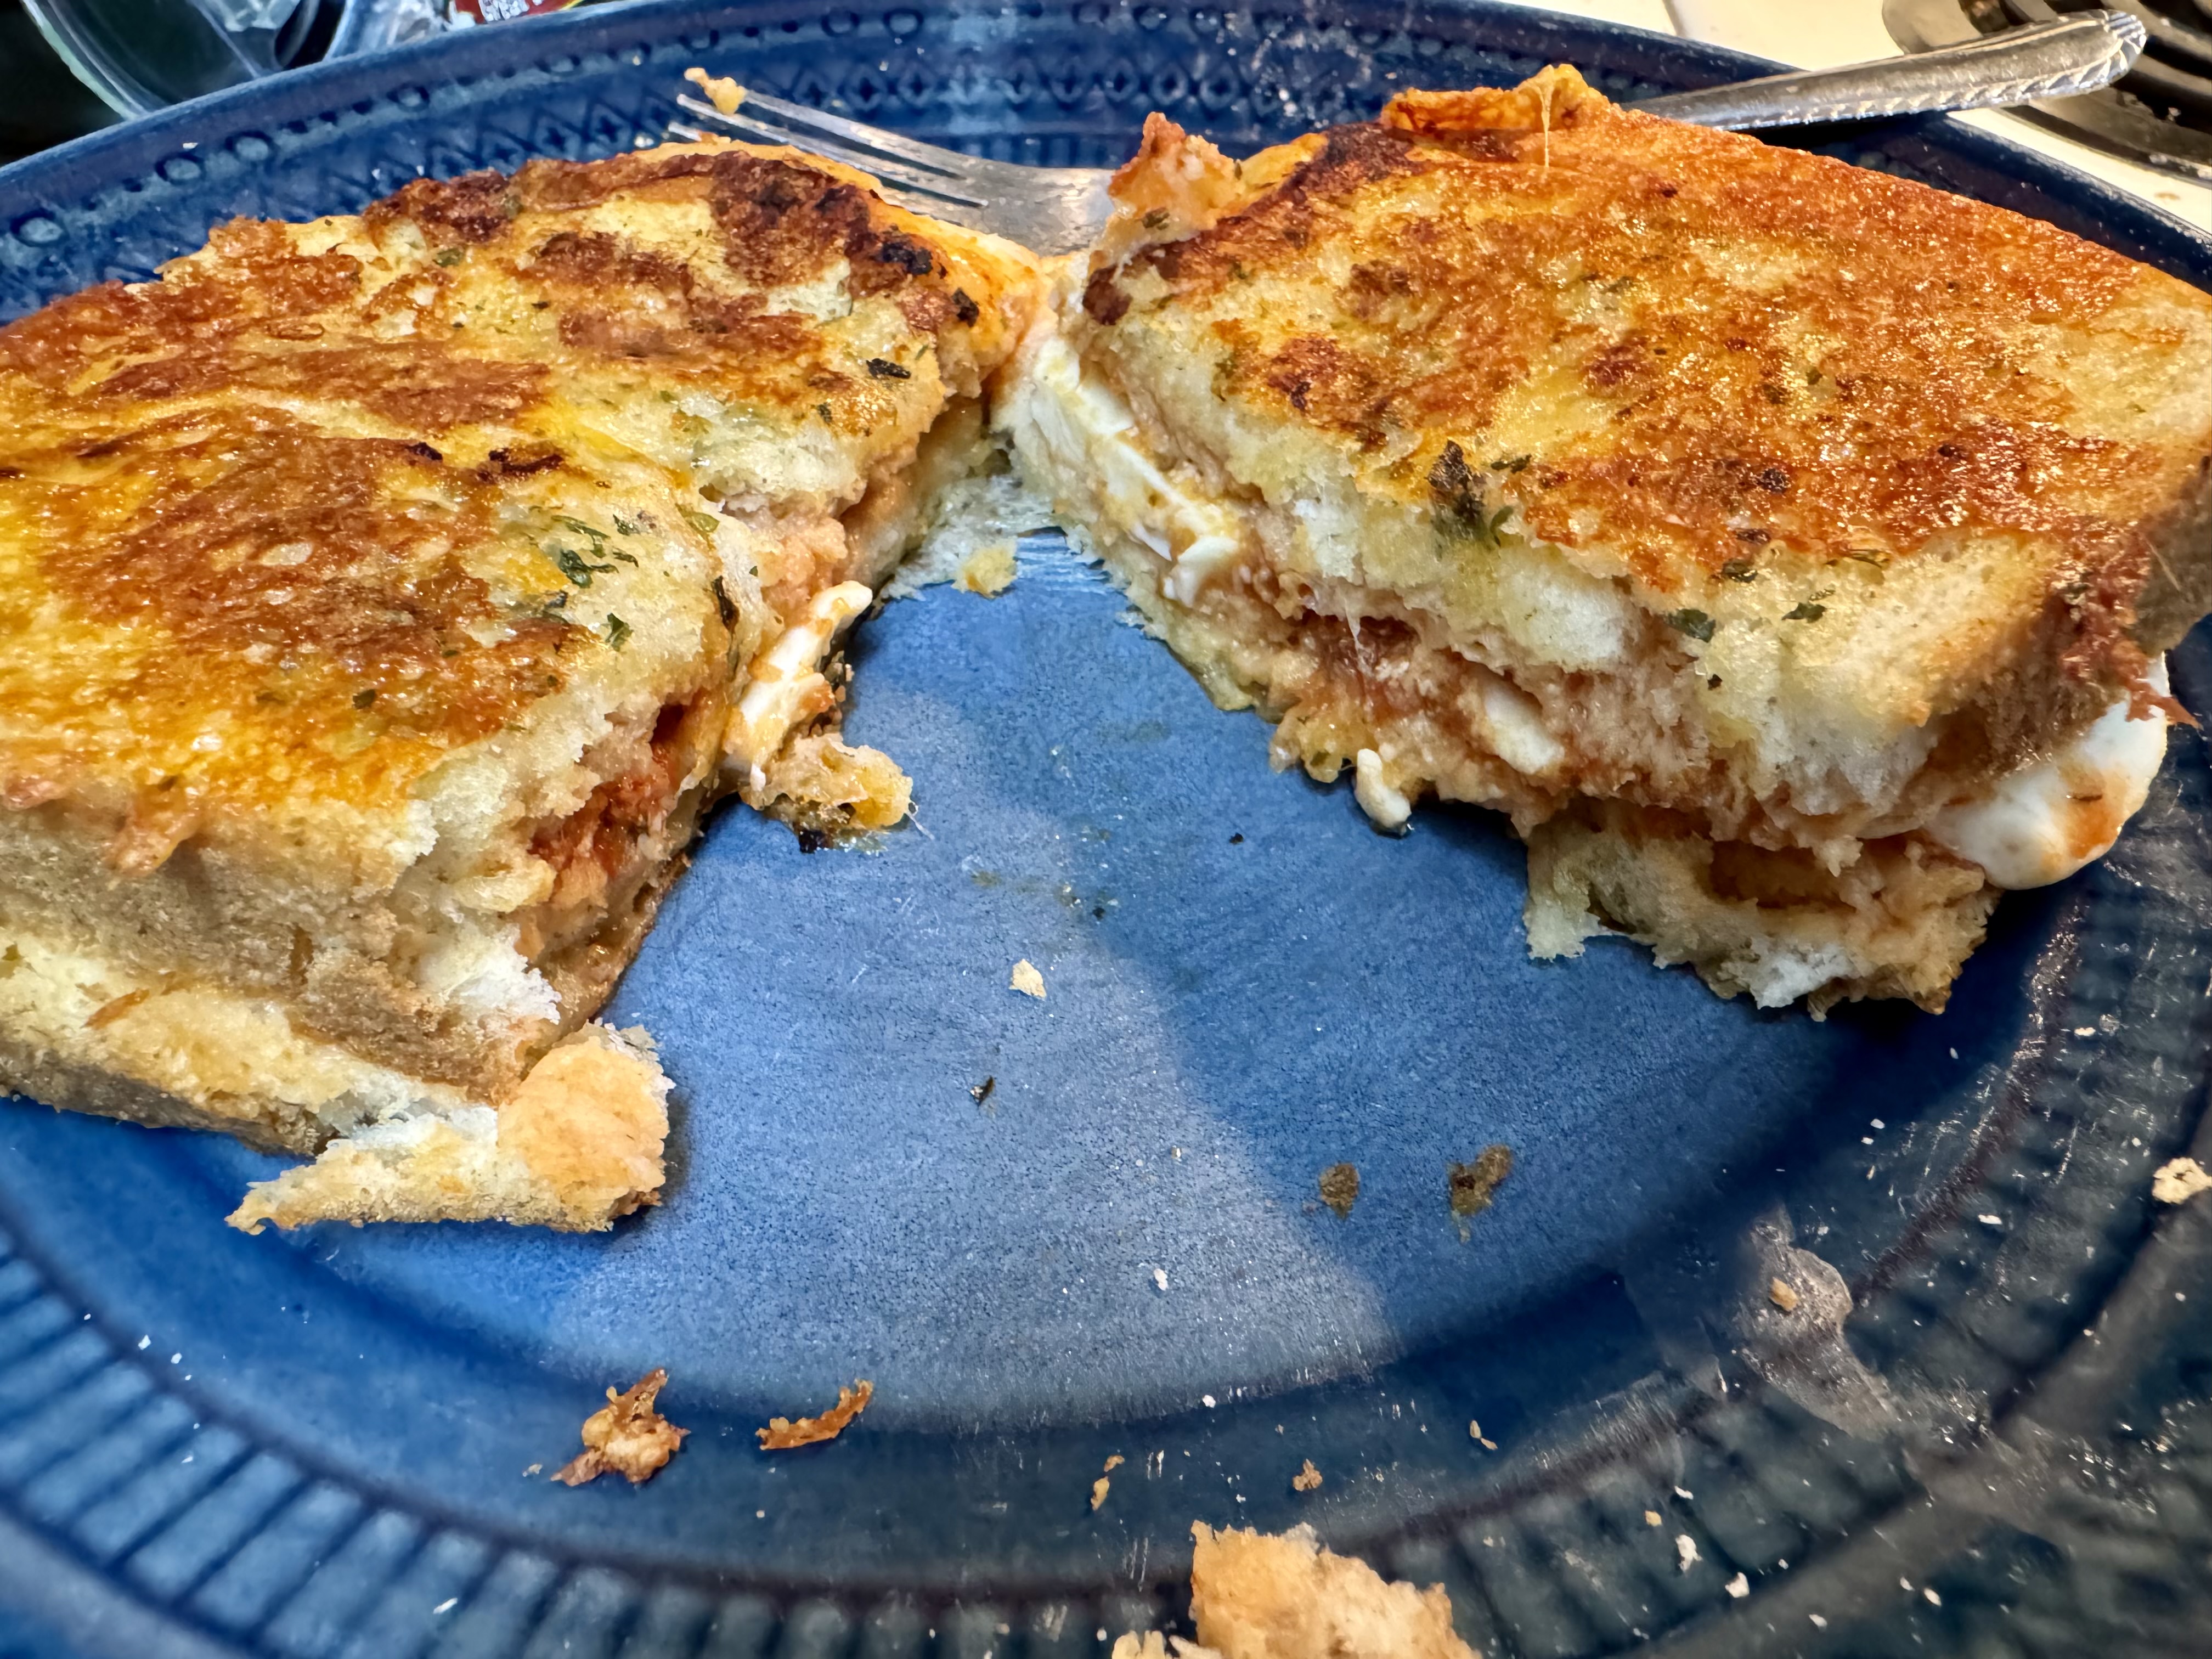
3) Top the sammy with the second piece of bread and turn the heat on to three or four. You don’t want the sandwich to cook too quickly because then the thick pieces of cheese won’t get as melty and delicious. Flip occasionally and wait until the cheese has melted down before turning the heat up to six or so to get the bread grilled. It will be done when the Mexican cheese is a golden brown but Johnny and I like ours a bit crisper.
4) Serve and dig in!
Carbo load? Totally. Yummy AF? TOTALLY! Also, in case you were wondering, this was not a “highdea” even though it really does look that way! 😀
Have you tried cooking something new recently? Is anyone else already excited for Thanksgiving? (I sure am!) I want to hear from all of you, so leave me a comment and let’s chat! Much love. -Sarah