Category Archives: Food

Almost All Aldi’s Dinner – 2.0 Veggie Burgers

Standard
Almost All Aldi’s Dinner – 2.0 Veggie Burgers

Hello! Last week, I learned the joys of grocery shopping at Aldi’s when Johnny and I decided that we had enough of the high prices at Giant Eagle. We went on our shopping trip after work, which resulted in a cart full of almost everything that we needed for over one hundred dollars less. My mind was blown, my wallet was happy, and I was thrilled to have gotten all of our essentials for a fraction of the price.

I have been making excellent use of our grocery haul and have been cooking dinner every other night. On Thursday, I made doctored up veggie burgers with every ingredient minus the MorningStar patties from Aldi’s. They were a hit! Check it out:

image_50727425(2)image_50448129(3)image_50439425(3)image_50431745(5)image_50404865(3)image_50740737(4)image_50770945

Shopping at Aldi’s was, honestly, so exciting lol. I have always really enjoyed grocery shopping and it was fun to buy so many new to me items like the everything bagel brioche buns and aioli spreads. I was also stoked to find a Southwest salad kit, which I would get at Giant Eagle all of the time until they stopped carrying it. And, can we talk about their resealable cheese packages? I’m amazed that this isn’t the standard because it’s such a simple but revolutionary idea!

Our burgers with all of the fixings turned out wonderfully and took ten minutes to make. You just can’t beat that! The brioche buns were so thick and fluffy and our taste buds went on a spin with the smoky Gouda on top. The Southwest salad was crisp and it was accentuated even more with a dollop of the chipotle aioli for good measure. My 2.0 veggie burgers with Aldi’s ingredients completely blew the ones I was making before out of the water.

Although I love to try new recipes on Pinterest, I still make a lot of standby dishes that Johnny and I will always enjoy. I’d be a liar if I said I wasn’t a bit bored with it, but simple and quick meals are often the best thing for me to make during the work week. Being able to make our usual dinners with a twist on the ingredients used has been an absolute game changer. Now, if only there were an Aldi’s and Trader Joe’s right down the street from me!

If you are feeling bored with your standard groceries, go to a different store lol. Aldi’s has turned our go to meals into something special again and what we saved is unmatched. A change of scenery for grocery shopping goes a long way!

What are some of your standby meals to make? What toppings do you like on your burgers? I want to hear from all of you, so leave me a comment and let’s chat! Much love. -Sarah

Aldi’s Haul Success: Pickle De Gallo

Standard
Aldi’s Haul Success: Pickle De Gallo

Hello!!! For the past several years, Johnny and I have done our grocery shopping at the Giant Eagle. The convenience of curbside and the fact that it is barely five minutes away from us was hard to beat. However, the prices at GE were simply getting out of hand and the amount we were spending to keep us fed and watered was ridiculous. So, we decided to make a change by shopping at Aldi’s and getting what we couldn’t find there at the GE.

We had our first Aldi’s trip together earlier this week and it was nothing short of a remarkably GREAT SUCCESS. Outside of about six things that weren’t available, we found everything we needed and paid over one hundred dollars less for it. The nearest Aldi’s to us is about twenty minutes away but, needless to say, it was well worth the trip!

I haven’t gone “real” grocery shopping in so long because I freaking LOVE online shopping with curbside. However, I always enjoyed a trip to the grocery store and going to Aldi’s with Johnny was a blast. There were SO many new to us options and we filled our cart with can’t say no finds. One of which being, pickle de gallo. I had seen people posting about it on Facebook before and I told Johnny that I really hoped it was at the Aldi’s we were going to. Lucky for me, it was!

image_50422785(7)image_50460161(5)image_50753281(3)

Johnny and I are avid dippers. No, not in the chewing tobacco way! We just love chips and dip and like to make what we call “dip island” AKA a wide variety of dips on a table lol. So, when I heard talk of a pickle based salsa, I NEEDED it. Pickles are one of my favorite things to snack on and pico de gallo is my preferred style of salsa. A combination of both of these things really blew my mind and I couldn’t wait to dig in as soon as we returned home from our shopping trip.

At Aldi’s, there were two different types of pickle de gallo – a mild one and a thick and chunky medium heat one. Obvi, I got them both! I decided to try the mild pickle salsa first and it was everything that I hoped it would be and so much more. The pickles were tangy, the onions were sweet, and the red pepper had the perfect amount of zip to make my taste buds soar. Every bite had an insane amount of crunch and it wasn’t from the tortilla chips I purchased which were kind of a dud. Several chips in, I had to exercise self control because I most definitely could have kept on going!

If you are a pickle fan and looking for a new and exciting way to eat them; RUN to Aldi’s. Also, if you are looking to save money on groceries; RUN to Aldi’s. This shopping trip was a complete game changer and I can’t wait to go back! 😀

What grocery store do you shop at? What is the best thing that you have found at Aldi’s? I want to hear from all of you, so leave me a comment and let’s chat! Much love. -Sarah

A Guide For Building A Healthy Food Business

Standard
A Guide For Building A Healthy Food Business

Are you someone who is passionate about healthy food and wants to turn that passion into a successful business? Starting your healthy food business or from scratch may seem daunting, especially if you don’t know where to begin. But fear not, because we have got you covered with this step-by-step guide to help you launch your healthy food business.

Starting a business requires hard work, dedication, and patience. However, once you get the ball rolling, it can be a rewarding experience that allows you to turn your passion for healthy eating into a thriving business:

Define Your Business Plan and Target Audience:

The first step in starting any business is to define your target audience and create a solid business plan. Your business plan should include a unique value proposition, your target audience, and your goals for the business. When it comes to healthy food, you need to be specific about the type of food you will offer, whether it be vegan, gluten-free, organic, or something else. Understanding your target audience will help you decide what healthy food offerings will succeed.

Creating a cohesive business plan that defines both short and long term goals is so important for achieving success. However, it can be a huge undertaking. Software programs like this ERP for the food and beverage industry can be most beneficial in helping you manage and execute your plan accordingly. Using technology like this can boost efficiency and give you the peace of mind that everything is running as it should.

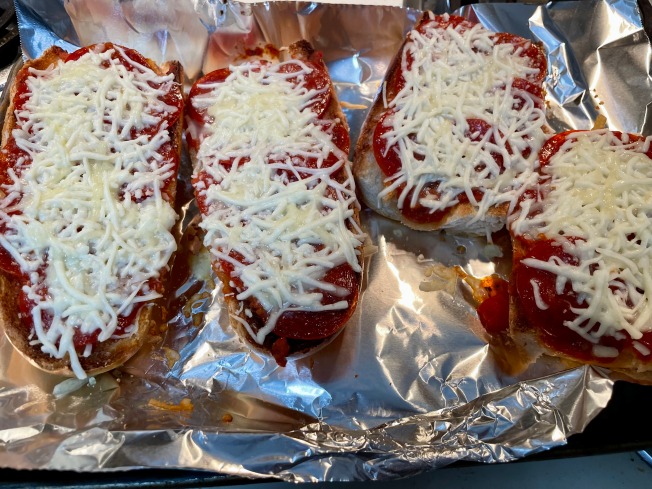
Get the Equipment You Need:

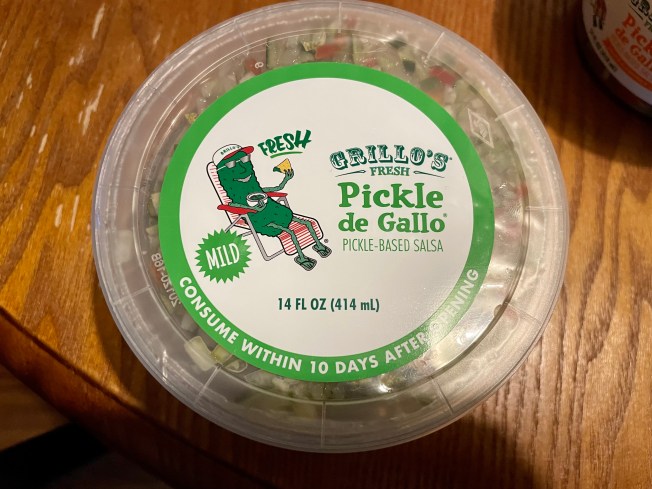
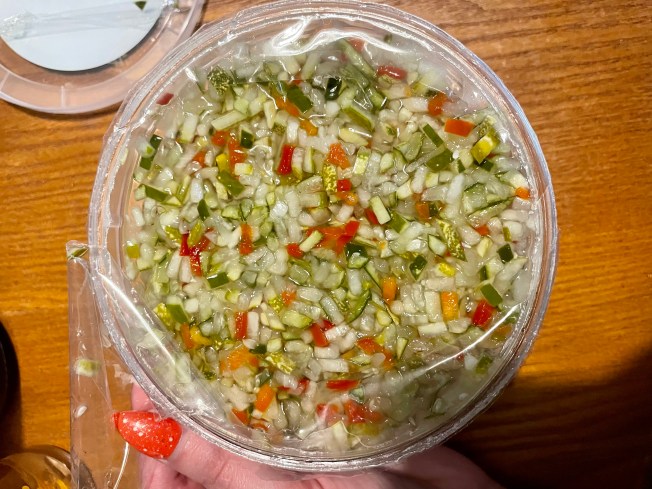
The equipment you need for your healthy food business will depend on the types of food that you plan to sell. You will need essential kitchen equipment like refrigerators, ovens, stoves, and specialized equipment for processing and preparing healthy food products. Don’t forget that you will also need to be well stocked with supplies you need for cleaning too like Commercial Disinfectants, floor cleaners, and sanitizers. Make sure to research the equipment and products required for your specific food niche.

Set Up Your Business Legally:

It’s essential to set up your healthy food business legally and obtain the necessary licenses and permits. Setting up your business correctly will protect you from potential legal issues down the road and give your customers the peace of mind that your products are safe and trustworthy.

Register Your Business Name:

Once you have chosen a legal structure, your next step should be registering your business name. This process usually involves checking your desired name, filing the appropriate paperwork with your state government, and paying a registration fee. Make sure to choose a name that is unique, memorable, and easy to spell, and do a trademark search to ensure that it is not already taken. Whether you are creating a vegetarian restaurant or financing a pub, you will want a name that sticks with people so don’t be overhasty with your decision.

Obtain the Necessary Licenses and Permits:

You must obtain licenses and permits to legally operate a healthy food business. These can vary by state and locality, but they may include a food service establishment permit, a retail food store license, a seller’s permit, and a food handler’s permit. You may also need to comply with specific regulations related to food safety, nutrition labeling, and sales tax collection.

Create Your Branding Strategy:

Your branding strategy is a set of guidelines that define your brand’s personality, values, and visuals. It includes your logo, color palette, tone of voice, and tagline. Your branding strategy should be consistent across all of your marketing and advertising materials to boost brand recognition. Start by identifying your target audience, researching your competitors, and defining what sets your brand apart. This is the perfect opportunity to explore promotional products which can help spread the word and keep your business on the minds of your customers. These products could be T-shirts, water bottles, or more unique items like a magic 8 ball for my company. Try printing on a variety of different promotional items and see what is the most popular for your clientele.

Develop Your Marketing Strategy:

Your marketing strategy promotes your products and services to your target audience. With the rise of social media, visual content has become more critical than ever. That’s where commercial food photography services come in. From capturing mouth-watering images of your delectable dishes to showcasing your brand’s unique story, professional food photography can take your marketing efforts to the next level. By portraying your business in the best possible light, you can attract a loyal customer base and stand out in a crowded market.

busin2

Plan Your Advertising Strategy:

Your advertising strategy is about reaching your target audience through paid media channels like Facebook, Google Ads, and print and online publications. Choosing the proper advertising channels to effectively reach your target audience and design ads that capture their attention and resonate with their needs and wants is essential.

Starting your own healthy food business from scratch is an exciting and rewarding journey. With these steps, you’ll be on your way towards building a successful healthy food business!

Roasted Garlic Butter Parmesan Potatoes

Standard
Roasted Garlic Butter Parmesan Potatoes

Hello!! Memorial Day was the first week day that I have had off since the holiday season and it was wonderful! I caught up on paperwork, did very minimal other work, binge watched Top Shot with Johnny, and cooked up a storm. I cooked a few favorite recipes like mac n cheese and tried out something new by following Eatwell101’s recipe for Roasted Garlic Butter Parmesan Potatoes. While there were parts of this recipe I would change, Johnny freaking loved it so it was a GREAT SUCCESS in that regard! Check it out:

image_50449665(6)image_50753537(4)

This potato side dish recipe was insanely easy to make and took less than fifteen minutes of prep time to complete. All I had to do was chop the potatoes and garlic, melt some butter, and mix a few ingredients together for the sauce. Then, all that was left to do was pop it in the oven and wait. Even before I placed the dish in the oven, it smelled SO good and while it was cooking it smelled even better – our hungry selves were very eager to try it out!

As I said, Johnny was most pleased with the outcome of this recipe and asked me right away if I could make it again lol. That always makes me happy, regardless of if I liked it or not! I thought that the base of the recipe was great, but it wasn’t as flavorful as I had imagined it to be; especially considering the amount of garlic used and I even added some onion in for good measure. The next time I make this, I will be opting for fresh herbs (Which I didn’t have) as well as some lemon juice. I love lemon and Parmesan together and I think that it will help bring more of the flavors out that kind of got muddled.

As per Johnny’s request, I will be getting the ingredients for the Roasted Garlic Butter Parmesan Potatoes again for our next curbside order. I will also be getting my modification ingredients and am hoping it will be even better the next time around. This is a recipe worth trying and putting your own spin on too!

What is your favorite side dish? How did you spend Memorial Day? I want to hear from all of you, so leave me a comment and let’s chat! Much love. -Sarah

Super Easy Baked Potato Dinner

Standard
Super Easy Baked Potato Dinner

Hello! After a long stint of craziness in my life, I have finally found some extra time and energy in the evenings to cook again. It makes me so happy to be able to make dinner and mine and Johnny’s wallets have been happy because we haven’t had to DoorDash in weeks! Despite having the additional time to cook, that doesn’t mean I want to spend all evening cooking and if the meal takes longer than a half hour to make than I say forget about it lol. The same goes for if the recipe has a million ingredients because that’s a hassle and a half too!

With my time and ingredient limit in mind, I racked my brain for dinners that I could make fairly effortlessly when putting in my curbside order. I came up with several, one of them being baked potatoes. I cannot tell you the last time I have had one and as soon as I thought about it, I was craving them something fierce. This past week, I made a baked potato meal with all of the fixings for me and Johnny and my dad and brother and it turned out SO bomb. 20/10 would make again! Check it out:

image_50460673(8)image_50405121(7)

Although baked potatoes are crazy easy to make, I have never made them before. In my youth, I remember my parents just sticking the potatoes in the oven and calling it a day. I wanted to make the 2.0 version, however, and began consulting different websites to find the best way to make them. The resounding theme that I found was to coat the potatoes in olive oil and seasoning and bake it on a foil lined sheet. I did just that and coated the skins with salt, pepper, parsley, and rosemary and let them bake for about an hour at 425 degrees. Once they were close to being done, I steamed broccoli and dinner was ready to go.

The final result of my baked potato effort was a huge hit and everyone who I cooked for loved it. The oil and seasoning truly made all of the difference. The skin of the potato was so crisp and flavorful and the inside was soft and fluffy – they were the dictionary definition of “just right”. This meal required no skill or thinking, but it was the favorite thing that I have made for my captive audience in a minute. Often times, simple is best when it comes to making dinner and this is one that I would definitely make again soon!

I have been working hard at setting small goals for myself and cooking was at the top of my list. I am beyond thrilled that I am holding true to my goal and accomplishing it and the reward is everyone enjoying what I am making. That’s the best part of all! ❤

What is your favorite easy dinner to make? What is your go to baked potato toppings? I want to hear from all of you, so leave me a comment and let’s chat! Much love. -Sarah

Peanut Tofu With Coconut Rice

Standard
Peanut Tofu With Coconut Rice

Hello!! The past almost three months of my life have been absolutely insane and one thing that fell by the wayside at home was cooking. After returning home from long days at the Cleveland Clinic, it was so much easier to DoorDash something or throw frozen food in the air fryer and call it a day. However, DoorDash was adding up and I was SO sick of not being able to make dinner because it’s one of my favorite things to do. I decided to really make an effort to begin cooking again with this past curbside order and I have been holding true to it.

On Tuesday, I made peanut tofu with coconut rice for my dad and me because Johnny hates both tofu and peanut butter lol. I have had this recipe by Nora Cooks saved on Pinterest for forever and was eager to finally try it out. It turned out pretty good and I would definitely make it again with a few adjustments. You can view the recipe here! Now, let’s get to it:

image_50747137(1)image_50382593(1)image_50432001(5)image_50450433image_50401281(5)

When I am looking for new recipes on Pinterest, I save the ones that don’t require a ton of ingredients and are simple and fast to make. The peanut tofu with coconut rice met all of these requirements and delivered on what was promised – a meal made in thirty minutes. The prep work for this recipe was insanely minimal and the only things that needed chopped were the tofu and garlic. The rest of the tasks were stirring ingredients for the sauce, cooking instant rice, and throwing the tofu into the oven to bake. It was SO easy and the rice and sauce were made with time to spare while the tofu cooked for twenty-five minutes.

Although Johnny can’t stand peanut butter, he told me how good it smelled while I was cooking and it really did. By the time everything was ready, I was beyond ready to dig in! For a first try, I thought that this dish turned out as good as it could have. But, there were some things that I didn’t like. The sauce, for example, had ingredients in it like ginger, lime juice, and soy sauce, but all I could really taste was the peanut butter. I prefer when peanut sauce has a bit of bite to it so next time around, I will be adding some sesame oil and vinegar for more variety in the flavor.

This recipe turned out very saucy and when I make it again, I will add some veggies to absorb all of the excess. I plan on using steamed broccoli and sauteed yellow pepper and onion. This will also give the meal some more texture because it was fairly one dimensional. Be warned that this dish is very rich between the peanut butter and coconut milk used – I was full after a small serving!

While there are things that I will be changing in this recipe for the next time I make it, it is still one worth trying out and putting your own spin on. I am looking forward to making my 2.0 version soon!

Are you a tofu fan or no? Have you tried any new recipes recently? I want to hear from all of you, so leave me a comment and let’s chat! Much love. -Sarah

Updated Vegetarian Cheesy Gordita Crunches

Standard
Updated Vegetarian Cheesy Gordita Crunches

Hello!! Last year, I began making vegetarian cheesy gordita crunches as an homage to my beloved Taco Bell. It has become a staple in mine and Johnny’s dinner arsenal ever since, which is fine by me because they are so yummy and crazy easy to make. Also, can we talk about how freaking expensive Taco Bell is now? What used to be a constant in my life has quickly become an every once in a while thing because of it. While it saddens me deeply, I have upgraded my at home gordita game quite a bit and truly consider it to be a Taco Bell taste alike. Check it out:

image_50734337(1)image_50748673(1)image_50418689(7)image_50398721(8)image_50458881(5)

^^^ Note that Taco Bell doesn’t use sour cream on their gorditas. I love it though and the Daisy sour cream squeeze bottle is perfect for tacos!

Although I miss TBell something fierce, I do find comfort in the fact that some of their products are available in grocery stores like the taco seasoning and Baja sauce. It takes the edge off, but only slightly lol. I have already been using both of these when making my gordita crunches and the real game changer happened when I discovered Old El Paso made nacho cheese shells. My mind was blown during my last curbside order and so was Johnny’s! The nacho cheese cheesy gordita crunch is his go to order at Taco Bell. 🙂

When I made this dish last week, it was definitely the best ever. I love to cook, but I have never made anything that I considered to be even remotely close to a restaurant or fast food chain before. What made it even better was how simple it was to make. This dinner took under a half hour to prepare with minimal work involved. All I did was make the taco meat for Johnny, heat up vegetarian refried beans for me, and melt cheese lol. This is a meal that I am so fine cooking regardless of how busy my day is and the leftovers turn into more easy peasy dinners throughout the week. You can’t beat that!

With some upgraded ingredients, I was able to invoke the taste of Taco Bell from the comfort of my own kitchen. Even if the prices of TBell went down, I will absolutely still be making my taste alike cheesy gordita crunches at home! 😀

Do you have any restaurant or fast food taste alike recipes? What is your favorite dinner to cook? I want to hear from all of you, so leave me a comment and let’s chat! Much love. -Sarah


Simple Dinner: Homemade French Bread Pizza

Standard
Simple Dinner: Homemade French Bread Pizza

Hello! My life is pretty crazy at the moment and it can be hard to find the time and energy to do much of anything once I return home for the day. One thing that always makes me feel good no matter how tired I am, though, is cooking dinner when I can. Earlier in the week, Johnny and I put in a curbside shopping order filled with all of our essentials and ingredients for me to make meals with. As soon as all of our groceries were put away, I got to work making homemade French bread pizzas as I wanted to use the loaf of bread we got at its freshest. They turned out SO good!

The cheese doesn’t look as melted as it actually was in these pictures and I will definitely keep them in the oven longer the next time around. I just didn’t want the pizzas to burn because I accidentally broiled them a bit too long in the first step. That was my bad because I actually should have baked it instead of broiled lol WHOOPS! Check it out:

image_50734593(1)image_50769153(1)

Ingredients:

1 loaf of French bread

Pizza sauce

Shredded mozzarella cheese

Butter

Garlic powder

Toppings

Step One: When I made jalapeno popper bread, I learned from the recipe to bake the bread with a melted butter and garlic powder spread to keep it from getting too hard. This was very effective and it kept the inside of the French bread soft and the outside nice and crisp. And, I repeat, BAKE not broil lol smh.

Step Two: Once the bread was taken out of the oven, I added pizza sauce, pepperoni for Johnny, and cheese, then put it back in the oven again to bake. Because of the broil catastrophe, I was monitoring my creation pretty closely and made the executive decision to take them out early. The cheese could have melted more, but it was an overall great first try!

Step Three: Enjoy!

This was such an easy and yummy dinner to make and was a fun twist on regular old pizza night. I really enjoyed my cheese French bread pizza and I know that Johnny loved his pepperoni ones because he asked me to make it again as soon as he was done eating. This is the best stamp of approval of all because my sweet husband is a fairly picky eater! I kept things simple in terms of toppings, but next time French bread pizza is on the menu, I will add some green pepper and red onion to mine; My favorite!

What is your favorite pizza topping? What is your go to simple dinner to make? I want to hear from all of you, so leave me a comment and let’s chat! Much love. -Sarah


Super Yummy Jalapeno Popper Bread

Standard
Super Yummy Jalapeno Popper Bread

Hello!!! Things have been crazy and stressful in Lil Red’s world and, thankfully, there appears to be a clearing in the woods. This past Thursday, I was so happy to finally have the time to cook something! Despite loving to cook for Johnny and myself, it is often one of the first things that falls by the wayside when life gets too busy. I have several recipes that I bought groceries for and decided to keep things simple by making some jalapeno popper bread. It was SO easy, cheesy, and delicious and I wanted to share it with all of you for a meal or snack that took barely ten minutes to prepare! Check it out:

image_50453505(3)image_50738177(8)

This recipe is compliments of Kami at NoBiggie and can be found on this link!

One of mine and Johnny’s favorite meals is jalapeno popper quesadillas. Naturally, we like any variation of cheese and jalapenos so when I saw the recipe for jalapeno popper bread on Pinterest, I was eager to try it out! When scouring for new food to make on Pinterest, I like to find recipes with minimal ingredients and prep time. The popper bread recipe boasted both of these requirements with only eight ingredients, ten minutes of prep, and about fifteen minutes of baking. I could definitely swing that!

To make my popper bread, I purchased a gorgeous loaf of artisan cheese bread from Giant Eagle’s bakery. I already had several of the ingredients listed, but I was also in need of pickled jalapenos and found a jar of sweet heat ones that were really tasty. To start, I cut the bread in half and brushed it with melted butter and garlic powder and let it bake for five minutes. During that time, I mixed up the mozzarella cheese, sour cream, cream cheese, salt, pepper, and jalapenos to top it off with. This spread was then applied to the bread and it went back into the oven to bake. Done and done.

While the bread baked, I monitored it pretty closely because our oven has the habit of burning things as soon as your back is turned. It was so satisfying to watch the ooey gooey cheese bubble and brown and it couldn’t bake fast enough; I was starving! I knew that the bread was going to be good, but I didn’t expect it to be freaking mind blowing. The cheese mixture had the consistency and flavor of a white pizza, the jalapenos added some kick, and the bread was crisp without being tough. It was SO yummy and filling too. I was full after a one third size piece!

I would happily make this recipe again and cannot recommend it enough. In fact, I plan on buying another loaf of bread to use up the rest of the ingredients as soon as we are out of leftovers. Thanks again to Kami of NoBiggie for sharing this!

Have you tried any new recipes lately? Do you have a favorite food blogger? I want to hear from all of you, so leave me a comment and let’s chat! Much love. -Sarah

Indian Cooking Class At Stir Studio Kitchen

Standard
Indian Cooking Class At Stir Studio Kitchen

Hello! Indian food is one of my favorite things to eat, but is something that I have never tried to cook before. Sure, I have recipes for some of the dishes I like on Pinterest, however, I never took the plunge to buy the ingredients. Some of them are pretty expensive and I could never justify it before because Johnny isn’t an Indian food fan (He never tried it and never wanted to!). This all changed this past weekend, however, because I learned how to make some Indian dishes at a cooking class and, surprisingly, Johnny loved the leftovers! With this newfound knowledge, maybe I will prepare Indian food at home yet! Check it out:

image_50417153(3)image_50455809(2)image_50418177(3)image_50419969(4)image_50400001(7)image_50450177(4)image_50740993(4)image_50735617(1)image_50734849(4)image_50456833(5)image_50456321(5)image_50461185(5)image_50429697(3)image_50738945(4)image_50420481(10)

On Friday, my aunt and I both attended a three hour Indian cooking class at Stir Studio Kitchen in Hudson. There were ten students in total and we were taught by a very skilled chef named Zack. During our class, we learned how to make naan, tikka masala, and palak paneer. We were also treated to kulfi ice cream for dessert made by our teacher. The class was amazing and while it was fun to cook, it was even more fun to enjoy the meal we made together – we were all starving by the time everything got plated up!

To begin our class, we prepared the dough for the naan, which was incredibly easy and moved onto veggie prep while the dough settled. While we all had our individual naan, the veggies we chopped would go into the tikka masala and palak paneer for us to share. For these dishes, we chopped up onion, garlic, red pepper, chili pepper, ginger, and tomato. Zack also taught us about the proper techniques for using a chef’s knife as well as tips and tricks for easier, more efficient veggie prep. My mind was blown when we set the garlic underneath the knife blade, hit it, and it unpeeled. 😀

As our veggies cooked, Zack introduced us to all of the spices that we would be using. We had to try and guess all of them and while the group was able to identify several, there were many that left us stumped! This was a very interesting section and one of my favorites. Zack was such a knowledgeable and fun teacher and it was cool to learn about the spices and where they came from and why they are used. Throughout the class, Zack taught us all about the chemistry that makes the ingredients activate with each other and it was so neat to learn about food in a completely different way.

Once our crash course on spices was complete, it was time to roll out our dough for the naan and bake it. To do this, we fried them on a completely dry cast iron pan with a bit of flour on it. Then, we spread a mixture of butter, chives, and garlic over top to create the final product. While other students were baking their naan, I got to help Zack out by using an immersion blender on the tikka masala and that was a hoot! As a vegetarian, I got to taste test it before chicken got added and a special dish was set aside for me so I could have it with chickpeas. It was delicious and made me even hungrier!

While everyone finished up with their naan, Zack began to plate up our food with jasmine rice and all that was left to do was eat! When it comes to my Indian food order from my favorite restaurant, The Saffron Patch, I always get the same thing because it’s too good not to. I have tried palak paneer and tikka masala before, but it has never been as yummy as this! The tikka masala was spicy and bold and the palak paneer had a cooler heat that paired beautifully together. I liked the palak paneer the best and, of course, the homemade naan was divine.

By the time our dessert of kulfi ice cream was passed out, everyone was bursting at the seams partially from fullness and pride at our handiwork. Under Zack’s expertise, we created a meal together that was better than any restaurant I have ever been to. I enjoyed my experience at Stir so much and would happily take another class there again!

Have you attended a cooking class before? What did you make? I want to hear from all of you, so leave me a comment and let’s chat! Much love. -Sarah