
Hi everyone and welcome to the first post in lifewithlilred’s Halloween Heaven guest bloggers series! This time around, I did something a bit different while on the hunt for participants for Halloween Heaven – I put my call of action on Facebook. My friends list is filled with so many talented makeup artists that it felt foolish to not try and include them, since part of the fun of Halloween is all about the costume makeup.
One of the lovely ladies who answered my cry for help is the darling Allison, who you can find at: allicat.mua on Instagram. Today, Allison is going to teach all of you how to apply a spooky beautiful sugar skull costume makeup. Then, she will be back later on in the series if you are in need of some more Halloween makeup inspiration for any upcoming parties. Take a look:
Sweet As Sugar Skull Costume Makeup


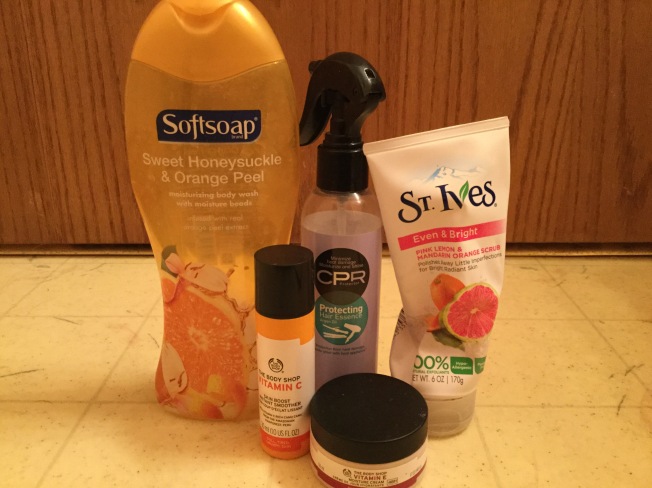
Products Used:
Base/Face:
- bareMinerals Combo Control primer
- Urban Decay Eye Primer Potion
- Kat Von D Lock-It concealer in White Out
- KVD Lock-It Foundation in Light 42
- White face powder from Spirit Halloween
Eyes/Lips:
- Black face paint crayon from Spirit Hallowen
- KVD Mi Vida Loca Remix palette
- KVD Alchemist palette
- Anastasia Beverly Hills Dipbrow in Dark Brown
- KVD Everlasting liquid lipstick in Echo
- KVD Glimmer Veil lipstick in Satellite
- KVD Ink liner in Trooper
- IT Cosmetics Superhero mascara
- Press-on pearls from Spirit Halloween
Step By Step:
*Please note that these are basic steps. This look allows you to be as fun and creative as you want. There is no right or wrong. The products that I used can easily be duped with drugstore items or any traditional Halloween store cosmetics.
- Apply primer all over your face.
- Apply eye primer, as well, and then set it with a flesh-colored eyeshadow.
- Face First: Apply under eye concealer and foundation, then set it with a white finishing powder. Contour using a navy or dark, cool-toned eyeshadow.
- Using the face paint crayon, draw a circle around each eye and fill it in with the crayon or black eyeshadow.
- With a small brush and colored face paint or eyeshadow (You could use lip liner for this step, as well.), draw your designs. Be creative!
- Apply lipstick or leave it whited out. Use eyeliner to draw the lines or teeth to complete the look.

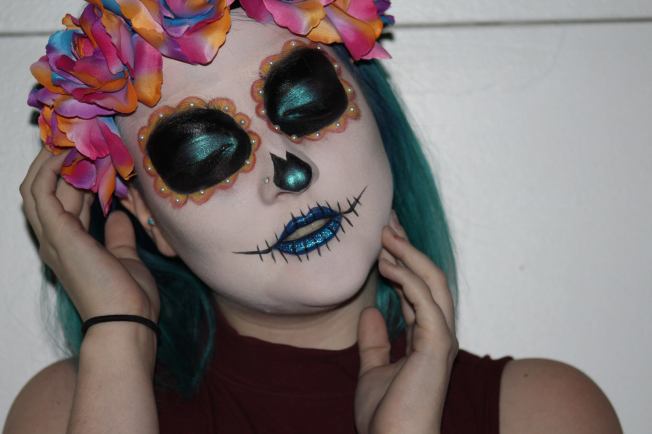
^^^ So ghoulishly gorgeous! Major thanks again to the insanely talented Allison for sharing her skills with us. Do be sure to give her Instagram (allicat.mua) some love if you want to see more of her amazing work! What are you being for Halloween? Do you have a sugar skull makeup look to show off? I want to hear from all of you, so leave me a comment and let’s chat! Much love. -Sarah


