
Hello! Today we are going to explore two more costume makeup looks compliments of Allison, who taught all of you on Sunday how to create a gorgeous sugar skull MOTD. Once again, be sure to follow Allison on Instagram at: allicat.mua for more of her amazing makeups like the ones seen below:
Vampire Vixen & Clowning Around Costume Makeup
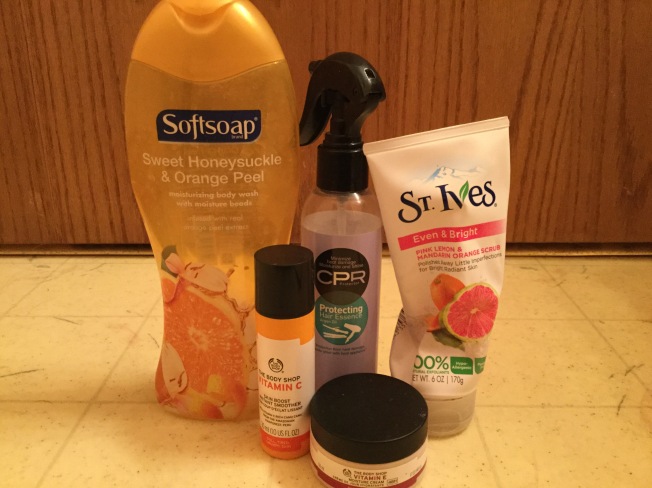
*Allison mentioned in her sugar skull tutorial that all of the makeup products used in her looks can easily be duped with drug store or Halloween store cosmetics and the same rings true for both of the looks seen below. Bear in mind that these are all basic steps, and Allison encourages all of you to get as creative as you wish with her looks!
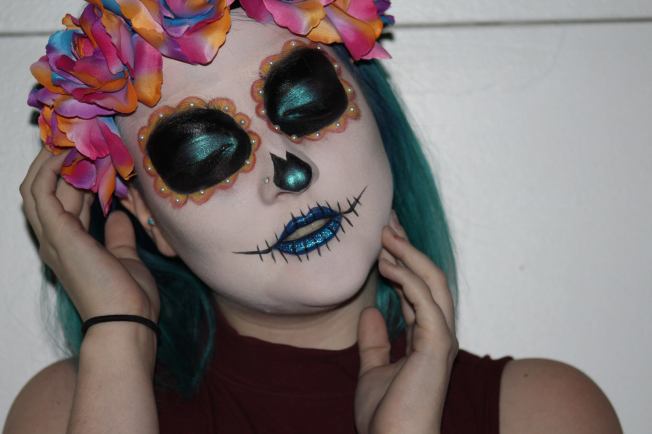
Vampire Vixen


Products Used:
Base/Face:
- bareMinerals Combo Control primer
- Urban Decay Eye Primer Potion
- Kat Von D Lock-It concealer in White Out
- KVD Lock-It Foundation in Light 42
- KVD Shade and Light contour palette
- White face powder from Spirit Halloween
- Rubies fake blood
Eyes/Lips:
- Anastasia Beverly Hills Modern Renaissance palette
- KVD Serpentina palette
- KVD Ink liner in Trooper
- IT cosmetics Superhero mascara
- Eyelure false lashes
Step By Step:
*Note that this look can easily be a beautiful every day makeup look sans the blood!!
- Apply primer all over your face and eye primer, as well. Set the eye primer with flesh-colored eyeshadow.
- Face First: Apply under eye concealer and foundation, then set with a white finishing powder. Contour using a navy or dark, cool-toned shadow.
- Fill in brows if necessary.
- For the eyes, apply a transition and crease shade, then BLEND. Apply a black shadow as a base only on the lid and BLEND. Then, layer a burgundy shade over top and BLEND again.
- Apply liner, mascara, and false lashes if desired.
- Apply fangs and have fun with the blood!


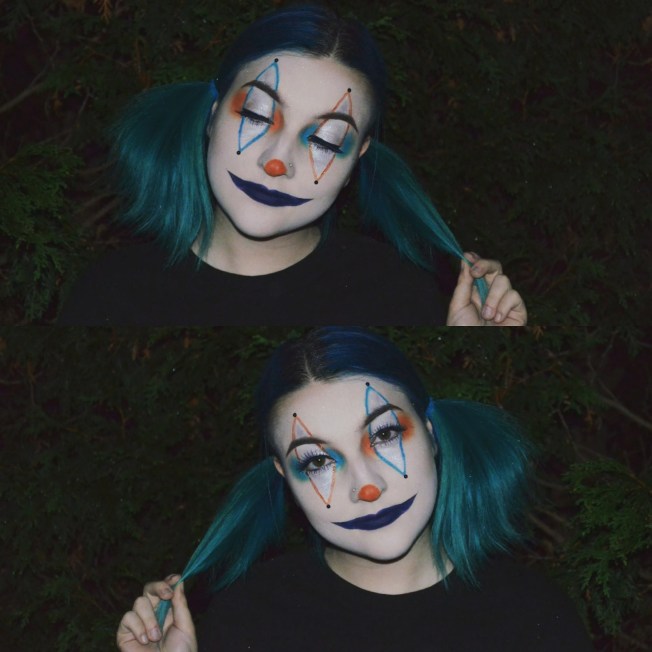
Clowning Around


Products Used:
Base/Face:
- bareMinerals Combo Control primer
- Urban Decay Eye Primer Potion
- Kat Von D Lock-It concealer in White Out
- KVD Lock-It Foundation in Light 42
- KVD Shade and Light contour palette
- White face powder from Spirit Halloween
Eyes/Lips:
- NYX white eyeshadow base
- KVD Mi Vida Loca Remix palette
- bareMinerals Pewter loose eyeshadow
- Anastasia Beverly Hills Dipbrow in Dark Brown
- KVD Everlasting liquid lipstick in Echo
- KVD Glimmer Veil lipstick in Satellite and Rocker
- KVD Ink liner in Trooper
- IT Cosmetics Superhero mascara
- Spirit Halloween blue false lashes and press-on pearls
Step By Step:
- Apply primer all over your face and eye primer, as well. Set eye primer with flesh-colored eyeshadow.
- Face First: Apply under eye concealer and foundation, then set with a white finishing powder. Contour using a navy or dark, cool-toned shadow.
- Fill in brows if necessary.
- Outline the triangle shape using the white eyeshadow base and a small, fine brush.
- Apply and blend out your desired eyeshadow shade along the outside and inside of the triangles.
- Fill in the triangles with shimmery shadow.
- Outline the triangles with glitter.
- Apply eyeliner, mascara, and false lashes if desired.
- Apply press-on pearls to the tips of the triangles.
- Apply lipstick or colored shadow for the nose.
- Apply lipstick and over line it to create as large and creepy of a smile as you want.
^^^ Many thanks to Allison for creating a total of three stunning looks for lifewithlilred’s Halloween Heaven guest bloggers series. Want more? Be sure to follow Allison’s Instagram page at: allicat.mua ! What is your favorite look that Allison created? Which look do you plan on trying out this Halloween? I want to hear from all of you, so leave me a comment and let’s chat! Much love. -Sarah


