Tag Archives: oh you crafty huh

Must-Have Tools For The Serious DIY Lover

Standard

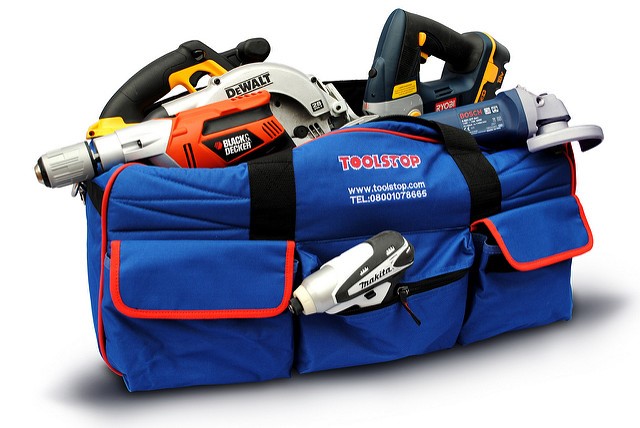
DIY enthusiasts can be found all over. Some people start doing DIY out of necessity but soon find that they love it. Others try their hand at some tasks because they think it will be fun and they discover that it is. Some people do a bit of casual DIY, but a few can get really into it. Serious DIYers will start with fixing a few things but will soon find themselves coming up with their own projects that they carry out. They will happily invent something to make or improve upon if they get to do some DIY. These people need to make sure they have the right tools. They need something a little more powerful than the standard items to make sure that they are making the most of their DIY. Like some of these, for example:

Power Sanders: Any DIY enthusiast worth their salt who likes to work with wood needs to have a power sander. Sure, using sandpaper is excellent for finishing something off, but you don’t want to do everything by hand when you have a huge project to tackle. If you want to take on a big project, you’ll need something more powerful to help you out. Sanding will help to prepare a surface or finish it off at the end of a project. There are different types of sanders to consider, though, so it’s important to get the right one. They include belt, disk, pad and random orbit sanders.
diy2

 Handy is dandy!

Impact Drivers: If you’re a fan of DIY, you’re likely to have a power drill or screwdriver. However, if you’re serious about DIY, you should consider getting an impact driver. An impact driver is like a power screwdriver but with much more weight behind it. It has more force behind it, allowing you to drive a screw further into any surface. You can find out more about impact drivers on any good DIY or product review website.

Angle Grinders: Angle grinders are excellent because they will do several jobs at once. They can cut, sand, grind, and polish materials. If you’re a DIY enthusiast with a limited amount of space, this is the one tool that you should consider investing in. It’s one of the most recommended tools to have in your DIY kit so you might want to choose it over some other options. They don’t need to be expensive and you can find them at different price points from excellent brands.

Nailers: It may seem like a simple tool, but a nail gun should be in any DIY lover’s tool arsenal. Who wants to waste time with a hammer, pounding nails into various materials and surfaces? A nailer takes the pain out of the job, making putting in multiple nails quick and easy. It might be a relatively simple tool, but it can be one of the best for a dedicated DIY enthusiast. It can help out tremendously with tasks both big and small.

Odds & Ends: If you are gifting for a DIYer but a new piece of equipment isn’t in your budget, why not assemble a package of odds and ends? Those little somethings that people who DIY can’t get enough of. It could be a Socket Head Cap Screw, magnetic wristbands to hold nails, or even blueprint paper. Whatever you choose, it is sure to be well used.

Anyone who loves DIY should make sure that they have the best tools for carrying out their work. If you take it seriously, your tools should be serious, too!
Easy Peasy Craft Tips For The Non-Crafty Gal

Standard
Easy Peasy Craft Tips For The Non-Crafty Gal

In the world of Pinterest and DIY projects, you might just feel like the worst arts and crafter on the planet. But, fear not! Here are some fab tips to get yourself crafting in no time:

Easy Peasy Craft Tips For The Non-Crafty Gal:

Sometimes it seems as though the whole world has gone craft mad! Ever since the emergence of Etsy and other handmade marketplaces, people have jumped on board the craft wagon. But what if you’re not crafty or artsy? The simple answer is, you don’t have to be. If you fancy flexing your creative muscle, there’s a project for everyone.

Start Small: Like most things, it’s a good idea to start small. Find a simple project like an adult coloring book and go from there. Find a coloring book that you like and enjoy the simple pleasures of coloring in. And if coloring doesn’t appeal, find something that does. Try photography or give sewing a try. Look online for simple projects that are easy to complete but will make a big impact.

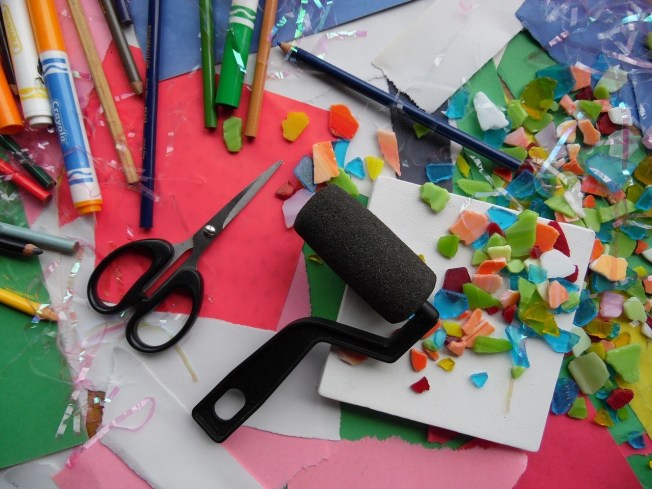
Find The Right Tools: In order to be creative, you need the right tools. They don’t have to be anything fancy. For some people, a pen or pencil is enough. Don’t go mad in the early stages. Take time to explore what you enjoy, then build up your tools slowly. It’s worth checking out online reviews and blogs to see what other people are using. Craft supplies are expensive so it makes sense to do your research.

Once you’ve found a craft you really like, it might be time to invest in the right tools. It may not be necessary to have something with all of the bells and whistles in the early stages. But as you become more experienced, you can save to add more to your craft cupboard. For example, a basic sewing machine may be sufficient for your early requirements. But as you begin to experiment, you may decide to add other accessories, such as a Singer walking foot, etc.

art1.jpg

Pixabay Image

The Fear: One of the greatest obstacles to creativity is the fear of the blank page. This is a combination of feeling overwhelmed and fear of failure. A common symptom is buying lots of beautiful notebooks but never using them. It’s that fear of making a mistake or messing up the page. The simple answer to this is that there are no rules when it comes to crafts. If you make a mess or a mistake, no problem. Just paint over it or start again. Some people bend their books or make a few ink blots on the cover to get past this initial fear.

Find What You Love: Finding a craft that you would like to invest your time in can be easier said than done. Look around, read blogs, and check out Pinterest pages. Find something that appeals to you and have a go. Don’t get stuck on one idea or technique. Experiment and keep on going. Strive to learn and discover as much as you can.

But a word of warning. Crafting is addictive. Prepare to spend evenings and weekends trying out new ideas and shopping for new tools. Expect to become a regular on craft forums and share your ideas on social media. And make sure to clear out some space in your home! Every closet, shelf, and spare room will soon be home to fabric samples, paints, glitter, and glue.

What is a DIY project that you are most proud of? (I welded a table in high school that I still have and I LOVE that thing!) What are some of your tips to struggling crafters? I want to hear from all of you, so leave me a comment and let’s chat! Much love. -Sarah

Featured Image By: Pixabay

Amazing DIY Tips Every Homeowner Needs To Know

Standard
Amazing DIY Tips Every Homeowner Needs To Know

Here’s a fun little post for all of my DIY-ers, Pinterest royalty, and crafting gods! As for me? I’ll stick to my handyman! 😉

Amazing DIY Tips Every Homeowner Needs To Know:

As a homeowner, you may have considered doing the odd couple of DIY projects. Even if you aren’t a very crafty person, you may have been swayed to dabble with some DIY just because it can be a major money saver! The world is your oyster in the world of DIY. You could simply fix some old furniture that needs repairing. Or you might have bought some shelves that need putting up. Once you get super confident in your DIY skills, you may even start to make your own furniture! However you want to use DIY in your home, here are some tips that can help you do a great job every time!

Invest In Top Quality Equipment: If you want to do a really good job in all of your DIY projects and tasks, you will need excellent equipment. This means that you might have to pay a bit more to get the best tools out there in the shops. It may be slightly expensive, but it will certainly be worth it! The better quality tools and equipment will also last for a lot longer compared to cheaper ones. Not sure which tools are the best to buy? See here for great benchtop bandsaw reviews. You’ll find plenty more reviews for other tools online.

Keep Your Old CDs: You may just stream your music online these days but that isn’t an excuse to throw out all of your old CDs. In fact, you should keep them and use them in your home decorating. You can break up the CDs themselves and create cool murals with them. These funky murals can be used throughout your home but will look especially good in a room that gets a lot of attention as a great conversation starter. Got a whole load of old CDs? Repurpose them as some dumbbells to use in your workouts! 😉

Sketch Out Plans: No matter what your latest DIY project may be, you should always sketch out a brief plan. This can help you envisage the finished result or product. The sketch doesn’t have to be too detailed or artistic. Just as long as it gives you a clear idea of how you plan on using all the materials. If you are simply redecorating a room, sketching can come in handy, too. This will give you a chance to carefully consider the use of space and lighting so neither affects your design too much.

Hang At The Right Height: Do you have some photographs or paintings that you want to hang on your walls? Then you need to make sure that these are hung at the right height. Otherwise, they might look odd compared to the rest of your decor. Ideally, the center of each piece needs to be at eye level. This is usually around sixty inches above the ground. If the ceilings in a room are particularly high, you can afford to hang your artworks slightly higher.

DIY should never be too tasking. And all of these tips should make it even easier! You may never have to hire a handyman to do your household jobs again!

Where are all of my DIY fans at? What was the latest thing that you have crafted? I want to hear from all of you, so leave me a comment and let’s chat! Much love. -Sarah

Featured Image Photo Provided By: Pexels

Wanted: Fall Guest Bloggers

Standard
Wanted: Fall Guest Bloggers

Hi everyone and TGIF! Similarly to my summer time guest bloggers series at the beginning of June, I would love to have a series to kick start the beginning of fall during September. I will be looking for seven to ten guest bloggers to create articles about anything from fall beauty and style to autumn inspired crafts, food, and drinks. If this is something that might be of interest to you, please shoot me an email at sarah.mush6794@gmail.com with your information as well as a topic that you would like to write about. I look forward to hearing from all of you soon! Much love. -Sarah

DIY Summer Festival Style

Standard
DIY Summer Festival Style

Hello everyone and welcome to an amazing arts and crafts guest blog by my talented friend, Emma, at Randomina. My guest blogger that was originally scheduled for today bailed on me and I was getting antsy as to what I would do since I promised a guest blog for every Sunday of May to my beloved readers. Luckily, an email from Emma shined like a beacon of hope and she was able to create a simply fantastic tie-dye tutorial post.

I am so appreciative to Emma for making this post on a time crunch and am so pleased to be able to house her on lifewithlilred for the day. I encourage all of you to check her blog out – I assure you that you won’t be disappointed! Now, take a look at the post that Miss Emma created special for all of my lifewithlilred readers:

DIY Summer Festival Style

Hello everyone! My name is E from Randomina, I do make up and clothing tutorials along with designing and manufacturing my own textile works while blogging part-time. I thank Sarah of Lil Red very much for having me as her guest blogger today as she is going away on holiday. This gave me the inspiration to teach you four fabric dying styles, three from the Japanese art called Shibouri, to have a fun and creative way to a Coachella Chic wardrobe at your fingertips!

This slideshow requires JavaScript.

 
You Need:
  • 1 bucket/container of water
  • 2 gloves (plastic or rubber will do)
  • Dye packets/tie-dye kits
  • Paint brushes
  • Elastics
  • A bundle of pebbles
  • A finished toilet paper roll
  • The garment you want to customize (in my case fabric samples)
Tutorial 1- Arashi/Pole Wrapping: Wrap the garment around the toilet roll and secure with elastics. Use as many bands as you please but when wrapping, scrunch as you go along to wrinkle it. Whatever dyes you are using PLEASE be careful as some dye packets can be harmful to the skin. And, of course, follow the instructions on how to make your color and how to store it. After you make your color, put a portion of it in your container (small doses makes the color pale) and mix it with your brush and then paint your color on your “pole” and leave to dry.
 
Tutorial 2- Kumo/Pebbles: Take the garment and the pebbles and place the pebbles in any way you like with the garment on top. Pull the pebble through and trap it in place with an elastic until the whole garment is covered in the “pebble pattern”. Get your brush and paint on the pebble silhouette and on the elastic around it. Take your time and when you’re done, leave it to dry.
 
Tutorial 3- Itajime/Folding: Fold your garment like an accordion until it becomes a small square or rectangle. Secure the bundle with elastics. With your container of dye you can (unless you want to have a delicate pattern) put the garment in the container and evenly coat it in dye. Take off the bands and  unfold when dried.
 
Tutorial 4- Twisty Stripes: Hold a corner of the garment and twist tightly and secure with bands as you go. You can submerge the garment in the container or you can paint as many colors as you wish sparingly. Wait until dried.
 
**Note: When washing your creations, rinse after the dying with cold water until it runs clear. Once it’s dried, it will be ready to wear. Wash it individually in a normal machine 2-3 times before mixing it in with the rest of your clothes.
 
Thank you for tuning in today! If you liked that tutorial, I also have a few other crafts that you might enjoy on my blog. See you later! Loads of love and happy crafting!
^^^ So. Much. Fun! I loved Emma’s cool new take on tie-dye and I hope that all of you enjoyed it, too. Again, please venture to Randomina for more from the lovely Emma! What is your favorite summer craft? Who plans on following the steps that Emma provided to create their own hand dyed fabrics? I want to hear from all of you, so leave me a comment and let’s chat! Much love. -Sarah

Monday Update: Paint Nite Edition

Standard
Monday Update: Paint Nite Edition

Hi everyone and happy Monday! For Christmas my brother and sister-in-law got me a Groupon for two admissions to a Paint Nite. For those of you not familiar with the event, it’s a lot of fun! You go online and pick a bar as well as the theme of the picture that you would like to paint. Then you make your way to whatever location you picked and paint a beautiful picture and enjoy some drinks while doing so. My boyfriend, Kyle, and I went to the Paint Nite that we chose last Tuesday and we had a blast. Kyle took pictures of our progress on the canvasses throughout the night, so take a look and then let’s chat:

^^^ The one on the left is mine and the one on the right is Kyle’s.

Kyle and I spent close to a half hour browsing through Paint Nite’s website to find a theme and a location that we both liked. We settled on the Love Birds theme which would take place at the Canton Brewing Company in Canton, Ohio. This location was good for Kyle because he’s a beer drinker but looking back on the event, I would have preferred to be at a wine bar! We booked our tickets thanks to my Groupons a few weeks in advance so for two or so weeks all we could talk about was how excited we were for our night out.

Finally, our date night on Tuesday the 26th rolled around and it was all I could think about for the entire day! We arrived at the Canton Brewing Company which was gigantic and then headed down into the basement where the event was taking place. After we walked down the huge stairway we saw all of the canvasses set up on easels and a bunch of people gathered around to enjoy their evening. We snagged a spot where we could sit together which I was afraid was not going to happen because almost everyone was there by the time we arrived. After we established our spots we went to the bottom floor bar to get ourselves some drinks before the extravaganza began.

The Canton Brewing Company had a great selection of beers (obviously) and that was great for Kyle but not so good for me! I’m not a big beer drinker at all – mama likes her sweet white wines! Unfortunately, they only had two wines to choose from which was a red and a chardonnay which ended up being way too dry. I threw back the chardonnay even though it was extremely unpleasant and was then able to get a drink that I actually like upstairs at the main bar. After I got a vodka sour in my system, I was feeling much better!

Our painting party started promptly at seven o’clock and was led by a lovely hostess whose name I can’t remember for the life of me, so we’ll call her “Anne”. Anne is a high school art teacher and had a lively personality which made listening to her talk a lot of fun. The basic idea of Paint Nite is that Anne will paint a section of the canvas and tell you how to do it and then you repeat the process. This back and forth went on for about an hour and then we dispersed for a fifteen minute break to get more drinks, go to the bathroom, and let the paint dry.

Once we returned from our break we got to work on the second half of our painting. Our hostess did a really good job of explaining the process in laymens terms which was so helpful because Kyle and I don’t have an artistic bone in our body. It was also nice to have another art teacher there who made her rounds around the tables to give some pointers and replenish our paint supplies. Before we knew it, another hour and a half had passed and our paintings were finally complete! Again, here are the finished products:

I was really pleased with how our paintings turned out – everything except Kyle’s dumb old cardinals that he decided to paint hair on to differentiate which bird was which. He gave his alter ego bird spiky hair and he ended up giving mine a mullet…Thanks, babe. -_-

I had so much fun at Paint Nite but there are a few things that I would do differently. It was nice to be among such a lively crowd while we got our paint on but at times, it was almost too much. There were around thirty or more people there so it would get incredibly loud which made it hard to hear Anne teach us what to do. I would definitely prefer smaller groups because then you would be able to get some type of attention from the hostess and her helper. You also wouldn’t have to deal with the insatiable urge to yell “SHUT UP” at everyone. 🙂

Other than the over abundance of people, I’d say that Paint Nite was a wonderful time. I was so thankful for my Groupon Christmas gift because the cost to go to an event is forty five dollars per person. I honestly think that that’s a bit pricey which is too bad because I would love to go to another one but I don’t particularly want to break the bank for it – especially when you still have to pay for drinks, snacks, and parking.

My best friend, Lea, wanted to try a Paint Nite after I told her about how much fun it was so we looked in to going to an event together. We were both not too keen to spend sixty or so dollars for the evening so we planned our own Paint Nite to have at home. We searched on YouTube for instructional videos on painting canvasses so we’re going to get our own supplies, grab a bottle of wine, and let an over enthusiastic YouTube painter walk us through creating a picture. Hello, girls night in!

So there you have it, this week’s Monday Update: Paint Nite Edition! If you’re looking for a unique and memorable date night, girls night, or gift idea then I can’t recommend a Paint Nite outing enough. How many of you have attended a Paint Nite before? What did you think of it? I wanna hear from all of you, so leave me a comment and let’s chat! Much love. -Sarah

Hi, Best Friend!

Standard
Hi, Best Friend!

Hi everyone and happy Hump Day! Yesterday I had the joy of hanging out with one of my dearest friends all day and I’m simply thrilled about it. One of my best friends, Tyler, is in the Army and is stationed far away from my neck of the woods. Tyler and I met during a play that we did, Suicide in B Flat, and have been inseparable ever since and I haven’t seen him for over a year. This past day we got to reenact our classic “Middle Aged Monday” hang outs, where we day drink, craft, and watch silly movies. We had an absolute ball candle making, drinking blueberry flavored beer, and watching Vacation! Take a look:

Tyler picked me up around noon yesterday and we had our usual MAM (Middle Aged Monday, falling on a Tuesday) lunch at Chipotle. After we dined, we hit up Hobby Lobby to find a craft for us to do while we drink. We decided on candle making, which we usually have frowned upon before because all of the products were so expensive. But lucky for us, all of the supplies we needed were half off!

Tyler and I perused Hobby Lobby and found the perfect jars, fragrances, and colored waxes for us to use during our craft. We settled on a peach mango fragrance and then headed to Giant Eagle to get our day drinking alcohol of choice. Usually we always drink wine during our MAM hang outs, but we went for beer this time around because wine always makes us sleepy during early afternoon get togethers. At first I didn’t care for the blueberry flavored beer but after one bottle it was surprisingly delicious!

Once we purchased all of our gear for a middle aged themed hang out, we made the trek back to my place to get our craft and drank on. The candles ended up being hella easy to make because literally all we had to do was pour the wax, wick, and a fragrance into the jar! Talk about easy peasy lemon squeezy! Tyler and I have played around with the idea of making candles before but we had never dreamed that it would be so simple!

After our craft, which ended up being a whopping five minutes to make, we delved into our six pack of Wild Blue beer and put on Vacation. We had a complete blast watching the movie and laughed until we cried. Once our movie was done, we spent time taking some cute picks while quoting basically the entire movie. It was perfect.

I had the most amazing time with one of my dearest friends and it felt so good to see him after such a long time of being apart. When Tyler is away, we keep in touch via Skype, FaceTime, and text – but nothing is better than being face to face with each other! Middle Aged Monday (falling on a Tuesday) was a great success and I can’t wait for my best friend to come home again soon!

Yesterday I got to say Hi to my Best Friend and I couldn’t be happier. We had the best time and I can’t wait to see him again soon! Who has a best friend that lives far away from you? What do you do to keep in touch? I wanna hear from all of you, so leave me a comment and let’s chat! Much love. -Sarah

Oh You Crafty, Huh? BFF Canvas Art

Standard
Oh You Crafty, Huh? BFF Canvas Art

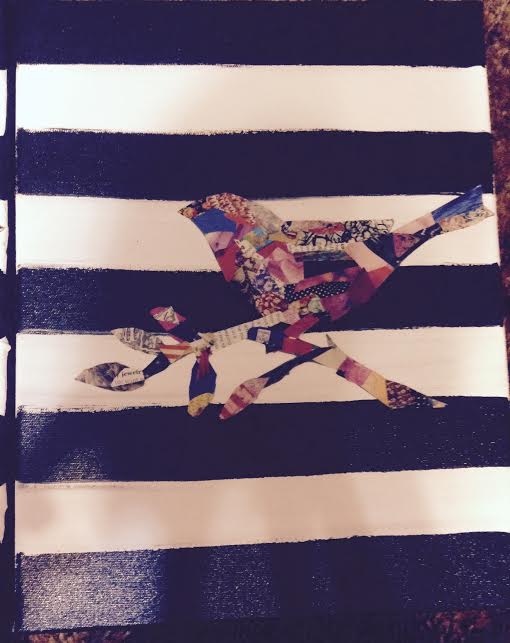
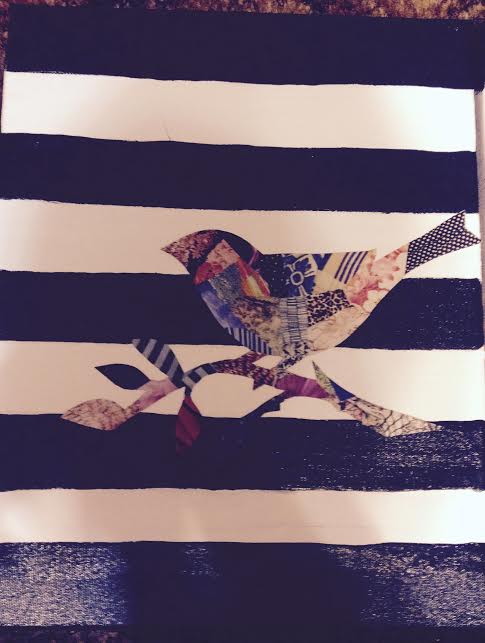
Hellooo everyone and TGIF! My laptop is still in the hands of the Geek Squad so this post is being prewritten at the local Cuyahoga Falls library…The things I do for lifewithlilred!! On Wednesday night my darling best friend, Lea, and I had a crafting extravaganza which resulted in the cuteness you see in my featured image photo! We had so much fun getting crafty and now I’m here to share with you guys our how to guide on how to make your own Bird Is The Word canvas art! Take a closer look at both of our creations and then let’s discuss! PS: Brownie points for whoever can guess which canvas is mine and which is Lea’s!

unnamed1unnamed2

Like it? Love it? Want more of it? Here’s the play by play on how to recreate it:

What You Need:

  • Canvas board
  • Paint/paint brushes
  • Silhouette image of your choice
  • Old magazines and newspaper
  • Scissors
  • Glue

Step By Step Guide:

  • Step 1) Paint your canvas. Lea and I both liked the idea of black and white stripes so our picture collage birds would really pop – but any color choice will do!! To get our stripes as straight as possible we held a newspaper to the canvas and painted underneath it once we had our stripe width to our liking.
  • Step 2) Find a silhouette image that you want to make your picture collage over. As you can see, Lea and I stuck with the classic white girl staple image of birds but anything will look awesome…Maybe. 😉 If my crafting partner and I ever make a canvas similar to this one again I would like to use a bird cage silhouette!
  • Step 3) Acquire magazines and newspapers to cut your images for your pic collage. Lea and I recommend using fashion magazines so you have lots of fun colors and patterns to choose from. We opted for three year old issues of People magazine and it was a blast cutting Taylor Swift to pieces for the sake of getting a cool pattern! 🙂
  • Step 4) Once you have enough bits and pieces of magazines to cover your silhouette, begin to glue them down. Fair warning, Lea and I both thought that we had more than enough scraps multiple times but had to refer back to our mags to get more collage material – so make sure you keep your magazines handy!
  • Step 5) Glue your silhouette onto your canvas and pat yourself on the back for a job well done!! OH YOU CRAFTY, HUH?!!! #Ihatemyself

So there you have it, the lowdown on Oh You Crafty, Huh? BFF Canvas Art! Lea and I had the best time during our crafting night and we both want to see if anyone can guess who made which bird! Have you made a craft similar to this one? What art project are you currently working on? I wanna hear from all of you, so leave me a comment and let’s chat! Much love. -Sarah

Vintage Style Hair Piece Craft

Standard
Vintage Style Hair Piece Craft

Helloooo everyone and happy Tuesday! Earlier this month I ordered a black beanie that had a fishnet veil attached to it off of Amazon. Unfortunately, when it came in the mail last week I discovered that the veil on the beanie was torn in two. I was so disappointed and when I emailed the vendor to request a return she was totally awesome. She gave me a refund on the product and I didn’t even have to send it back to her. Now I was stuck with a defective beanie that I had no clue what to do with. I pondered my options and came up with a solution to make something out of nothing and I am very happy with the results, as you can see from my featured image photo! Let’s discuss the simple steps that it took to make my new Vintage Style Hair Piece Craft:

beaniecraft2

  • Step 1) Acquire veil. In my case, all I had to do was cut the netting from the beanie. #SCORE
  • Step 2) Find a jewel, feather, hat, or whatever you would like to pin your veil to. The feather and jeweled piece that I used came from an old headband of mine that I wore when my hair was longer. The feathers were attached to a circular elastic band which I don’t care to wear because it makes my hair tuft up in the back. But that’s neither here nor there. #Idigress
  • Step 3) Pin your accessory to your netting. I used two bobby pins to secure my veil to the feathers. One to keep the items attached and one to clip in my hair when I wear it. I know it looks super janky in the pictures because you can so clearly see the bobby pins, but it’s not noticeable in the slightest when it’s in your hair. #pinkiepromise
  • Step 4) Wear. Wow everyone. Repeat. #number1stunner

^^^ Honestly, those directions were so unnecessary. Lol, you guys are all smart and I’m sure you could figure this craft out on your own. But maybe this post will come in handy to those who are not the craftiest, like myself. When I’m not looking a hot wreck, I’ll be sure to post some pictures of me rocking my fun new accessory! OH YOU CRAFTY HUH?!

So there you have it, the easy how to guide for a Vintage Style Hair Piece Craft. I am so pleased with the little spark of inspiration that I had to recycle old items and make them new again. I found an unexpected use for a headband that I haven’t worn in years and a defective purchase. Not bad! What is your favorite craft that you made from a recycled item? Have you made anything similar to my hair piece craft? I wanna hear from all of you, so leave me a comment and let’s chat! Much love. -Sarah

Super Silly Fun Night

Standard
Super Silly Fun Night

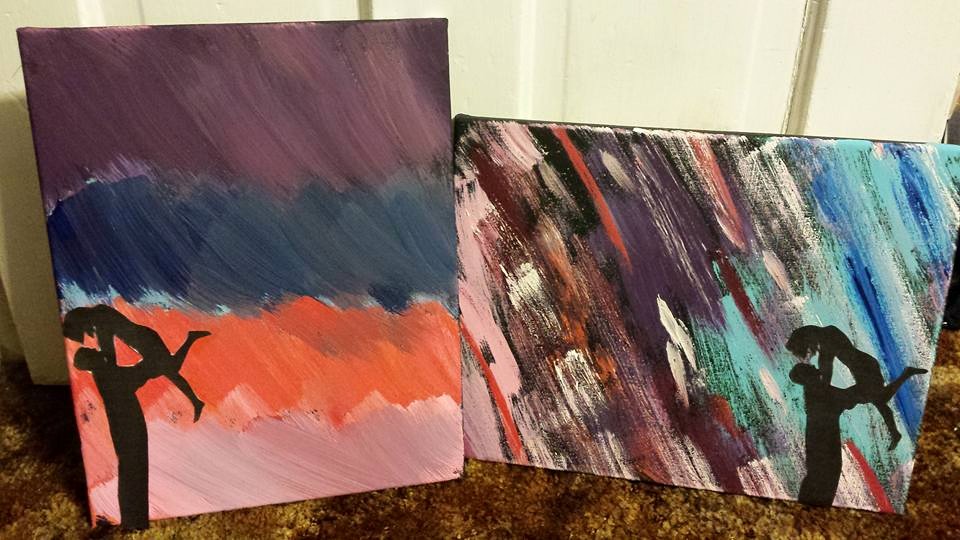
Howdy everyone and TGIF!! Omg guys I had the most fabulous night with my sweet best friend Lea yesterday! It was a terrific evening of crafting, eating hella Cheez-Its, and being straight up silly – it was perfection. The last time we hung out we tried making a canvas art craft of a night sky over looking a city silhouette….unfortunately we couldn’t get past painting our canvas black and dousing it with glitter so we called it a night. But last evening we were dedicated to making something pretty out of our black canvas, and this was our final result:

craftyy

^^^ So adorable! Mine is the one on the left and Lea’s is obviously the one on the right! Here’s the step by step guide on how we made our cute canvas craft: #ohyoucraftyhuh

  • Step 1) Paint your canvas black. (Optional)
  • Step 2) Pour glitter all over your freshly painted canvas. (Optional)
  • Step 3) Cry. (Optional)
  • Step 4) Give up. (Optional)
  • Step 5) Try again! Lea and I decided to go balls to the wall with this craft so we just started painting over our glittery black canvas however we pleased. I was trying to go for a more sunset-y vibe…and I’m honestly not sure what vibe Lea was going for – but it turned out great!
  • Step 6) Find a silhouette picture on the computer of whatever you like and cut it out. Or if you’re an overachiever and can draw well, feel free to draw out a silhouette. Lea and I are both a big fan of the cutesy couple images, so that’s what we both opted for. But it really can be anything – a giraffe, a toilet, a bomb…it’s up to you!
  • Step 7) Glue on your silhouette and bask in the glory of your craftiness!

Throughout our evening Lea and I basically annihilated a bag of Cheez-Its – as you can see by my featured image photo, and it was the most fulfilling snacking experience I’ve ever had. So the answer is yes, there probably is Cheez-It residue all over my canvas. After we completed our craft, we spent the rest of our time together creeping on people on Facebook, laying in bed being silly, and making up quotes that historical figures and celebrities definitely didn’t say. For example, when we posted our picture of our craftiness on Facebook we captioned it with “A steady hand and a calm heart” – Elenore Roosevelt…..Okay – maybe it’s not that funny BUT it was SO funny to us!! I’m so happy that I got to have an evening off from drowning in homework to have some much needed girl time with my darling. We had such a blast and by the time I got home I felt rejuvenated enough to complete the rest of my work at the prime time of 11:30 at night! #dedication

I hope all of you guys are having an awesome day so far! What is everyone up to this weekend? What have you been crafting recently? I wanna hear from all of you, so leave me a comment and let’s chat! Much love. -Sarah

^^^^^ CHEEEEEEEEZ-ITS!!!!!!!!!!!!!!!!!!!!!!!!!!!!!!!!!!!!!!! Cheez-Its. Cheez-Its. Cheez-Its.