Tag Archives: pronails

New Black, Glittered, And Bejeweled Nails

Standard
New Black, Glittered, And Bejeweled Nails

Hi everyone and happy Sunday! This Thursday I was able to squeeze in getting a much needed fill for my talons. I used to get my nails filled every three weeks, but I’ve pushed it up to four in the name of saving money. I don’t really mind, but by the time the month mark hits, my nails are in desperate need of some TLC.

As always, my beloved nail tech, STEVE, did an amazing job of sharpening the claws and getting them back to their normal fierce selves. Then, once I got home, I rhinestoned my middle finger crosses myself and it turned out great! Take a look:

newnails

I am super happy with how my rhinestones turned out, especially because this is only the second time that I’ve tried my hand at it. AND I freaking LOVE my accent nail color. The glitzy, glam, not quite pink and not quite purple color is so fun. Combined with the harsh black on my eight other acrylics and the edgy crosses, my accent nails add the perfect touch of sassy sweetness and I think that they look stunning.

I must pat myself on the back during this post, because none of my nails broke in an entire month and that rarely happens. It’s not like I mean for it to happen because I try to be careful with my claws, but accidents are bound to occur when my acrylics are over an inch and a half long in length. It’s really no matter, because instead of rushing to the salon to fix a break, I super glue them myself and once I’m in for a fill, Steve can repair it without even putting a new nail on. BUT, it was a nice feeling to not sit at Steve’s station with my tail between my legs about another boo boo on my acrylics! GREAT SUCCESS.

So there you have it, my New Black, Glittered, And Bejeweled Nails! What color of nail polish do you have on right now? Are you an acrylic or natural nails kind of gal? I want to hear from all of you, so leave me a comment and let’s chat! Much love. -Sarah

Falling For Autumn Nail Art

Standard
Falling For Autumn Nail Art

Hello everyone and happy Sunday!! As all of you know, Lil Red loves pretty nails, but is far from adequate at doing them on my own. While I opt for my talon style acrylic nails, there are ladies like the lovely Sandra from Finger Candy who can create gorgeously designed nails at ease. Sandra was kind enough to create three different tutorials on how to DIY beautiful autumn themed nails and I am so excited to share them with you on my page. Take a look:

Falling For Autumn Nail Art

Hello there, friends! Coming at you today from the brave new world of guest blogging, brave as in Sarah trusting me enough to write something for her that won’t embarrass us all? 😉 It’s really quite the exercise in trust, and I don’t intend to let Lil Red, kind hostess that she is, down…particularly since I have a mess of fun fall nail art to share with you, and I know you’re going to want to get in on that action. (You couldn’t embarrass me if you tried, darling! -Sarah)

“Woah, woah, woah,” you may be saying to yourself. “Nail art? Like, dangling pendants and jewels and stuff?” Well, sometimes – nail art is nothing if not deeply excessive. One of its many charms (ba dum chhhhhh)! But nail art can also be simple, and often all the more stunning for it. It’s just a nice little bonus when a manicure doesn’t take two hours and twenty different tools.

The following three tutorials cover a trio of easy nail art looks that are perfect for the upcoming fall season – dotted, multi-color leaves, a sponged-on blanket of leaves carpeting the forest floor, even a bit of that cold November Rain that the forecasters are always wailing on about.

“But that looks like so many polishes!” you also may be thinking to yourself (My, aren’t we chatty today?). True, eleven polishes across three manicures does seem like a lot, but they’re all fairly basic colors and finishes, and readily available at your local drugstore or beauty supply shop – no hard-to-find and/or expensive indies on this list. So feel free to deviate from the specific polishes that I’ve shown here (Which you’ll find at the bottom of this post.). In fact, I’d prefer it if you did, as some of these polishes have seen better days and may no longer be in production. So grab any old red, green, or yellow that you already have on hand, and don’t feel wedded to my choices; there’s no wrong answers here.

Having said all that, you will need a fine detail brush, a palette onto which to dab your polishes (I use the back of a plasticized DVD case, although the back of a plastic baggie also works very well.), a small-to-medium sized dotting tool, and three cosmetic sponges. Those points are non-negotiable, I’m afraid. 🙂

Tutorial - Tools Collage

Marbled Leaves Nail Art Tutorial

Tutorial - Dotted Leaves

These fun dotted nails utilize a technique that I like to think I came up with myself where you blend two different polishes together and then dot them onto your nails to create a cool marbled look. It’s a neat trick that lends itself well to fall’s bounty of multi-colored foliage.

For this mani, you’ll need your dotting tool, a cream or nude-colored base, and polishes in red, orange, yellow, grass green, forest green, and glittery gold.

Step 1: Paint your nails to opacity with a cream, off-white, or nude polish. Let dry.

Step 2: Dab a small blob of red and then yellow polish out onto your palette. Dipping your dotting tool first into the red polish and then into the yellow (or vice versa, it doesn’t really matter), dot the mixture onto your nails, two or three dots per nail.

Step 3: Repeat with a mixture of the yellow and grass green polishes.

Step 4: Repeat again with a mixture of the orange and forest green polishes.

Step 5: And then repeat again with the red and orange polishes. A little overlap will occur – that’s okay! You want these little marbled dots to look like layered drifts of crunchy autumn leaves, so the dots are bound to touch.

Step 6: Repeat the dotting (Last time, I promise!) with a mixture of the forest green and yellow polishes. Then, dabbing a small blob of the glittery gold polish out onto your palette, dip your dotting tool into the polish and apply to any spots that need a bit of filling-in or brightening-up, three or four dots per nail. Once dry, top with a high gloss topcoat and you’re good to go.

November Rain Nail Art Tutorial

Tutorial - November Rain

I can’t hear the words “November Rain” without wanting to immediately sprint into the desert in a lo-sho lace wedding gown and get hitched to some dude who looks better in floral spandex pants than I do. The ’90s were a confusing time, kids! But these striking nails are straightforward enough, and so very pretty.

For this manicure, you’ll need your detail brush, a black or very dark grey base, and polishes in light grey and shimmery silver.

Step 1: Paint your nails to opacity with the black or dark grey polish. Let dry.

Step 2: Dab a small dot of the light grey polish out onto your palette. Dip your detail brush into the polish. Holding the brush at a downward angle, swipe the polish onto your nails from the top right to the bottom left with a short flicking motion. It’s okay, even preferable, if the little slashes don’t look too “done” – you’re going for that sleeting rain kind of look, after all.

Step 3: Dab a small dot of the sliver polish out onto your palette. Then following the technique laid out in Step 2, add short, silver slashes to your nails just below the light grey slashes. You don’t want to cover the grey completely, merely enhance it. Once dry, top with a high gloss topcoat.

Forest Floor Nail Art Tutorial

Tutorial - Forest Floor

Finally, we have a fun, sponged-on manicure that mimics the kaleidoscope of rich autumn leaves that blanket a forest floor. Or your front lawn if you’re lucky enough to live in a lushly leafy climate like mine (Ontario, Canada, if you’re curious.). The other nice thing about these nails is, with the exception of the yellow and the addition of a medium brown, I used all of the same polishes as I did in the first manicure.

For this mani, you’ll need three cosmetic sponges, a cream or nude-colored base, and polishes in red, brown, grass green, orange, and forest green.

Step 1: Paint your nails to opacity with a cream, off-white, or nude polish. Let dry.

Step 2: Dab a small blob of brown polish out onto your palette. Taking one of your cosmetic sponges, dip it into the polish and dab it up and down a couple of times to remove any excess. Then, sponge the polish onto your nails, one little patch per nail (Or more if your nails are longer than mine, which would be pretty much everyone!) If the sponged-on bits look too light, that’s fine, you can always add more. But much like salting your food, you can’t remove too much, so sponge lightly to start, and then go over any bare spots again if you feel that it’s necessary.

Step 3: Repeat with the grass green polish.

Step 4: Repeat again with the red polish.

Step 5: And again with the forest green polish.

Step 6: And then one last time with the orange polish.

Step 7 (top photo): Dab a small dot of the glittery gold polish out onto your palette. Dip the last remaining clean side of one of your cosmetic sponges into the polish and lightly sponge all over your nails for that extra pretty fall twinkle. Let dry and then top with a high gloss topcoat.

So there we have her, friends, three cool, not-too-brutally-difficult nail art looks perfect for the upcoming fall season. If any of you try these manicures for yourself, I’d love to see your results! Finally, thanks to Sarah, Lil Red, for temporarily hosting Finger Candy in her little corner of the virtual sky; Tis a pleasure to be your neighbor. 🙂

************************************

Polishes Used:

  • Essie Cocoa Karma (brown) and Pretty Edgy (forest green)
  • KB Shimmer Chilly Pepper (red)
  • OPI My Vampire is Buff (cream) and My Signature is “DC” (shimmery silver)
  • Orly Bling (glittery gold)
  • Pure Ice Wild Thing (grass green) and Show Stopper (yellow)
  • Sally Hansen Insta-Dri Show Steel-er (light grey)
  • Wet n’ Wild Sunny Side Up (orange)
  • Zoya Genevieve (dark grey)

Weren’t those tutorials absolutely fabulous?! A million thanks, again, to Sandra of Finger Candy for sharing her nail art talent with lifewithlilred for my Falling For Fall guest bloggers series. What is your favorite Sandra original design? Are you going to try out any of these styles? I want to hear from all of you, so leave me a comment and let’s chat! Much love. -Sarah

DIY Rhinestone Nails

Standard
DIY Rhinestone Nails

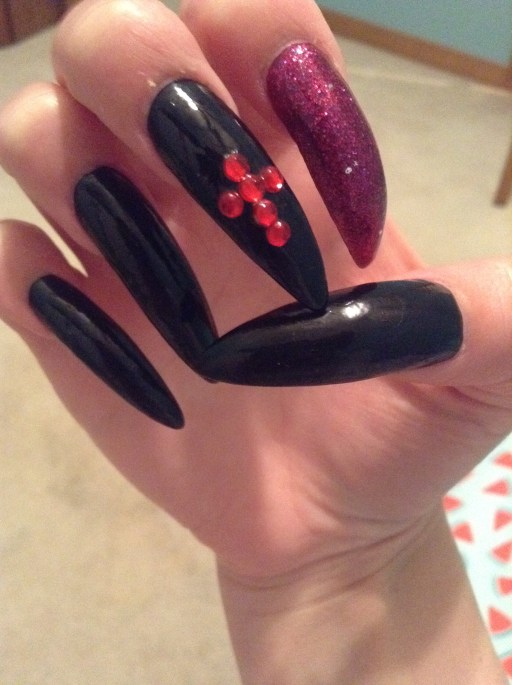
Hi everyone and happy Sunday! Although I am not the most talented DIY-er in the world, I’m pretty pleased with myself for creating some rhinestone crosses on my acrylic nails. As you guys know, my cross airbrush stencil was lost so I couldn’t get my signature middle finger crosses during my last fill. My nails looked pretty blah without them, so I went to the craft store and snagged some red rhinestones so that I could try my hand at doing some nail art on my own. And, surprise! It turned out alright! Take a look:

cross

The stoning process was fairly easy, all I needed were tweezers and super glue to apply the gems. First, I put the glue on my nails in a cross shape. Then, I picked up the stones with an old pair of tweezers and applied it one by one.

I’ve only gotten gem stones on my nails once (Because I refuse to pay for them!), and I did it exactly how I remembered the nail tech doing it and I was really happy with how they turned out! Yes, it probably looks a little sloppy and I should have put a top coat on afterwards but that’s just going to be knowledge for next time. I paid a dollar twenty-five for a bag of rhinestones and did what would have costed me five bucks at the salon all by myself. I can definitely swing that, even if it doesn’t look ideal at first. But, hey, practice makes perfect!

Next time I get my nails filled (And excuse how janky they look in the picture above!), I’m going to get different colored rhinestones from the store to try some more designs. I’m excited to get better at stoning my acrylics myself so that it will look like an actual nail tech did them instead of little old me!

So there you have it, my DIY Rhinestone Nails! Who else does their own nail art? What pattern should I try on my nails next time? I want to hear from all of you, so leave me a comment and let’s chat! Much love. -Sarah
New Black & Sky Blue Nails

Standard
New Black & Sky Blue Nails

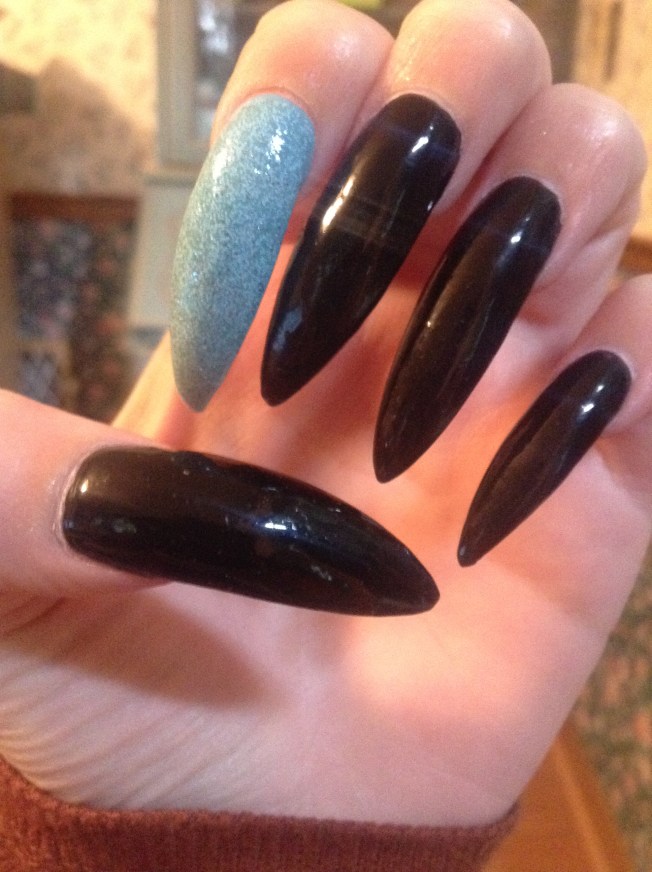
Hi everyone and happy Hump Day! This past week I got my beloved talons spruced up with a much needed fill. I’ve been trying to extend the amount of time that I go in between fills to save money so I recently began getting my nails done every four weeks instead of three. I have to say, that it’s freaking torture! BUT, it does end up saving money in the long run so I guess that there’s a silver lining to everything. 😉 Take a looksee at the claws and let’s discuss:

bluee

I’m sure that all of you noticed that there’s something missing on my nails…MY MIDDLE FINGER AIRBRUSHED CROSS. 😦 Unfortunately, my nail tech, Steve, couldn’t find the stencil anywhere, so I had to go cross-less this time around. I can’t say that I’m not disappointed about this because I’ve been getting crosses on my middle fingers ever since I started getting my nails done. I’m definitely mourning the loss of the fallen stencil, but hopefully when I come back in a month’s time, someone will have found it and my nails can be complete again! WHOMP WHOMP.

Despite the disturbing lack of my crosses, I do love my glittery sky blue accent nail. I think that it looks so pretty against the harsh black and sharpened points and it’s a color that I can totally see myself getting again in the future!

So there you have it, my New Black & Sky Blue Nails! What color of nail polish do you have on right now? What color should I get next for my accent nail? I want to hear from all of you, so leave me a comment and let’s chat! Much love. -Sarah

New Black & Red Nails

Standard
New Black & Red Nails

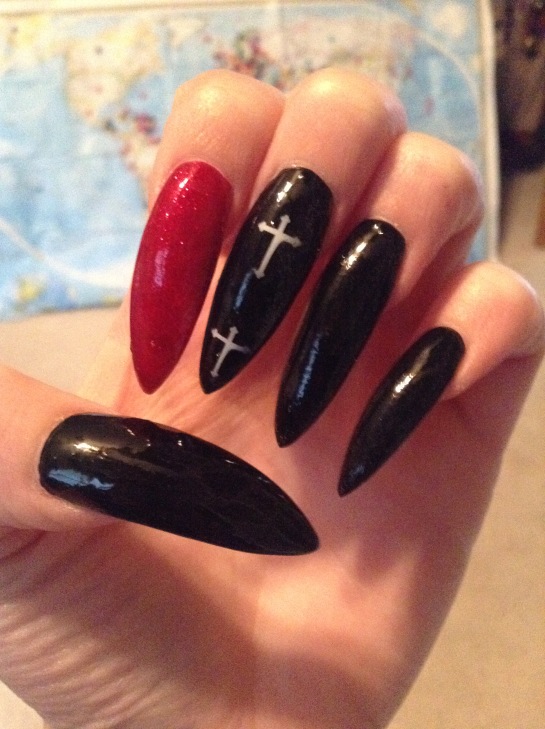
Hi everyone and happy Sunday!! This past Thursday I treated myself to a princess afternoon of getting my nails filled and indulging in HELLA Taco Bell afterwards. To make the outing even better, my beloved ex nail tech, VINNY, was helping out at the salon in my current nail tech, STEVE’S, absence. It was just like old times, and my nails turned out completely gorgeous as per ushe! Take a look and let’s discuss:

neww

No matter who does my nails between Steve or Vinny, they always turn out magnificent. It always seems that my talons do the talking no matter where I go. I have to admit that it does get a bit annoying being literally constantly asked how I do anything with my claws, but I guess that’s just a small price to pay for my favorite accessory. I will say that just because someone can’t imagine their life with something, whether it be long nails, piercings, tattoos, out there hair, etc. doesn’t mean that that goes for everyone else. I couldn’t imagine my life without any of the above examples and I’m willing to broadcast that to anyone who questions it – which I encounter at least twice daily!!

What color do you have on your nails right now? What is something that makes you unique that people question? I want to hear from all of you, so leave me a comment and let’s chat! Much love. -Sarah
New Black & Navy Nails

Standard
New Black & Navy Nails

Hello everyone and TGIF!! I hope everyone has super fabulous weekend plans on the horizon – I most certainly do! My boyfriend is up from North Carolina for my birthday so he has some weekend surprises in store! AHHH! So yes, I’m way excited and all of the girly things. And speaking of all of the girly things, I got my nails done yesterday and they look gorgeous so take a looksee and let’s discuss:

navy

^^^ Pretty! :*)

It wouldn’t be my birthday week without treating myself to getting my talons filled and sharpened. As always, my darling nail tech, Steve, did a beautiful job giving me the princess treatment. As we were chatting while he worked his magic, I told Steve that I don’t think I’m ever going to not get my nails painted black. I have enough anxiety picking out my accent nail color for two nails let alone all ten!

Black is my go to color for literally anything because I’m never going to not like it, lol. Like, I’m never going to be disappointed with the color black and it saves me the hassle of having to analyze outfit choices if I were ever to venture away from sweet sweet noire. Long story short, it’s the best. And, believe me, I totally am aware of how redundant these nail posts are considering they legit look the exact same EVERY THREE WEEKS but they’re so pretty that I just can’t help myself! :’)

So there you have it, my New Black & Navy Nails! What color do you have on your nails right now? What is your go to polish color? I want to hear from all of you, so leave me a comment and let’s chat! Much love. -Sarah
New Alien Green & Black Nails

Standard
New Alien Green & Black Nails

Hiii everyone and happy Tuesday! Yesterday, I participated in Mani Monday and got my beloved talons filled. I prolonged my length between fills from three to three and a half weeks and was actually quite surprised at how un-janky they looked. In fact, I probably could have waited a little bit longer but I had nothing to do yesterday so I figured that I would get them done. So, this time I will probably see if I can stand going four weeks until my next fill because ballin on a budget. But, enough about that, let’s see these bad boys!

claws

^^^ Pretty! :*)

When my dad asked me what I was doing yesterday and I told him that I was going to get my nails done, he asked if I was going to get them taken off. LOL, I don’t think that that’s ever going to happen. My claws make me so unbelievably happy and it’s really the one “treat yoself” thing that I do, considering I dye my hair at home now. I can’t picture myself without them and, damnit, I don’t want to!

Unfortunately for this fill, I ended up picking the worst shade of green because in the bottle it looked super neon but on the nail it just looks kind of thin and dull. But that’s okay, because the overall effect is still really nice! I got the sparkle hearts top coat on my accent nails last time and I loved it so much that I had to get it again. Without them, I would have been super disappointed in the green and asked to pick out a different color but I’m not that picky and still like the finished product well enough just the same.

Regardless of how I feel about the blah green, I have already gotten a ton of compliments on them in just one day thanks to my nail tech, Steve’s, nail wizardry. So, I guess the wait out for my next fill won’t be all that bad! What color of nail polish do you have on right now? How about on your toes? I want to hear from all of you, so leave me a comment and let’s chat! Much love. -Sarah

New, Fabulous, Super Cute Nails!

Standard
New, Fabulous, Super Cute Nails!

Helloooooooo everyone and happy weekend! This Thursday I got my nails done and holy moley am I obsessed. Seriously, this just might be my favorite fill of all time. Because I always opt for black on all of my talons but two accent nails, I try to make those two nails extra fun. Errr… I pick out the polish and my nail tech, Steve, does a brilliant job of making them look extra fun. Like my previous nail tech, Vinny, Steve spoils me rotten. I’ve been going to Steve’s salon (he is the owner) for the better part of two years so he always makes sure to spend lots of time making my nails look fierce. Take a look at his latest creation:

pretty

^^^ LOVE!!

For my accent nail this time around, I knew that I wanted it to be red but I also didn’t want it to be plain. After spending some time at the polish rack while Steve was at lunch, I found this super great top coat that has glitter and confetti hearts and stars in it and I was sold. It was admittedly kind of a pain in the butt for it to be applied because if it wasn’t done right, the confetti would just clump together. But Steve made sure that I had an accent nail with expertly placed hearts all over it. What a guy!!

Every three weeks I go to Empress Nails to get my talons fixed up and I am never disappointed. I have no problem shelling out about twenty-five bucks a month to get my nails looking right, all while having an hour or two to myself to relax. My acrylics are my ultimate TREAT YOSELF accessory, but they make me happy and their gorgeous appearance is always well worth the price!

treatyoself_main01

So there you have it, my New, Fabulous, Super Cute Nails! How do you treat yoself when it comes to getting pampered? What color of nail polish do you have on right now? I want to hear from all of you, so leave me a comment and let’s chat! Much love. -Sarah

The Countdown To Summer – Look Fab on Your Next Vacation!

Standard
The Countdown To Summer – Look Fab on Your Next Vacation!

A vacation is a chance to get away from it all – a week or two of fun, sunshine, and great food. When it comes to your annual trip, it’s nice to know that you look your best and are feeling as confident as possible. Not only will you look great in your pictures but you won’t be held back by insecurity. Here are a few things that you can do on the run up to your vacation to ensure that you look the best ever this summer:

Figure: Getting your body into shape is a great way to give you confidence. Eating right and exercising will not only sculpt your figure and allow your clothes to fit better, but you’ll feel fitter and healthier too. If your vacation is going to involve a lot of walking, then this is especially good, because you don’t want to be struggling and lagging behind when your fitness isn’t up to scratch. Focus on a clean, balanced diet. Plenty of fresh fruit and vegetables, whole grains, healthy fats, and protein from lean meat and/or non- meat sources should all give your body everything it needs.

For exercise you could hit the gym or find an activity that you enjoy that requires a lot of movement. Whether it’s running, swimming, a sport, or just working out at home – anything that gets your body moving will tone muscles, burn calories, work your cardiovascular system, and shape your physique so anything goes!

If you find you have stubborn areas of fat that don’t respond to diet or exercise, liposuction could be an option. This isn’t a weight loss technique, though, it’s generally performed on people who are already a healthy weight who want to shape their body rather than decrease in mass. There is nothing wrong with considering plastic surgery to improve yourself but you just need to be so careful about who is performing the surgery. Seek recommendations from friends and family and look into several different options after searching “Best Liposuction Surgeon Houston” (or your local area). It can be very helpful to schedule consultations with a few different surgeons so you find the best fit for yourself and your needs.

Teeth: Want a gorgeous set of pearly white teeth to set off your holiday tan? Teeth whitening trays from the dentist take around six weeks or you can have laser teeth whitening in around an hour. Both of these treatments can lift the color of the teeth many shades and have a dramatic effect on the way you look and smile!

Hair: As the saying goes, ‘your hair is the ballgown you never take off’. Shiny, happy hair is the best accessory that you can own. In the weeks and months leading up to your vacation, you could give it some extra TLC. Use deep conditioning masks and oils to replenish and repair dry or damaged hair. Visit a hairdresser to have the split ends removed and have a fresh new color applied. It’s a fantastic way to give you confidence. If there are going to be nights during your trip where you want to dress up and look your best, clip in extensions are also a good option. It might be a little warm to wear them during the day, but they can add instant glamour for an evening outing. They add both length and thickness and look great either straight, curled, or in an updo.

Hair Removal: No one wants to deal with stubble or constant shaving while they’re away. Since holiday clothes and swimwear tends to show a lot of flesh, chances are you want to be as smooth as possible – for as long as possible! Going to the salon for a waxing treatment before you jet off will leave you hair-free for a number of weeks. For a longer lasting alternative, electrolysis and laser hair removal are effective.

Shellac Nails: Unlike regular nail polish, Shellac lasts for around two weeks. Meaning you get a chip-free manicure without the hassle of having to repaint your nails while you’re away. Most salons offer this and it’s cheaper than gel or acrylic nails.

Ready, get set, get pampered, and enjoy your vaca!

Featured Image By: Pexels

New Purple & Black Nails

Standard
New Purple & Black Nails

Hi everyone and TGIF! Yesterday was super fabulous because when I went to get my beloved talons filled, I was pleasantly surprised to see VINNY at the salon. For those of you who don’t know, Vinny was my former nail tech who unfortunately works at a salon that is over an hour away now. Sweet Vinny was helping out for the day and although he couldn’t do my nails, he took me out to a delicious, boozy dinner after he was done at the salon. It was basically the best day of my life and I was so happy to finally be able to spend some much needed quality time with one of my favorite people on the planet.

Despite Vinny not taking care of my nails, they still look fabulous – compliments of STEVE! I am freaking obsessed with the OPI shimmery purple shade for my accent nail and legit can’t stop looking at my freshly filled claws. Check it out:

nails5

I’ve grown increasingly fond of all things sparkly as of late for my accent nail and can’t get enough of my latest color choice. I pointed out to Steve how this OPI shade doesn’t look like it just has a teaspoon of glitter thrown into it, which I liked. He then explained to me that OPI uses ground up crystals in their polish to give it that gorgeous shimmer and I think that that’s the coolest thing ever! I definitely plan on using more of their OPI shades in the future so that my accent nails can achieve that extra touch of glitz that isn’t obnoxious.

Super special shout out to my favorite nail techies, Vinny, Steve, and the darling Tina (Steve’s wife)! I freaking love you guys! ❤

I hope everyone has a fabulous Friday and a super fun weekend. What accent nail color should I get next? What color of polish do you have on currently? I want to hear from all of you, so leave me a comment and let’s chat! Much love. -Sarah