Tag Archives: crafts

Oh You Crafty, Huh? BFF Canvas Art

Standard
Oh You Crafty, Huh? BFF Canvas Art

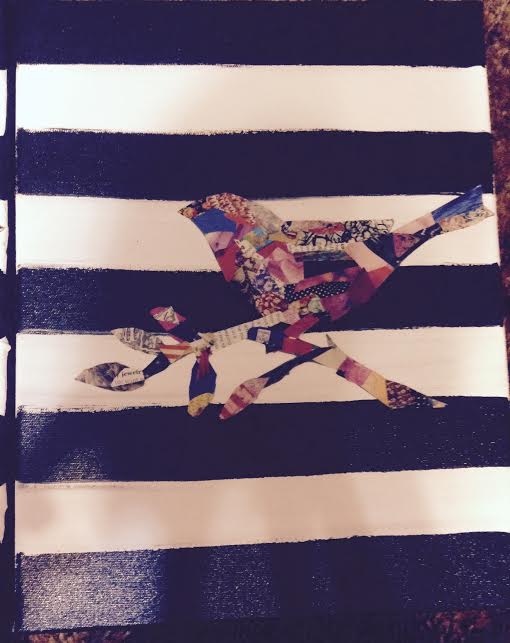
Hellooo everyone and TGIF! My laptop is still in the hands of the Geek Squad so this post is being prewritten at the local Cuyahoga Falls library…The things I do for lifewithlilred!! On Wednesday night my darling best friend, Lea, and I had a crafting extravaganza which resulted in the cuteness you see in my featured image photo! We had so much fun getting crafty and now I’m here to share with you guys our how to guide on how to make your own Bird Is The Word canvas art! Take a closer look at both of our creations and then let’s discuss! PS: Brownie points for whoever can guess which canvas is mine and which is Lea’s!
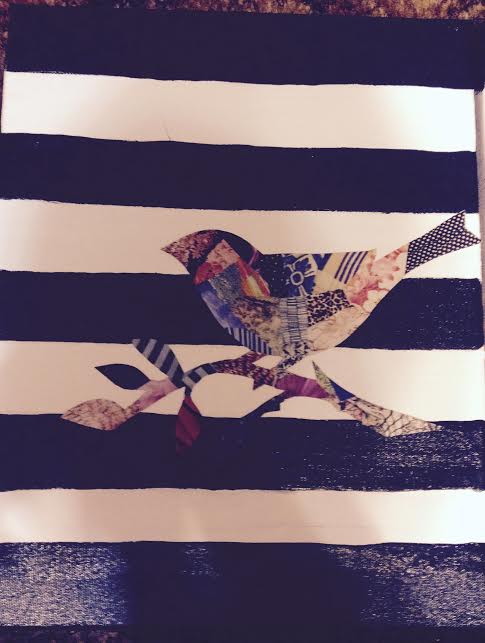
unnamed1unnamed2

Like it? Love it? Want more of it? Here’s the play by play on how to recreate it:

What You Need:

  • Canvas board
  • Paint/paint brushes
  • Silhouette image of your choice
  • Old magazines and newspaper
  • Scissors
  • Glue

Step By Step Guide:

  • Step 1) Paint your canvas. Lea and I both liked the idea of black and white stripes so our picture collage birds would really pop – but any color choice will do!! To get our stripes as straight as possible we held a newspaper to the canvas and painted underneath it once we had our stripe width to our liking.
  • Step 2) Find a silhouette image that you want to make your picture collage over. As you can see, Lea and I stuck with the classic white girl staple image of birds but anything will look awesome…Maybe. 😉 If my crafting partner and I ever make a canvas similar to this one again I would like to use a bird cage silhouette!
  • Step 3) Acquire magazines and newspapers to cut your images for your pic collage. Lea and I recommend using fashion magazines so you have lots of fun colors and patterns to choose from. We opted for three year old issues of People magazine and it was a blast cutting Taylor Swift to pieces for the sake of getting a cool pattern! 🙂
  • Step 4) Once you have enough bits and pieces of magazines to cover your silhouette, begin to glue them down. Fair warning, Lea and I both thought that we had more than enough scraps multiple times but had to refer back to our mags to get more collage material – so make sure you keep your magazines handy!
  • Step 5) Glue your silhouette onto your canvas and pat yourself on the back for a job well done!! OH YOU CRAFTY, HUH?!!! #Ihatemyself

So there you have it, the lowdown on Oh You Crafty, Huh? BFF Canvas Art! Lea and I had the best time during our crafting night and we both want to see if anyone can guess who made which bird! Have you made a craft similar to this one? What art project are you currently working on? I wanna hear from all of you, so leave me a comment and let’s chat! Much love. -Sarah

Vintage Style Hair Piece Craft

Standard
Vintage Style Hair Piece Craft

Helloooo everyone and happy Tuesday! Earlier this month I ordered a black beanie that had a fishnet veil attached to it off of Amazon. Unfortunately, when it came in the mail last week I discovered that the veil on the beanie was torn in two. I was so disappointed and when I emailed the vendor to request a return she was totally awesome. She gave me a refund on the product and I didn’t even have to send it back to her. Now I was stuck with a defective beanie that I had no clue what to do with. I pondered my options and came up with a solution to make something out of nothing and I am very happy with the results, as you can see from my featured image photo! Let’s discuss the simple steps that it took to make my new Vintage Style Hair Piece Craft:

beaniecraft2

  • Step 1) Acquire veil. In my case, all I had to do was cut the netting from the beanie. #SCORE
  • Step 2) Find a jewel, feather, hat, or whatever you would like to pin your veil to. The feather and jeweled piece that I used came from an old headband of mine that I wore when my hair was longer. The feathers were attached to a circular elastic band which I don’t care to wear because it makes my hair tuft up in the back. But that’s neither here nor there. #Idigress
  • Step 3) Pin your accessory to your netting. I used two bobby pins to secure my veil to the feathers. One to keep the items attached and one to clip in my hair when I wear it. I know it looks super janky in the pictures because you can so clearly see the bobby pins, but it’s not noticeable in the slightest when it’s in your hair. #pinkiepromise
  • Step 4) Wear. Wow everyone. Repeat. #number1stunner

^^^ Honestly, those directions were so unnecessary. Lol, you guys are all smart and I’m sure you could figure this craft out on your own. But maybe this post will come in handy to those who are not the craftiest, like myself. When I’m not looking a hot wreck, I’ll be sure to post some pictures of me rocking my fun new accessory! OH YOU CRAFTY HUH?!

So there you have it, the easy how to guide for a Vintage Style Hair Piece Craft. I am so pleased with the little spark of inspiration that I had to recycle old items and make them new again. I found an unexpected use for a headband that I haven’t worn in years and a defective purchase. Not bad! What is your favorite craft that you made from a recycled item? Have you made anything similar to my hair piece craft? I wanna hear from all of you, so leave me a comment and let’s chat! Much love. -Sarah

Fun & Easy Craft!!

Standard
Fun & Easy Craft!!

I had a lovely time this evening getting crafty with my favorite little lady Miss Lea! She’s my go to crafting partner in crime and tonight we created a glitter masterpiece! Here’s the big reveal…*drum roll please*………………………..TA DAAAA! (In case you don’t know, our glitter picture is of Ohio, our home state and the heart on the picture is of our home town of Akron. #REPRESENT)

IMG_1336[1]

Before I give you guys the step by step on how to make this fun craft, here’s some tune-age for you to enjoy. Except you have to change the lyrics of “oh you fancy, huh?” to “oh you crafty, huh?” Instant classic.

Alright!!!! This craft is clearly pretty self explanatory, but here’s the how to guide on how to make it in case you can’t figure it out! First things first, here’s the supplies you’re going to need: (All together this craft cost about ten dollars to make)

  • A canvas board of your choosing. Lea and I opted for an oval shaped canvas.
  • Paint color of your choosing for the background.
  • Glitter color of your choosing for the shape you’ll be covering.
  • Glue
  • Outline of an object, animal, shape, state, continent, or whatever your heart desires to be on your canvas.
  • Scissors

Once all of your supplies are gathered, I’d recommend placing some newspaper down so glitter doesn’t get everywhere. You don’t want your workspace looking like Ke$ha rolled around on it.

dresscode-kesha

Step 1) Paint the background of your canvas.

Step 2) Blow dry the paint to get it dry.

Step 3) Cut out the outline of whatever you’re gluing onto your canvas and glue it on.

Step 4) Cover your outlined picture with glue. For an even coat of the glue and to avoid bumpy glitter, Lea and I applied the glue with a paint brush.

Step 5) Pour the glitter color of your choosing over the freshly glued object. The glitter might not cover everything on the first try, so I would make sure that you’re glittering over a piece of paper so you can continue to pour the excess glitter from that.

Step 6) Apply a glitter heart to your glitter picture if you’d like.

And viola! You now have a super fun, quick, and easy craft. Lea and I had so much fun making this! Here’s a few pictures of us and our handy work!

craftbest friends

If you have any fun crafting suggestions, please let me know! Lea and I would definitely love to try them out! Have you made any cool crafts or projects lately? I’d love to hear all about it, so leave me a comment and let’s chat! Have a great night! -Sarah

Christmas Craft Fun!

Standard
Christmas Craft Fun!

A few days ago I had one of the most fantastic times with my dear friend Kate. I’m sure you recall reading about her, as she’s the girl who I’m planning a trip to Europe with. She’s also my go to shopping partner!! A few weeks ago you might recall me posting about how Kate and I assembled a vintage Christmas tree together in her apartment. Unfortunately, we had no ornaments to decorate our tiny tree with, so we decided to make our own. During this fun filled evening we ate Taco Bell, drank our favorite Starbucks Peppermint Mochas, drank a bottle of wine, watched the live taping of Peter Pan that was released recently, and became the crafting queens. The night started with a trip to Patcatan’s which is a craft store, as you can guess. When we entered the store, we realized we didn’t exactly plan out what we needed very well. (The night that we assembled our tree, we had a Pinterest party to get some ideas for what ornaments to make.) So we made a quick verbal list of what we should get to at least get us started. We left the store with ornaments, black, silver, and pink glitter, a hot glue gun, black and yellow paint, paint brushes, and last but not least: googly eyes. After we finished up at Patcatans, we stopped at Giant Eagle so Kate could run in and get us a bottle of wine for the evening. A night with Miss Kate wouldn’t be complete without getting Taco Bell and Starbucks, so stops were made there as well and then we headed back to her apartment. If you take a look at my featured image, you’ll see our crafting table where all of the magic happened. Here’s a Pic Stitch collage of some of the ornaments that we made that night:

IMG_1195[1]

So I’m sure a lot of these ornaments are pretty self explanatory on what they are and how to make them, but here’s a little further detail on all of them:

Top left and bottom right Minion ornaments: If you’ve seen the movie Despicable Me, then you’ll know that these bulbs are supposed to be the Minions! Kate and I adore that movie, and when we saw this craft made on Pinterest, we knew that we had to give it a go. It’s as easy as it looks to make:

  • Step 1) Paint the ornament yellow
  • Step 2) Wait for the paint to dry and then paint a black band around the top of the ornament
  • Step 3) Wait for the black paint to dry and then hot glue the googly eyes on
  • Step 4) Complete your Minion by painting a little smile on it! 🙂

It’s up to you to decide whether your Minion ornament has one eye or two!!

minions

Top right ornament: This was a really cool one that Kate made. She painted the outside of the ornament with a black paisley pattern and then she filled the bulb with red M&M’s. Super easy, super delicious.

Middle left and right ornament: At one point during our evening of crafting we both got quiet and were working intently on these ornaments for each other. When we both asked what the other was doing we each said something along the lines of “you can’t see it yet!” It turns out we were both making a name ornament for each other at the exact same time. If that isn’t best friend telepathy, then I don’t know what is!

  • I wrote Kate’s name with hot glue and then coated the glue in silver glitter. I then cut a red heart out of construction paper and put it inside the ornament. Viola!
  • Kate wrote my name in black paint and then put black glitter over top of it. She tore up red tissue paper and filled the inside of the bulb with it. Done.

Center candy cane reindeer: This is our beloved reindeer named Albert. Isn’t he the cutest?! Making this ornament is exactly how it looks like you would make it:

  • Step 1) Cut out antlers for the reindeer with brown foam paper and hot glue it onto the candy cane
  • Step 2) Cut out circles from the brown foam paper and hot glue googly eyes onto the circles. Then hot glue these onto the candy cane for the eyes
  • Step 3) Hot glue a red M&M onto the tip of the candy cane for the nose
  • Step 4) Wrap a ribbon around the neck of the candy cane and now you have your very own Albert!

Bottom left and center ornaments: These ornaments were made simply with paper and glitter.

  • On the bottom left ornament I drew the British flag, the German flag, and a tiny Eiffel Tower and then cut them out and stuck them in the inside of the ornament along with an ample amount of silver glitter. This little baby obviously symbolizes our European trip dream which will be happening in 2016!
  • The bottom center ornaments have the same “message in a bottle” idea as our dream ornament. They also have glitter….lots of glitter 🙂

So there you have it, some fun make shift crafts to get you in the holiday spirit!! Kate and I had such a blast making these. We also had an equally fun time drinking some delicious blackberry wine and enjoying Peter Pan Live. Here’s a little clip from it and if you haven’t seen the full movie, I can’t recommend it enough!!

Do you have any fun last minute holiday crafts to recommend? Did you make a seasonal craft that you were particularly proud of? I want to hear all about it, so leave me a comment and let’s chat! Happy Monday! -Sarah

IMG_1158[1]IMG_1164[1]

PS: My brother is home for the holidays!!!!!!!!!!!!!!!!!!!!! HURRAY!!!!!!!!!!! Lil Red is a happy camper :))))

Oh you crafty huh? Part two!

Standard

I had a lovely time hanging out with one of my dear friends Tyler today. One of our favorite things to do when we hang out is indulge in a bottle of wine and get nice and crafty! Here’s the results and the how to’s of our fall inspired creation today!

IMG_0563[1]

All that’s needed for this craft is:

  • mason jar
  • acorns
  • rope
  • candle holder
  • candle

Here are the steps for making this cute little craft, even though it’s pretty self explanatory!

  • Acquire acorns! Go to your nearest hiking trail or even your backyard and turn into a human squirrel and collect as many acorns as needed to semi fill your mason jar.
  • Place the candle holder with candle into said mason jar. Tyler and I purchased a taller candle holder and a tea light candle, and the acorns fit very nicely around them.
  • Fill your jar with as little or as many acorns as you’d like. I’d recommend filling it a little more than halfway so you get a nice effect from the candle light peeking out of all the nooks and crannies of the acorns piled on each other.
  • Tie the rope around the top of the jar for the final touch.
  • Light your candle, dim the lights, and enjoy your new fall themed candle jar!

And there you have it! Simple as that. A ten minute craft gave Tyler and myself a fun new autumn decoration! If you guys have any quick and easy fall crafts, let me know! Have a great night! -Sarah

Oh you crafty, huh?

Standard

IMG_0461.JPG

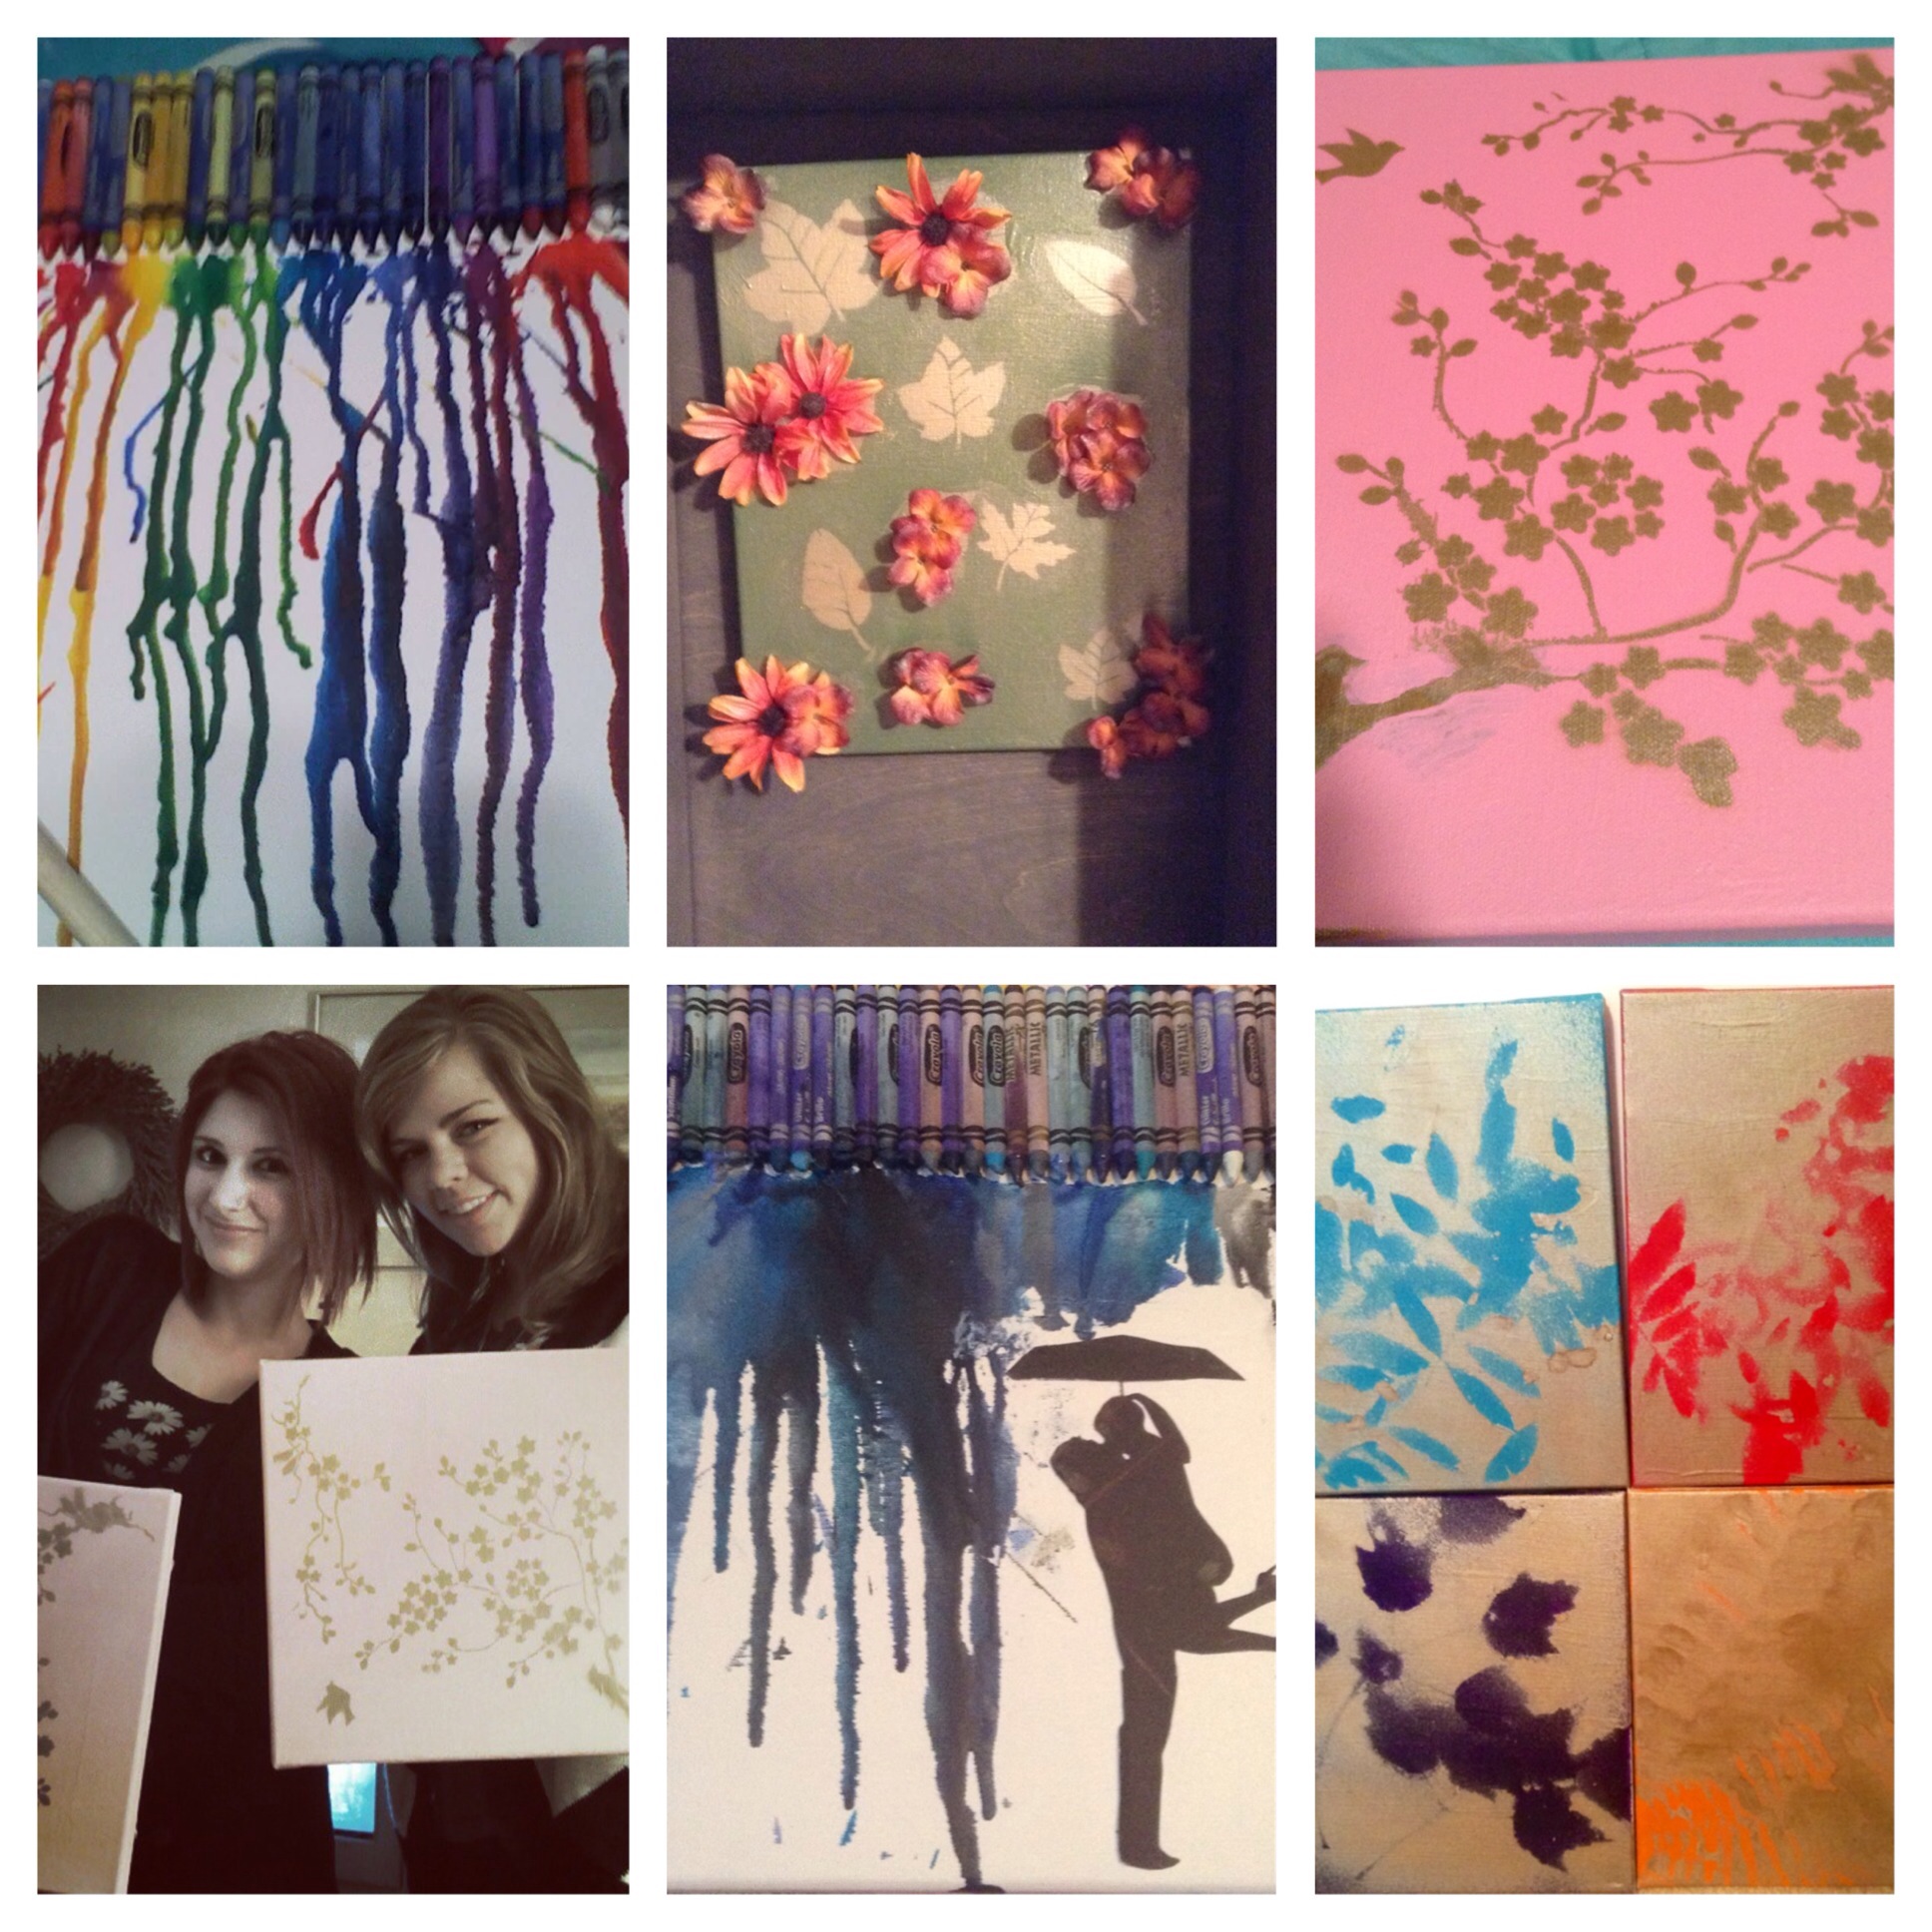
My friends and I LOVE crafting!!! Canvas art projects have been our favorite thing to do while we hang out. There’s so many cute ideas on Pinterest, that I wanna make them all! (GOTTA CATCH EM ALL – POKEMON!) Seriously who knew that you could have a fabulous looking piece of art just by painting and glueing stuff down on a canvas?! I barely have half an artistic bone in my body, but these fun projects make me feel creative and artsy and I love it! My favorite craft though is definitely the melted crayon canvas. Particularly the one with the couple under the umbrella. So sweet. So fun. If you guys have any questions on how to make any of these, leave me a comment! And please comment some of your favorite canvas crafts so I can make them with my friends!!! Thanks! ❤ ❤